
Understanding the Common HDMI Port Issues on PS4
Modern gaming consoles have become a staple in many homes worldwide, and the PlayStation 4 (PS4) is one of the top-selling consoles of all time. However, like any electronic device, it is not immune to technical difficulties. One of the most common issues that PS4 users experience is problems with their HDMI ports. The HDMI port is a crucial component that connects the PS4 to a display, allowing gamers to experience the full visual and audio capabilities of the console. If this port fails, the device will not display any video output, leaving the user frustrated and unable to play.
The HDMI port on the PS4 is a sensitive component, and there are various reasons why it may fail. One of the reasons is physical damage caused by forceful insertion or abrupt removal of the HDMI cable, which can cause the port to break or bend. Aging and regular use can also cause the HDMI port to become loose or worn out, which degrades the connection and can eventually cause it to fail. Sometimes, the HDMI cable itself can be the issue, causing problems with the signal or not fitting securely into the port.
If you are experiencing problems with your PS4 HDMI port, the good news is that there are ways you can try to fix it before resorting to expensive repairs or replacement. The following tips will help you troubleshoot and fix HDMI port issues on your PS4:
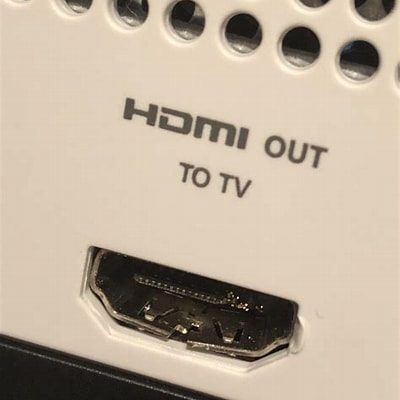
1. Properly Check Your HDMI Cable and Port: The first thing to do is to check both your HDMI cable and port for any visible signs of damage. Start by examining the HDMI cable for any bends, dents, or exposed wires. Look at the connector ends of the HDMI cable and check for any dirt or lint that may have accumulated. Next, turn off your PS4 and unplug the HDMI cable from both the console and the connected display, making sure to remove it gently. Examine the HDMI port on your PS4 for any dirt, dust, or debris that may have accumulated inside.
Using a flashlight or a magnifying glass can help you get a better look at the HDMI port and spot any damage more clearly. Use a soft-bristled brush or a can of compressed air to clean the port of any dirt or dust. Be sure not to use sharp objects or liquids to clean the port, as this can damage it further. If you spot any visible damage to the HDMI port, consider seeking professional assistance or replacing it entirely.
Next, plug your HDMI cable back in, making sure to push it in firmly but gently. Ensure that the HDMI cable fits snugly into the port and is not loose in any way. Turn on your PS4 and check if the video output has been restored.
If this step doesn’t solve the issue, there may be a software-related issue that requires further troubleshooting. In that case, try restarting your PS4 and updating its software to the latest version. If none of these solutions work, it may be time to consult a professional or consider replacing your console or HDMI port altogether.
By following these tips, you can quickly fix common HDMI port issues and keep your PS4 running smoothly so you can continue to enjoy your favorite games and entertainment.
Tools Required for Fixing a Faulty HDMI Port on PS4
Fixing a faulty HDMI port on your PS4 requires a few tools that are easily available in electronics repair shops or online stores. With the right tools and a bit of know-how, you can get your PS4 HDMI port working in no time. Here are the tools you’ll need:
Contents
1. Soldering Iron
A soldering iron is an essential tool when it comes to fixing electronic devices. It’s used to melt soldering material to connect two metal parts together. For your PS4 HDMI port repair, you’ll need a soldering iron with a wattage of 30 to 60 watts, which is ideal for small-scale jobs like this. A higher wattage soldering iron may damage your console’s motherboard, and a lower wattage one may not be hot enough to melt the soldering material, making it harder to complete the repair.
2. Soldering Wire
Soldering wire is the material used to connect two metal parts together using a soldering iron. You’ll need this wire to replace the HDMI port’s pins that are damaged. It’s recommended to use lead-free soldering wire, which is safer and eco-friendly. Make sure the diameter of the wire is small enough to fit the HDMI port’s pins, usually around 0.5mm to 1mm. Using a thicker wire can damage the other components on the motherboard, which you don’t want.
3. Desoldering Wick or Solder Sucker
Desoldering the broken HDMI pins requires a desoldering wick or a solder sucker. A desoldering wick is a braided copper wire that absorbs melted solder, while the solder sucker is a small pump that sucks the melted solder out of the port. Either tool is effective in removing the pins safely and can be used interchangeably. Just make sure to use the right size of wick or nozzle on the sucker to fit the pins’ diameter.
4. Tweezers and Phillips Screwdriver
In addition to the soldering tools, you will also need a pair of tweezers and a Phillips screwdriver. The tweezers are used to hold small components while you solder them in place. A Phillips screwdriver is used to remove the screws holding the PS4 case in place so that you can access the motherboard. Make sure you use a screwdriver the right size for your PS4 as using one that’s too big or too small will damage the screws.
With these tools, you have everything you need to fix a faulty HDMI port on your PS4. Make sure to take precautions when handling your console’s motherboard to avoid further damage. It’s also essential to unplug the power supply before starting any repair work, as working on electronic devices with live current is hazardous. Following these safety measures will help you get your PS4 back up and running in no time!
Step 3: Replacing the Damaged HDMI Port
If the previous methods failed to resolve the issue, the next step is to replace the damaged HDMI port. Please note that this method requires the right tools and skills to do it successfully. If you’re not confident of your abilities, it’s best to take your console to a certified repair technician.
To replace the damaged port, you’ll need:
- Soldering iron
- Solder wire
- Replacement HDMI port (compatible with PS4)
- Desoldering tool (optional)
The first thing to do is to disassemble the PS4 until you reach the HDMI port. Be cautious while doing this to avoid damaging other components. Depending on your PS4 model, you may have to remove screws and/or other components to access the HDMI port.
Next, use the soldering iron to heat the joints of the HDMI port. Doing this will melt the solder, and you’ll be able to remove the damaged port. It’s recommended to use a desoldering tool to remove the old solder completely. This will ensure that the new port will sit tightly on the board.
Once the old HDMI port has been removed, place the new port in the same location, making sure that it fits perfectly. You can use a magnifying glass to help you inspect the tiny solder points around the port. After the new port is in place, solder its pins and be sure that they’re properly connected to the board.
Finally, reassemble your PS4 and test your replacement. If done correctly, your console should now be able to display video through the HDMI port. If not, double-check your work and ensure that all the connections are in order.
It’s essential to take extra precautions to avoid damaging other components while repairing your HDMI port. Be careful not to force or bend any components, damaging them in the process. Also, be sure to use a good quality soldering iron to avoid overheating and damaging the board.
Replacing a broken HDMI port is a complicated procedure. If you’re not confident in performing this type of repair, it’s best to seek assistance from a professional technician. In most cases, replacing a damaged HDMI port with precision is a detailed and time-consuming task.
Now that you know how to fix a HDMI port on a PS4, get your tools ready, and try out the different methods outlined above. By following the guide step by step, you’ll be able to determine the problem and fix it to have your PS4 running like new
Alternative Solutions to Fixing a HDMI Port on PS4
If you are experiencing problems with your HDMI port, trying out the common troubleshooting methods may not work all the time. In some cases, you may need to resort to alternative solutions to fix this issue. In this section, we will discuss some of the alternative solutions that you may consider to fix your HDMI port on your PS4.
Cleaning the HDMI Port
One of the possible reasons why your HDMI port is not working is because it is dirty or clogged. Dust, debris, and other foreign objects can get stuck in the port and prevent your PS4 from detecting the HDMI connection. In this case, you can try cleaning the HDMI port by using a can of compressed air. Simply aim the nozzle into the port and spray the air to remove any dirt or debris that may be blocking the connection. This can help improve the connection and resolve any issues you may be experiencing with your HDMI port.
Using an HDMI Switch
If your HDMI port on your PS4 is damaged and cannot be repaired, you can use an HDMI switch as an alternative solution. An HDMI switch is a device that allows you to connect multiple HDMI devices to a single port on your TV. In this case, you can connect your PS4 to the HDMI switch, and the switch will then connect to the TV’s HDMI port. This can help solve your problem if you have multiple HDMI devices that you want to connect to your TV, and your PS4’s HDMI port is no longer working.
Using an External Capture Card
If you want to capture gameplay footage or record videos on your PS4, you can use an external capture card as an alternative solution to fix your HDMI port. An external capture card is a device that allows you to record gameplay footage from your PS4 and stream it to your TV or computer. In this case, you can connect your PS4 to the external capture card, which will then connect to your TV’s HDMI port. This can help resolve your issue if your HDMI port is not working, and you still want to capture gameplay footage or record videos on your PS4.
Using a Wireless HDMI Kit
If you want to avoid using cables and wires to connect your PS4 to your TV, you can use a wireless HDMI kit as an alternative solution to fix your HDMI port. A wireless HDMI kit is a device that allows you to wirelessly transmit HDMI signals from your PS4 to your TV without the need for cables. In this case, you can connect the HDMI transmitter to your PS4’s HDMI port, and the HDMI receiver to your TV’s HDMI port. This can help resolve your issue if your HDMI port is not working, and you want to avoid using cables and wires to connect your PS4 to your TV.
Conclusion
In conclusion, there are several alternative solutions that you can consider to fix your HDMI port on your PS4. These options include cleaning the HDMI port, using an HDMI switch, using an external capture card, and using a wireless HDMI kit. Try these solutions out if you are experiencing problems with your HDMI port and see which one works best for you. Remember, if these solutions do not work, you may need to contact a professional to repair or replace your HDMI port.
Tips to Prevent Future HDMI Port Issues on PS4
If you have recently fixed your HDMI port issue on your PS4 or want to prevent it from happening in the future, here are some tips:
1. Proper Cleaning and Maintenance
To prevent dust and debris buildup in the HDMI port, regularly clean your PS4. Use a soft-bristled brush or canned air to gently clean around the port. Do not use water or harsh chemicals as it can damage the port. Additionally, make sure to maintain proper ventilation by placing your PS4 in a well-ventilated area.
2. Proper Cable Handling
Handle your HDMI cable with care when plugging and unplugging it from the port. Do not forcefully pull or tug on the cable as it may loosen or damage the port. Additionally, make sure to purchase a high-quality HDMI cable that is compatible with your PS4.
3. Avoid Power Surges
Power surges can cause damage to your PS4’s HDMI port. To prevent this, use a surge protector or power strip when plugging in your console. This will protect it from sudden voltage spikes that can damage the port and other components.
4. Avoid Overheating
Overheating can cause damage to the HDMI port and other components of your PS4. To prevent this, avoid placing your console in enclosed areas, such as cabinets or shelves, where airflow is limited. Additionally, regularly check and clean the vents of your console to prevent dust buildup.
5. Proper Storage
Proper storage of your PS4 can prevent potential damage to the HDMI port and other components. Always place your console in an upright position when not in use, preferably on a flat surface. Avoid storing it upside down or on its side as this can put unnecessary stress on the port and other components. Additionally, avoid stacking other electronics or objects on top of the console as it can cause damage.
By following these tips, you can prevent future HDMI port issues on your PS4. Proper cleaning and maintenance, proper cable handling, avoiding power surges and overheating, and proper storage are all essential in prolonging the lifespan of your console and preserving its components.