
Understanding the Throttle System
If you are looking to fix your lawn mower’s throttle cable, it is important to understand how the throttle system works. The throttle system is responsible for controlling the speed of the engine by regulating the amount of fuel and air that enters the engine. This is done by adjusting the throttle valve, which is controlled by the throttle cable. When you move the throttle lever on your lawn mower, it pulls the throttle cable, which opens the throttle valve and allows more fuel and air into the engine, causing it to speed up. Understanding the throttle system is critical to accurately diagnose and fix any issues that may arise with your lawn mower’s throttle cable.
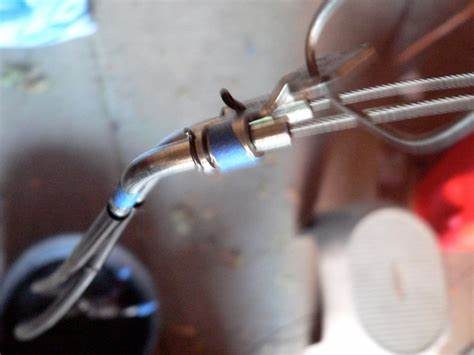
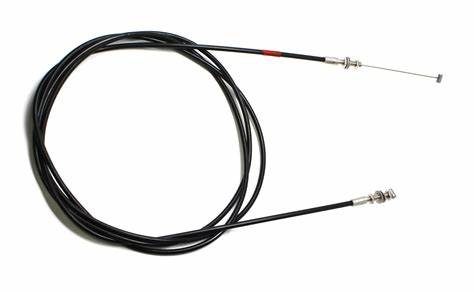
The throttle cable is one of the most critical components in the throttle system, as it is responsible for transmitting the movement of the throttle lever to the throttle valve. Over time, however, the throttle cable can become worn, frayed, or disconnected, leading to issues with engine performance and speed control. If you suspect that your throttle cable is damaged or not working properly, you will need to take steps to fix it in order to restore proper engine function. Here are some basic steps to help you fix a lawn mower throttle cable:
Contents
- 1 Step 1: Disconnect the throttle cable
- 2 Step 2: Inspect the throttle cable
- 3 Step 3: Clean the throttle cable
- 4 Step 4: Reconnect the throttle cable
- 5 Step 1: Check for Broken or Frayed Cables
- 6 Step 2: Check for Cable Binding
- 7 Step 3: Check for Loose or Worn Out Connections
- 8 Step 4: Check for Improper Throttle Adjustment
- 9 Step 5: Test the Throttle Cable
- 10 Step 1 – Preparation
- 11 Step 2 – Disconnect the Old Cable
- 12 Step 3 – Install the New Cable
- 13 Step 4 – Adjust the Cable Tension
- 14 Step 5 – Clean Up and Test
Step 1: Disconnect the throttle cable
The first step in fixing a lawn mower throttle cable is to disconnect it from the throttle valve. This is usually done by removing the cable from the carburetor or throttle body, depending on the type of engine your lawn mower has. Make sure to consult your owner’s manual or a service manual to determine the correct procedure for your specific engine.
Step 2: Inspect the throttle cable
Once the throttle cable has been disconnected, you should inspect it for any signs of damage or wear. Look for any frayed or broken wires, kinks or bends in the cable housing, or any signs of corrosion or rust. If the cable is damaged in any way, it will need to be replaced.
Step 3: Clean the throttle cable
If the throttle cable is not damaged but is dirty or corroded, you may be able to clean it to restore proper function. Use a soft brush or cloth and a mild cleaner to gently scrub away any dirt or debris on the cable and housing. Once clean, you can lubricate the cable with a light oil or spray lubricant to ensure smooth operation.
Step 4: Reconnect the throttle cable
Once the throttle cable is clean and free of damage, you can reconnect it to the throttle valve. Make sure to follow the correct procedure for your specific engine, as reconnecting the cable incorrectly could lead to further issues with the throttle system.
By following these basic steps, you should be able to fix your lawn mower’s throttle cable and restore proper engine performance and speed control. However, if you are not comfortable working on your lawn mower or are unsure about the cause of your throttle issues, it is always a good idea to consult a professional mechanic or lawn mower repair service for assistance.
Diagnosing Cable Issues
If you’ve noticed that your lawn mower’s throttle cable isn’t working as well as it used to, or is not working at all, it’s time to take a closer look. The throttle cable is an important component of your lawn mower’s engine, which provides the necessary power for mowing. When the cable is damaged or broken, it can cause all sorts of problems, from engine stalling to difficulty starting the mower. In this guide, we’ll show you how to diagnose cable issues with your lawn mower, so you can get it fixed and back out on the lawn in no time.
Step 1: Check for Broken or Frayed Cables
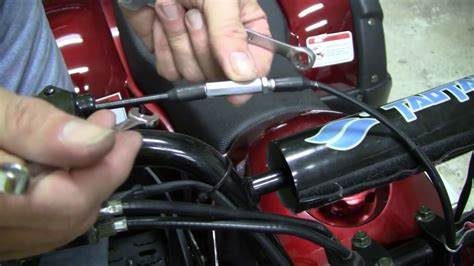
The first step in diagnosing throttle cable issues is to check the cable itself for damage. Start by turning off the engine and unplugging the spark plug wire. Locate the throttle cable, which is usually located near the engine and attached to the carburetor. Loosen any clips or bolts that are holding the cable in place and remove the cable from the carburetor. Inspect the cable for any fraying or breakage. If the cable appears damaged, it will need to be replaced.
Step 2: Check for Cable Binding
If the cable appears to be in good condition, the issue may be due to binding. Binding is when the cable gets stuck as it moves within the casing. This can be caused by a number of things, including dirt and debris, rust, or corrosion. To check for binding, move the throttle lever back and forth and observe the cable’s movement. If the cable doesn’t move smoothly, you may need to clean or lubricate it. To do this, remove the cable from the carburetor and wipe it down with a clean cloth. Apply a light oil to the cable and replace it.
Step 3: Check for Loose or Worn Out Connections
If the cable appears to be in good condition and is not binding, the issue may be due to loose or worn out connections. These can be caused by a number of things, including vibrations from the engine and general wear and tear. To check for loose or worn out connections, inspect the throttle lever, carburetor, and engine linkage. Tighten any loose bolts or connections and replace any worn out parts. If you’re not sure what needs replacing, consult your lawn mower’s manual or take it to a professional.
Step 4: Check for Improper Throttle Adjustment
Another reason why the throttle cable may not be working properly is due to an improper throttle adjustment. This can occur when the throttle cable is not attached to the carburetor correctly or the throttle linkage is not set up properly. To check for improper throttle adjustment, review your lawn mower’s manual for specific instructions on how to adjust the throttle linkage. If you’re not comfortable making these adjustments yourself, take your lawn mower to a professional.
Step 5: Test the Throttle Cable
Now that you’ve checked for common issues with your throttle cable, it’s time to test it out. Reattach the cable to the carburetor and tighten any clips or bolts. Reconnect the spark plug wire and turn on the engine. Slowly move the throttle lever to the full throttle position and observe the engine’s response. If the engine responds smoothly and accelerates without any hesitation or stalling, congratulations, you’ve successfully diagnosed and fixed a throttle cable issue! If the engine still has issues, repeat the steps above or take your lawn mower to a professional for further diagnosis.
Remember, proper maintenance and care of your lawn mower, including regular cleaning and lubrication of the throttle cable, can help prevent throttle cable issues before they occur. If you do experience issues, however, don’t despair. With a little patience and know-how, diagnosing and fixing throttle cable issues is a relatively easy and inexpensive process that can get your lawn mower up and running again in no time.
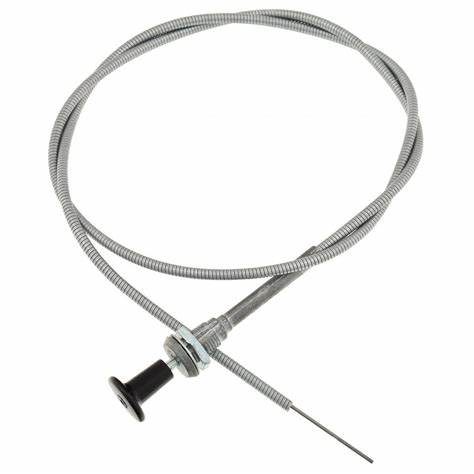
Replacing the Throttle Cable
The throttle cable is a crucial part of your lawn mower. It’s responsible for controlling the engine speed, and without it, you won’t be able to use your machine efficiently. If the throttle cable is broken or damaged, it’s important to replace it as soon as possible. Here’s how you can replace the throttle cable on your lawn mower:
Step 1 – Preparation
The first thing to do is to prepare your lawn mower for the replacement process. Park the machine on a flat and hard surface and disconnect the spark plug to avoid any accidental start during the repair. Remove the engine cover to expose the carburetor and throttle mechanism. Now inspect the throttle cable and make sure you have the right size and type before proceeding to step two.
Step 2 – Disconnect the Old Cable
Locate the end of the old throttle cable on the carburetor and unhook it from the clamp. You may need to use pliers to help release the clamp, depending on the model. Next, remove the cable from the throttle control lever. You can do this by loosening the nut, allowing you to pull the cable out of the lever’s pawl. Once the cable is disconnected, you can now remove the entire cable from the lawn mower.
Step 3 – Install the New Cable
With the old cable removed, it’s now time to install the new one. Start by threading it through the cable housing. You may want to apply a little oil to the cable to help it slide more easily. Once the new cable is in place, reattach it to the throttle control lever and the carburetor clamp. Make sure the cable is taut but not too tight to allow for easy movement.
Step 4 – Adjust the Cable Tension
After the new cable is in place, it’s important to adjust the tension. This ensures that the engine can start and idle at the right speed. Use the throttle control lever to check that the movement is smooth, and there’s no binding. If your cable has an adjustment screw, turn it until the cable has the correct tension. Otherwise, make sure the cable is snug but not too tight.
Step 5 – Clean Up and Test
Lastly, clean up any debris around the lawn mower before testing the new cable. Reinstall the engine cover, reconnect the spark plug, and start the engine. Make sure the engine starts and runs smoothly with the new cable. Move the throttle control lever in both directions to check that the engine speed adjusts accordingly. Congratulations, you’ve successfully replaced your lawn mower throttle cable!
Some quick reminders when replacing your throttle cable:
- Make sure to disconnect the spark plug before doing any repair work on your lawn mower.
- Inspect the new cable before installing it to ensure it is the correct size and type.
- Adjust the cable tension to ensure the engine runs smoothly.
- Test the engine to see if the new cable is working correctly.
Adjusting Throttle Cable Tension
When it comes to fixing a lawn mower’s throttle cable, adjusting the cable tension is often the solution. The throttle cable, which is connected to the carburetor, is responsible for controlling the speed of the engine. If it is too loose or too tight, it can cause problems with the mower’s performance, such as idling too high or low. Here’s how to adjust the tension:
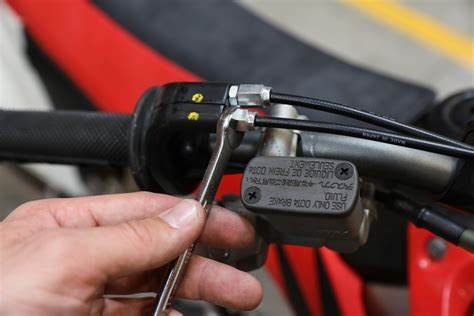
Step 1: First, locate the throttle cable. It’s usually on the opposite side of the spark plug and the carburetor. You’ll see a small screw that you need to tighten or loosen.
Step 2: Start the lawnmower and let it run for a few minutes to warm up. Take note of the RPMs while the engine is idling. This will serve as a baseline for the next adjustment.
Step 3: Use a pair of pliers to loosen the locking nut on the small screw that controls the throttle cable tension. Once the nut is loose, you can turn the screw to adjust the tension. Turning the screw clockwise will tighten it, and turning it counterclockwise will loosen it.
Step 4: Make very small changes to the screw, turning it a quarter turn at a time. After each adjustment, check the RPMs with a tachometer or by ear. You want to reach a point where your engine idles smoothly and at a proper speed. If the RPMs are too high, tighten the screw. If they’re too low, loosen it.
Step 5: Once you find the sweet spot, lock the adjustment in place by tightening the locking nut back on the screw with pliers. Avoid over-tightening the locking nut, which can restrict the throttle cable movement.
Step 6: Finally, turn off the engine and check the throttle’s movement by turning the cable’s end by hand. The movement should be smooth and continuous. If it’s not, adjust the screw again, and repeat Steps 4 and 5 until you’re satisfied with the throttle’s operation.
It’s essential to note that adjusting the throttle cable tension will affect the engine’s speed. If you don’t feel confident with this task, seek the help of a professional or technician.
Routine Maintenance for the Throttle Cable
Just like any other part of your lawn mower, the throttle cable needs regular maintenance. This ensures that it works smoothly and extends its lifespan. Below are some routine maintenance practices that help keep your lawn mower’s throttle cable in top condition:
1. Lubricating the Cable
The throttle cable moves inside a sheath when you adjust it. This movement can cause friction, increasing the chances of the cable snapping. To prevent this, lubricate the cable regularly using a spray lubricant. WD-40 or any other light lubricant works best. Spray on the cable as you adjust various positions of the cable. This will ensure that the throttle cable slides smoothly without any hitches. Don’t forget to avoid spraying the lubricant to the lever. Always wipe off any excess lubricant to keep the cable dry.
2. Inspection of the Cable
Inspect the throttle cable for any signs of wear and tear. Look at both ends of the cable, making sure there are no frayed parts, kinks, or breaks. If you notice any of these signs, it’s time to replace the cable. You don’t want to wait until it snaps and stops working, causing serious damage to the engine. Inspect the sheathing too for any signs of damage or corrosion. If it’s damaged, you’ll need to replace the entire cable. It’s essential to inspect the cable frequently, especially after using your mower in wet areas.
3. Adjusting the Cable
When the cable gets loose, it can cause problems with the engine’s RPM. Hence, it’s crucial to adjust the cable regularly. First, start by locating the adjustment screw on the lever/mower’s control settings. Turn the screw to adjust the cable until the RPM (Revolutions Per Minute) is within the recommended range. You can use a tachometer to monitor the RPM. Follow the manufacturer’s instructions in your mower’s manual for the specific RPM settings.
4. Cleaning the Cable
Build-up of dust, dirt, or debris can cause the throttle cable to clog or stick. This can affect the mower’s engine response and performance. Cleaning the cable ensures that it works smoothly. To clean it, a combination of soapy water and a clean rag can do the trick. Rub the soapy water onto the cable and scrub gently using the rag. Rinse with clean water and dry with another clean rag. Do not use petroleum or harsh solvents.
5. Replacing the Cable
If you notice any significant wear or damage that you can’t repair with simple maintenance, it’s time to replace the cable. Check for the correct fitting, either with a barrel-end or notched-end cable. Begin by detaching the old cable from both ends of the lever, including the throttle and the carburetor mechanism. Make sure you remember how the cable routing goes. This will help you in the reinstallation of the new cable. Before installation, check the new cable’s lubrication as well. Pass the new cable through the sheath and reconnect the cable ends to their respective mechanisms. Do not overtighten when attaching the new cable.
Routine maintenance of your lawn mower’s throttle cable goes a long way in keeping your machine in excellent condition. It prolongs the lifespan of the mower and ensures that it works efficiently. Whether it’s lubricating, cleaning, adjusting, inspecting, or replacing, these maintenance practices prevent any damages that may cost you a lot to repair or replace.