

Check the Fuel Supply
One of the most common reasons why a weedeater won’t start is due to a lack of fuel or a bad fuel supply. Before checking any other components, start by examining the fuel supply system. Here are the steps to check and fix the fuel supply:
Contents
Step 1: Check the Fuel Tank
The first thing you need to do when your weedeater won’t start is to check the fuel tank. Make sure that it is filled with fresh fuel. If the fuel is old, dispose of it and refill the tank with fresh fuel. Also, make sure that the fuel is mixed to the correct ratio. Refer to your weedeater’s manual to know the correct mixing ratio specified by the manufacturer. Using the wrong fuel mixture can cause severe damage to the engine.
Step 2: Check the Fuel Filter
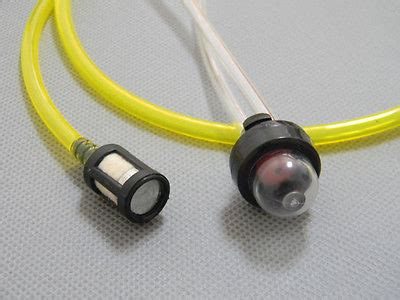
If the fuel tank is fine, the next thing you should check is the fuel filter. The fuel filter is responsible for filtering out any impurities in the fuel before it reaches the engine. A clogged fuel filter can cause a lack of gas flow to the engine, resulting in a no-start condition. To check the fuel filter, remove it from the fuel line and clean it thoroughly. If the filter is severely clogged or damaged, replace it with a new one.
Step 3: Check the Fuel Lines
The next component to check is the fuel lines. Over time, the fuel lines can become brittle and crack, causing fuel to leak out, or preventing fuel from reaching the engine. Inspect the fuel lines for any cracks, kinks, or signs of wear and tear. If you notice any damage to the fuel lines, replace them with new ones.
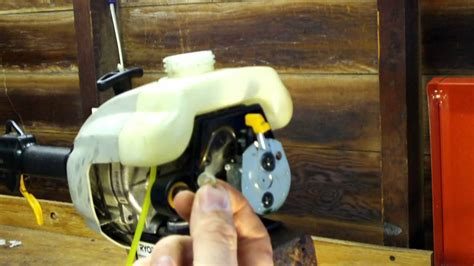
Step 4: Check the Carburetor
If the fuel tank, filter, and lines are all clean and in good condition, the last component to check is the carburetor. The carburetor is responsible for mixing the fuel and air in the correct ratio and delivering it to the engine. A dirty or clogged carburetor can cause starting problems. Remove the carburetor from the engine and clean it thoroughly with carburetor cleaner. Also, check the gaskets and seals for any signs of damage or wear, and replace them if necessary.
By following these steps, you should be able to fix a weedeater that won’t start due to a faulty fuel supply. If the problem still persists, it may be time to take your weedeater to a professional mechanic for further diagnosis.
Clean the Air Filter
If your weedeater has been sitting for a while or you have been using it regularly, the air filter will likely get dirty over time. When the air filter is clogged, it can prevent the weedeater from starting. A simple fix is to clean the air filter to make sure the engine will get the air it needs to run smoothly.
The first step is to locate the air filter cover. On some weedeaters, this cover will be on the side of the engine, while on others it may be on top. Once you find the cover, remove it by unscrewing the bolts or simply pulling it off.
Next, take out the air filter. Depending on the type of weedeater you have, the air filter may be a foam element or a paper cartridge. If it’s a foam element, gently wash it with soap and water. If it’s a paper cartridge, replace it with a new one.
After cleaning or replacing the air filter, make sure to dry it thoroughly before putting it back in place. Once the air filter is dry, carefully replace it in the housing and put the cover back on. Tighten the bolts or snaps to secure the cover in place.
It’s important to remember that if you don’t clean the air filter on a regular basis, it can cause permanent damage to your weedeater engine. A dirty air filter can lead to reduced engine power, decreased fuel efficiency, and shorten the overall lifespan of the weedeater.
Some weedeaters also come with a reusable, washable air filter. If you have this type of air filter, you can clean it with soap and water and let it dry before reusing it.
If you have cleaned or replaced the air filter and your weedeater still won’t start, try checking the fuel line and spark plug as these components are also critical for proper engine function. If you still can’t get your weedeater to start, it might be time to take it to a professional to diagnose and repair.
Inspect the Spark Plug
One of the most common reasons why a weedeater won’t start is because of a faulty spark plug. The spark plug is responsible for igniting the fuel in the engine. If the spark plug is dirty or worn out, then it won’t be able to produce the spark needed to start the engine. Therefore, it’s important to inspect the spark plug for any signs of damage before jumping into more complex repairs.
Follow these steps to inspect the spark plug:
Step 1: Locate the spark plug
The spark plug is typically located on or near the engine block of the weedeater, depending on the model. Refer to the owner’s manual for your specific weedeater to find the location of the spark plug.
Step 2: Remove the spark plug
Using a spark plug wrench, carefully remove the spark plug from the engine block. Be sure to use the correct size wrench to avoid damaging the spark plug or engine block. Once removed, inspect the spark plug for any deposits, dirt, or damage.
Step 3: Check for deposits
If the spark plug has any deposits on it, such as oil or carbon buildup, then it needs to be cleaned or replaced. Deposits on the spark plug can prevent the spark from igniting the fuel, thus preventing the engine from starting.
Step 4: Assess the condition of the spark plug
If the spark plug appears to be in good condition, then check the electrode gap. The gap should be between .020 and .030 inches for most weedeaters. If the gap is too narrow or too wide, it can cause the engine to misfire or not start at all. Use a spark plug gap tool to adjust the electrode gap as needed.
Step 5: Replace the spark plug
If the spark plug is damaged or worn out, then it needs to be replaced. Refer to the owner’s manual for your weedeater to find the correct replacement spark plug. Once you have the replacement spark plug, carefully insert it into the engine block and tighten it with a spark plug wrench. Be careful not to overtighten the spark plug, as this can cause damage to the engine block.
Once you’ve inspected the spark plug and either cleaned or replaced it, try starting the weedeater again. If it still won’t start, then move on to the next step in the troubleshooting process.
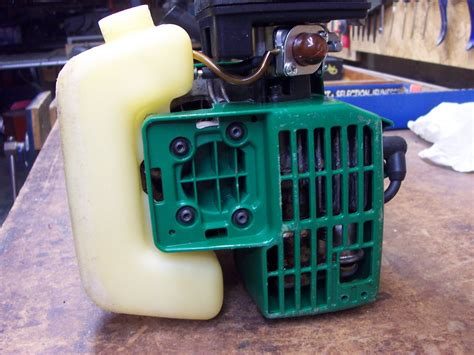
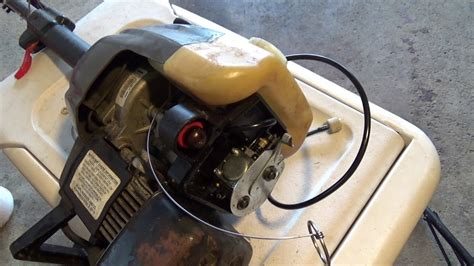
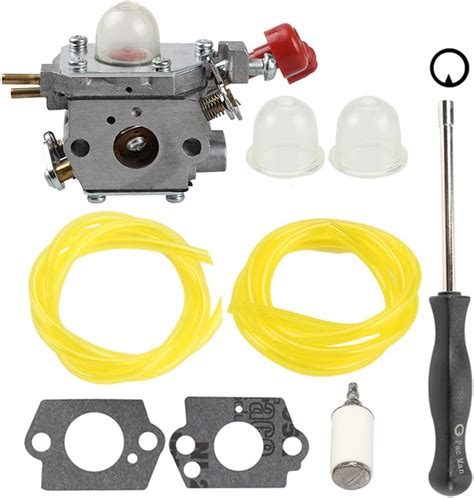
Replace the Carburetor
If your weedeater won’t start, it could be the carburetor. The carburetor is responsible for mixing the air and fuel in the correct ratio for combustion. Over time, the carburetor can become clogged with debris, preventing the proper fuel flow needed for the engine to start. In some cases, the carburetor may need to be replaced entirely.
Replacing the carburetor can be a bit trickier than some other repairs, but it’s definitely doable. Start by locating your weedeater’s carburetor – this will vary based on the make and model of your weedeater, but generally, it’s either on the top or side of the engine. Once you’ve located it, disconnect the fuel line and the throttle cable.
You’ll also need to detach the air filter and the air filter housing to access the carburetor. This may require removing screws or other fasteners – be sure to keep track of these so you can reassemble the weedeater correctly.
Once you’ve accessed the carburetor, you can remove it using a wrench or pliers. Take care when handling the carburetor – it’s delicate and can be damaged easily. The carburetor will likely be attached to the engine with gaskets – be sure to remove these as well so you can install the new carburetor properly.
Before installing the new carburetor, be sure to check that its size and shape matches the old one. The new carburetor should also come with gaskets and other necessary components. Install the new carburetor in reverse order of how you removed the old one – attach the gaskets to the engine, then carefully reattach the new carburetor. Reattach the throttle cable, fuel line, air filter housing, and air filter.
Once you’ve replaced the carburetor, it’s important to adjust the fuel-to-air ratio setting. This can be done with the carburetor’s adjustment screws – one will adjust the fuel-to-air ratio at idle, and the other will adjust it at full throttle. These screws will need to be adjusted carefully – consult your weedeater’s user manual for specifics on how to do this.
Overall, replacing the carburetor can be a bit of a challenge, but it’s definitely doable with some patience and the right tools. If you’re not comfortable replacing the carburetor yourself, take your weedeater to a professional for repair.
Seek Professional Help
If you have tried every possible solution and your weedeater still won’t start, it may be time to seek professional help. There are a number of reasons why you should consider taking your weedeater to a professional:
- Experience and Training: A professional technician has years of experience and comprehensive training in repairing all types of outdoor power tools, including weedeaters. They have the knowledge to diagnose and fix issues that may be difficult for the average person to solve. Additionally, they know the best ways to handle safety issues when repairing power tools.
- Proper Tools: Repairing a weedeater requires certain specific tools, such as compression gauges, air pressure gauges, fuel pressure testers, and other specialized equipment. These tools can be quite expensive and may not be accessible or affordable for the average person. Professional technicians, however, have all the tools and equipment needed to diagnose and repair issues with your weedeater.
- Access to Parts: Sometimes fixing a weedeater requires replacing certain parts. Professional technicians have access to a wide range of parts from top manufacturers. They can also order parts that are not available locally, unlike the average person who may end up spending days trying to find the right parts.
- Cost-Effective: While it may seem like repairing your weedeater on your own is more cost-effective, it may actually turn out to be more expensive if you don’t have the technical expertise and experience. You may end up causing more damage to your weedeater and may need to replace it altogether. However, a professional technician can diagnose and fix the problem effectively and offer you a guarantee of their work.
- Peace of Mind: One of the most significant benefits of taking your weedeater to a professional is that you get peace of mind knowing that the job is done right. You don’t have to worry about the repair failing, causing damage to your property or hurting yourself, or your family. Professional technicians issue warranties for their work, giving you the guarantee that your weedeater will work excellently and efficiently.
Taking your weedeater to a professional technician can save you time, money, and effort, not to mention ensure that your weedeater is fixed correctly. So, it is always wise to take the advantage of the expertise, tools, and training that professional technicians possess.