
Understanding the issue with the Yeti zipper
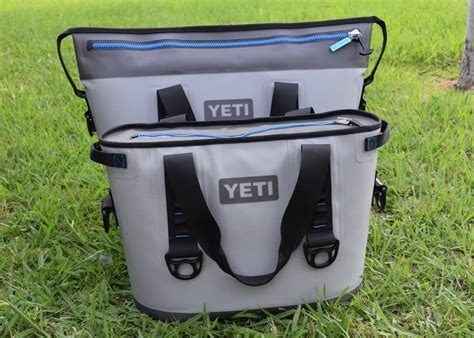
The Yeti zipper is a sturdy and reliable zipper found in many high-quality outdoor gear. It is designed to withstand rough handling and harsh weather conditions, but like any other zipper, it can suffer from wear and tear, malfunctions, or breakages.
The usual problems associated with a Yeti zipper are hard to zip, stuck or caught zipper, separated or detached teeth, broken sliders, or worn-out zippers.
Hard zipping can be caused by several factors such as sand, dirt, or debris that have accumulated in the zipper teeth and clogged the slider. This can also happen if the zipper has been exposed to moisture or humidity, causing the zippers to jam or rust.
A stuck zipper, on the other hand, occurs when the slider gets caught in the fabric, usually at the edges of the garment. This snag can cause the slider to get stuck, preventing closure or opening of the zipper, and sometimes leading to misalignment of the teeth.
A separated or detached zipper occurs when the teeth have come apart, and the slider is no longer holding them together. This can happen when the zipper has been pulled too hard, or the garment has stretched, causing the teeth to become misaligned and eventually break apart.
Broken sliders are one of the common issues with Yeti zippers. This can be caused by improper usage, rough handling, or wear and tear. The slider can break or be dislodged from the zipper tape, causing the zipper to be unusable.
Lastly, worn-out zippers are a result of prolonged usage or exposure to harsh weather conditions. Over time, the zipper teeth may become worn out and lose their grip, causing the zipper to malfunction or eventually break apart.
These issues can be frustrating, but fixing the zipper doesn’t have to be a nightmare. With some basic knowledge and a few tools, you can easily fix a Yeti zipper in no time.
Preparing the Necessary Tools for Yeti Zipper Repair
Fixing a Yeti zipper is necessary to prolong the life of the product and help save money. It can be a simple repair but requires the right tools to ensure that it’s done correctly. Here are the necessary tools needed for a Yeti zipper repair:
1. Needle and Thread: These are the most important tools needed in fixing a yeti zipper. It’s important to use the right thread that matches the color of the zipper to ensure that the repair is seamless. The needle should also be thin enough to go through the zipper teeth without compromising their integrity. A thinner needle makes it easier to sew the zipper into place and makes the finished repair look neat.
2. Pliers: Pliers are essential in repairing a Yeti zipper. They come in handy when replacing missing or damaged teeth. With the pliers, gently remove the damaged teeth by using moderate force, making sure not to damage the surrounding teeth. Then insert the new zipper teeth into the zipper fabric and clamp them carefully using the pliers. This should be done carefully so that the zipper does not come apart after repair.
3. Scissors: Scissors are important in cutting any excess thread, especially after sewing the zipper fabric back in place. They should be sharp so that they make a clean cut.
4. Pins: Pins come in handy when keeping the fabric in place when sewing it back into place. They are necessary when working on the zipper slider, as they will help keep the fabric in place while carrying out the repair.
5. Lubricant: Lubricant comes in handy when working on a stuck zipper. It’s used to lubricate the zipper teeth to make them slide easily against each other.
6. Fabric Glue: Fabric glue also comes in handy when repairing a Yeti zipper. It’s important to use fabric glue to patch up any holes that are not too big. This is because using a needle and thread to fix big holes may not hold up for long.
Once all the tools mentioned above have been acquired, it’s important to pick a comfortable and well-lit working space. Ensure that there’s enough space to lay out all the parts of the zipper and that there are good lighting conditions to make the repair task easier. When carrying out the repair, it’s important to pay attention to detail and use the right tools as using the wrong ones may cause further damage to the zipper, leading to a replacement or a more expensive repair.
Step-by-Step Guide to Fixing a Broken Yeti Zipper
If you’re an avid outdoorsman or woman, it’s likely that you have a trusty Yeti cooler by your side on all of your adventures. While Yeti coolers are known for their toughness, there may come a time when you encounter a broken zipper. This can be a frustrating issue, but it doesn’t mean that you need to replace your beloved cooler. In this guide, we will take you through the step-by-step process to fix a broken Yeti zipper and make your cooler function as good as new again.
Step 1: Diagnose the Problem
The first step in fixing any broken Yeti zipper is to diagnose the problem. You need to be able to identify exactly what’s wrong with the zipper before you can start fixing it. Take a close look at the zipper and identify if the problem is with the teeth or with the slider. If the teeth are misaligned or bent, you will need to use pliers to gently straighten them out. If the problem is with the slider, you may need to take it off completely and replace it with a new one.
Step 2: Clean the Zipper
Before you start taking your Yeti cooler apart to fix the zipper, make sure that you give the zipper and the surrounding area a good clean. Dirt and grime can get stuck in the zipper, which can cause it to become stuck or break. Use a soft-bristled brush and some gentle soap and water to clean the zipper. Remember to dry it completely before moving on to the next step.
Step 3: Lubricate the Zipper
Lubricating your zipper is an essential step in fixing a broken Yeti zipper. It will help the zipper to glide smoothly, without getting stuck. To do this, you will need to apply some zipper lubricant to the teeth and to the slider. Zipper lubricant comes in different forms, including wax, spray, and gel. Choose the type that works best for your needs, and apply it to the zipper according to the manufacturer’s instructions. Make sure that you don’t use too much lubricant, as this can attract dirt and debris, making the problem worse.
Step 4: Replace the Slider
If the problem with your broken Yeti zipper is with the slider, you will need to remove it and replace it with a new one. To do this, use pliers to gently open the zipper and slide the old slider off. Make sure that the new slider you choose is the right size for your zipper. You can purchase replacement sliders from a hardware store or online. Once you have the new slider, slide it onto the zipper, making sure that it’s in the correct orientation.
Step 5: Stitch the Zipper
If the teeth on your zipper are missing or damaged, you may need to stitch the zipper to repair it. This step can be a bit tricky and requires a steady hand and some basic sewing skills. To stitch the zipper, turn the cooler inside out and use a needle and thread to stitch the teeth back into place. Make sure that you sew carefully, ensuring that the zipper is straight and even. Once you have finished stitching, turn the cooler right side out and test the zipper to make sure it’s working correctly.
Conclusion
Fixing a broken Yeti zipper doesn’t have to be a difficult task. By following these step-by-step instructions, you can quickly and easily repair your cooler’s zipper and get back to enjoying your next outdoor adventure. Remember to take your time and be patient when fixing your zipper, and always make sure that the cooler is clean and dry before you start working on it. Happy repairing!
Tips and tricks to prevent future Yeti zipper problems
Having a faulty zipper on your Yeti cooler can be quite frustrating, especially if you have to make use of it regularly. However, the good news is that you can prevent future Yeti zipper problems with a few tips and tricks. These tips are not only useful for fixing any current zipper problems but can also help prevent zipper issues on your Yeti cooler in the future.
1. Keep the zipper clean
One of the most common reasons for Yeti zipper problems is dirt and debris getting stuck in the zipper teeth. In order to prevent this from happening, it is important to keep the zipper clean after every use. To do this, simply wipe the zipper clean with a damp cloth and allow it to dry completely before storing your Yeti cooler.
2. Avoid overstuffing the cooler
Another common issue that can cause zipper problems is overstuffing your Yeti cooler. When the cooler is overstuffed, it can cause the zipper to stretch and strain, which can lead to it becoming misaligned or stuck. To prevent this from happening, ensure that you do not pack your cooler beyond its maximum capacity. Instead, use an appropriate size cooler for your needs and pack it carefully to avoid putting too much pressure on the zipper.
3. Don’t force the zipper
While it may be tempting to force a jammed zipper to fix it quickly, this can cause more harm than good. Forcing the zipper can cause it to break or become misaligned, which will only worsen the problem. Instead, gently wiggle the zipper back and forth, applying gentle pressure to get the zipper moving again. If this doesn’t work, try using a lubricant such as silicone spray to help loosen the zipper before trying again.
4. Use a zipper lubricant
Using a zipper lubricant can help prevent future Yeti zipper problems by reducing friction between the zipper teeth. This will make the zipper slide more smoothly and prevent it from getting stuck or misaligned in the future. There are several different types of zipper lubricants available, but a silicone spray or wax-based lubricant works best for Yeti cooler zippers. Simply spray or rub a small amount of lubricant onto the zipper teeth and then gently slide the zipper back and forth to distribute the lubricant evenly.
5. Store your Yeti cooler properly
Lastly, it is important to store your Yeti cooler properly to prevent future zipper problems. When your cooler is not in use, keep it in a dry, cool place where it won’t be exposed to direct sunlight. Avoid storing your cooler in areas with extreme temperature changes as this can cause the zipper to become misaligned or deteriorate. Additionally, always ensure that the zipper is completely closed and the cooler is properly secured to prevent any accidental damage to the zipper.
By following these simple tips and tricks, you can prevent future Yeti zipper problems and ensure that your Yeti cooler continues to function properly for years to come.
When to seek professional Yeti zipper repair assistance
If you’ve tried all the basic steps to fix your Yeti zipper and it’s still not working, you might want to consider seeking professional Yeti zipper repair assistance. This process will help you save time and money. Fixing Yeti zippers can be a bit tricky, and you don’t want to end up causing more harm than good. However, here are some specific indications that you need to search for professional assistance.
- When the Zipper is Stuck: A stuck zipper is another problem you may experience with your Yeti zipper. When this occurs, it may indicate a more significant issue, such as a bent zipper slider or a damaged chain.
- When the Slider Falls Off: If your slider falls off, it means there’s a problem connected with the slider. You may be able to replace the slider yourself, but if you have trouble, it’s best to seek professional assistance to avoid further damage.
- When the Zipper is Failing Completely: You know you’ve gotten to the point of needing expert assistance when your Yeti zipper has failed entirely. At this point, the zipper may be beyond repair, and you’ll need to replace it, which can be done by a professional.
- When the Teeth are Bent: Bent teeth can indicate chain damage, and this can be challenging to correct on your own. So, if the teeth are bent or twisted, you should avoid trying to fix them and get professional help instead.
- When You’ve Tried Multiple Fixes: If you’ve tried multiple repairs to no avail, it’s time to seek professional help. A professional Yeti zipper repairer will have specialized equipment and know-how, making the task easier and ensuring a positive outcome.
These are some of the most common warnings that it’s time to seek professional Yeti zipper repair assistance. If you perform basic repairs and still have difficulty using your Yeti zipper, you should seek professional assistance. This will help you prevent garments from becoming damaged or causing further harm to yourself or family members.