
Gather necessary tools and materials
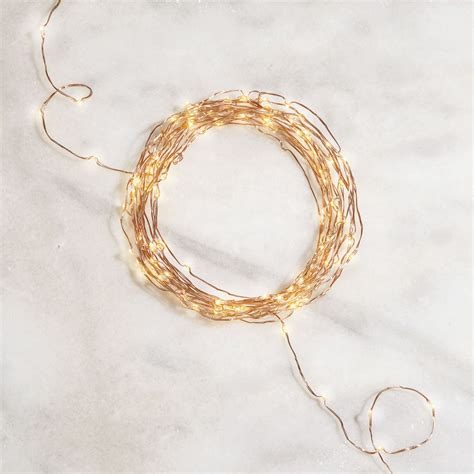
If you have a set of fairy lights that have stopped working because of a broken wire, it is often much easier and cheaper to fix them yourself than it is to purchase a new set. Not only is it more cost-effective, it is also an excellent way of recycling! Before you begin, you will need to gather a few tools and materials.
Contents
- 1 1. Pliers
- 2 2. Wire strippers
- 3 3. Heat shrink tubing and a heat gun
- 4 4. Replacement bulbs and wire connectors
- 5 5. A work surface and workspace
- 6 Step 1: Gather Your Tools
- 7 Step 2: Locate the Broken Wire
- 8 Step 3: Cut and Strip the Wire
- 9 Step 4: Connect the Broken Wire
- 10 Step 5: Replace the Bulb or LED
- 11 Step 6: Test the Fairy Lights
1. Pliers
The most important item you will need is a good pair of pliers. Choose a pair that is comfortable for you to use, with a good grip, and a pointed end. This will help you to open and close the wire connectors that connect the wires, and also to bend the wire to fit the shape of the bulbs. Ideally, you should choose a pair with a thin nose that can fit into small spaces.
2. Wire strippers
You also need a good pair of wire strippers to remove the insulation from the wire. A wire stripper has two blades that can easily cut and remove the protective coating from the wire, without damaging the wire itself.
3. Heat shrink tubing and a heat gun
You will need heat shrink tubing to cover and protect the repaired wire. The heat will shrink the tubing around the wire once it has been heated, creating a tight and durable seal. Heat shrink tubing comes in various sizes, so you will need to choose one that is suitable for the size of the wire you are repairing. A heat gun is also required to heat up the tubing so that it can shrink around the wire. Although a cigarette lighter can be used to heat up the tubing, a heat gun is a safer option.
4. Replacement bulbs and wire connectors
If you have a bulb that is not lighting up, or if the connector is broken, you may need to replace the bulb or connector. You can buy these items at most hardware stores or online. Just make sure to choose the correct size and type of bulb or connector for your particular set of fairy lights.
5. A work surface and workspace
You will also need a work surface and a workspace where you can spread out your materials and tools. Ideally, you should choose a well-lit and well-ventilated area where you can work comfortably without distractions. This will help you to focus on the work at hand and ensure that you can complete the task safely.
Once you have gathered all these materials, you are ready to begin repairing your broken fairy light wire. By following simple steps, you will be able to successfully repair your fairy light wire and enjoy the magic of twinkling lights once again.
Locate the Broken Section of Wire
Identifying the broken section of wire is the crucial step when fixing your fairy light wire. Once you have located the damage, you will have a better idea on the type of repair it requires.
Firstly, unplug your fairy light from its power source and start to inspect the wire starting from the power plug. Check each bulb along the way and examine the cord for cracks, frays, or exposed wires. The damaged part could be anywhere along the cord, so make sure to thoroughly examine it by bending and twisting the cord to see if the bulbs flicker or turn off.
If you’re still unable to locate the damaged part, you can use a multimeter to locate the exact spot where the cord is broken. A multimeter is a device used to test electrical connections. To use it, set the multimeter to the continuity test mode and touch the probes to each end of the cord. If the multimeter beeps, the cord’s continuity is intact, and the damaged part is likely in a different location. If it does not beep, move the probes along the wire, and the point which the multimeter beeps indicates the breakage point.
Another technique for locating the damaged section is the “wiggle test.” While the lights are still plugged in, gently wiggle the wire cord near the suspected damage point. If the lights flicker or turn on and off, you have found the damaged segment.
Additionally, inspecting the color of the wire cord is another useful way to identify the damaged section. The wire is usually made up of two wires of different colors, like red and green. Look for any changes in color, indicating abrasions or breaks in the cord.
Remember to take your time when identifying where the wire is broken. Once you have found the damage point, you will have a better idea on how to proceed with the repair.
Cut and Strip the Wire

One of the most common problems with fairy lights is broken wires. This problem can happen due to various factors, such as wear and tear, a manufacturing defect, or it may even be caused by squirrels or other small animals that chew on the wires. Whatever the cause, it is easy to fix broken fairy light wire by following the steps outlined here.
Step 1: Gather Your Tools
The first step in fixing a broken fairy light wire is to gather the necessary tools. You will need a pair of wire cutters, a wire stripper, some electrical tape, and a replacement bulb or LED. You can find most of these items at your local hardware store, or online.
Step 2: Locate the Broken Wire
Once you have your tools, the next step is to locate the broken wire. This may be fairly easy, especially if the break is visible, or may require more effort if the break is inside the light or tangled up in other wires. Patience is needed in this step, as finding the broken wire can be frustrating. If you cannot find it, try plugging in the lights, as this can sometimes reveal the problem area.
Step 3: Cut and Strip the Wire
This step is crucial in fixing the broken fairy light wire. Once you have located the broken wire, the next step is to cut it with the wire cutters. Make sure to cut the wire as close to the break as possible, leaving enough room for stripping. Once you have cut the wire, strip both ends of the wire using the wire stripper. Be careful not to strip too much wire, as this may cause a short circuit.
When stripping the wire, place the wire in the wire stripper and squeeze the handles, pulling the wire through the stripper. This will remove the insulation from the wire, exposing the copper. Do this carefully, ensuring that you only strip the coated wire and not the copper wires inside.

Step 4: Connect the Broken Wire
Now that both ends of the wire are stripped, you will need to connect them together again. To do this, twist the exposed wires together. Make sure to use long-nose pliers to twist the wire if it is too short to hold with your fingers.
It is important to ensure that the wires are tightly twisted together, as this will prevent them from separating and causing a short circuit. Once the wires are twisted together, cover the exposed wire with electrical tape. This will protect the wires from coming into contact with each other and causing a short circuit.
Step 5: Replace the Bulb or LED
If the broken fairy light wire was caused by a faulty bulb or LED, you will need to replace it. To do this, gently pull the bulb or LED out of the socket, and insert a new one. Once the new bulb or LED is in place, plug in the fairy lights to test if the repair has worked.
Step 6: Test the Fairy Lights
The last step in fixing a broken fairy light wire is to test the lights. Plug the lights in and check if they are working. If the lights do not light up, then there may be another problem, and you may need to try the process again, this time checking for other potential problems.
By following these steps, you should now be able to fix a broken fairy light wire easily. Remember to use caution when working with electrical wires and always bear in mind safety. If in doubt about tackling a project such as this, it’s always best to consult an electrician.
Twist the Wires Together
Fairy lights are one of the most beloved forms of decorative lighting thanks to their ability to create a whimsical, magical atmosphere. However, it’s inevitable that at some point you’ll encounter a problem with the wiring. Perhaps a light has stopped working, or maybe the entire string of lights has gone dark. No need to panic though! In this article, we will guide you through the process of fixing broken fairy light wire and restoring your luminous décor fantasy back into reality.
The first step in fixing broken fairy light wire is to try and locate the damaged wire. In many cases, it will be visibly exposed, such as a wire that has snapped off or become frayed. Other times, however, you may have to do some detective work to find the culprit. A good way to locate the problem is to systematically test the lights one by one. Start at one end of the string and work your way through each light until you find the one that’s not working. Once you’ve figured out where the issue is, it’s time to start fixing it.
The most basic and straightforward solution is to twist the wires together. This method is ideal for repairing damaged wires that are still connected to the fairy lights. To start, identify the two wires that are broken and strip off a small section of the protective plastic coating from the ends. This will reveal the copper wires inside. Strip off about a centimeter of the plastic covering to give yourself plenty of wire to work with.
Next, hold the two copper wires together so that the bare ends are touching. Then, carefully twist the two wires together in a clockwise direction. Keep twisting until the wires are tightly intertwined and the connection feels secure. This will ensure that there is a good electrical connection between the two wires, thus allowing the current to flow along the string of lights.
It’s important that you twist the wires firmly but gently so that you don’t break the wire or damage the strands inside the wire. If the wires are too short, you may need to use your wire cutters to trim off a bit of the excess wire. Once you’ve twisted the wires together, wrap a piece of electrical tape around the join. This will secure the wires in place and help to protect against any moisture or damage.
If your fairy light wire is damaged in multiple areas or the damage is too widespread, twisting the wires together may not be sufficient for a secure repair. In such cases, you may need to consider replacing the wire or the whole string of fairy lights.
In conclusion, broken fairy light wire is a common issue that you can easily fix at home. By simply twisting the wires together, you can restore your fairy lights’ shine and revive the magic in your household. Always ensure you stay safe while handling electricity and keep pets and children from the wiring.
Secure the Connection with Electrical Tape
If you have a broken fairy light wire that has fallen victim to any wear and tear, the first thing you can try to do is to secure the connection with electrical tape. Electrical tape is the most commonly used tape for fixing broken wires. It is easy to find in almost all hardware stores. This method is often the most effective as it is low-cost and requires no special equipment or skills.
To begin, you will need to get hold of some electrical tape. It comes in different colors, but black is the most common. Ensure that the tape has a good adhesive capability, as this will make it stick better to the wire. When wrapping the tape around the wire, hold it down lightly as you twist to wrap it tightly around the wire. Make sure that the wire is completely covered with the tape and that no bare wire is left exposed. This will help to prevent the wire from coming into contact with any other object which could cause further problems.
When you are satisfied that the wire is completely covered with the electrical tape, pull on both ends of the wire to ensure that it is tightly secured. This will prevent the tape from coming undone and any further damage to the wire. If this method works, it will save you time, money, and effort in buying new fairy light wire.
It is important to note that electrical tape is a temporary solution, so you will still need to replace the wire at some point. However, it will give you the time needed to prepare for a replacement as well as allow you to use your fairy lights for an extended period.
Bearing in mind that although this method is simple and straightforward, it is not guaranteed that it will always work, especially if the wire is already badly damaged. However, it is definitely worth a try, considering its cost-effectiveness, ease of use and the fact that you probably already have it lying around the house.