
Understanding Curb Rash and Machined Rims
Machined rims are great because of their polished surfaces that enhance the look of your car. Since present-day modern automobiles feature distinct rim designs, it’s almost impossible to discover ones that flawlessly fit your vehicle’s profile. As such, aftermarket additions have become an innovative approach to personalize cars. As beautiful as they may be, machined wheels with a polished surface can become damaged over time. One of the most common damages that plague machined rims is curb rash. Curb rash is the term used to describe scratches, dents, and scuffs that appear on a vehicle’s rims due to contact with curbs, road debris, and other obstacles. Even the most attentive drivers can’t avoid every obstacle obfuscated around curves or parked vehicles hence, the result is damaged rims, which are unsightly and can diminish your automobile’s visual appeal.
When it comes to fixing curb rash on machined rims, there are various ways to approach the issue, and you can easily do it yourself right at home. You can decide to take it to a professional if you’re not confident about your DIY skills. However, repairing curb rash on machined rims is manageable. We suggest buying a kit specifically designed for the type of repair you want to make. This should come with all the necessary tools and guidelines that will enable you to fix your machined rims efficiently.
Curb damage can happen at any point while driving. As a driver, whenever you notice the defect, it’s crucial to check the rims to ensure that the damage is minimal. If there are any visible signs, it’s wise to take immediate action to prevent any further damage.
The first step in fixing curb rash on machined rims is cleaning. Before you begin the actual repair process, ensure that you thoroughly clean the affected area. Start by hosing the wheel to remove any debris and grime on the surface. If there’s dirt in between the spokes or lug nuts, use a soft-bristled wheel brush to reach the difficult spots. We suggest using a microfiber cloth to dry the wheel, and this will prevent the buildup of water stains on the rim surface.
After drying the wheel, apply the masking tape to the tire to prevent the compound from getting onto the tire. We recommend using a tape made for bodywork, and you should apply it about a quarter-inch from the edge of the rim. Once the masking tape is in place, you can proceed to apply the filler. For the appropriate filler, you may consult the retailing shop for the right brand that works for your machined rims.
If the scratch is more profound, and it reaches the base metal, we’d suggest smoothing the edges first. You can use sandpaper to achieve this. However, we suggest wrapping the sandpaper around a firm foam surface for smooth grinding. You should also take care not to abrade the painted areas of the wheel.
In summary, machined rims with curb rash aren’t ideal for the aesthetic of your automobile. Curb rash can easily happen, but with the right procedures, you can quickly fix the problem yourself or take the vehicle to a professional. It’s important to check for curb rash regularly so that you can catch and fix the issue quickly. Let’s keep our car’s appearance at its best by ensuring we take care of our rims.
Gathering the Necessary Materials and Tools
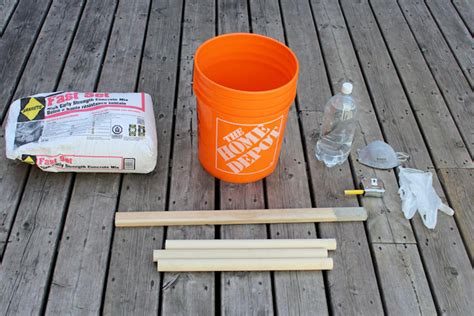
Fixing curb rash on machined rims is easy, but you need to gather some necessary materials and tools to do it. Here are the items that you should prepare:
Sanding tools: You will need some sandpaper, a sanding block, and a drill with a sanding attachment. Mix the sandpaper grit levels to sand the wheel and spot out any deep scratches. Begin with a 220-grit sandpaper and move onto 400- and 800-grit sandpaper. If there are still visible scratches, sand the wheel using 1200-grit sandpaper. A sanding block helps sand at a constant angle for smoother results while a sanding attachment fits into a drill for faster work and better results.
Masking tape and paper: Use masking tape and paper to prevent other areas of the wheel or the tire from getting scratched or painted. Use a waterproof tape for better results, and ensure the area covered is as close to the damaged area as possible.
Primer: Primer is essential when it comes to wheel refurbishing. It helps in priming the damaged area before painting. While buying a primer, match it with the color paint you’ll be using for the best results. Ensure that the primer is the right color to avoid a multi-layered approach and a shabby finish.
Paint and clear coat: This is necessary for matching the wheel’s original color. While looking for the right color paint, consider the paint brand and color code. The clear coat provides an extra layer of protection from water, sunlight, and dust. Get both spray paint and clear coat for the best results.
Heat-resistant gloves and safety goggles: Ensure to wear gloves and safety goggles while painting the wheel. The paint releases harmful gases which you can prevent from inhaling by putting on goggles. Protecting your skin is also crucial when working with paint as it can cause skin irritation.
Fixing curb rash on machined rims can be done easily, but you will need to gather the necessary materials and tools before proceeding. Once you have all the tools, you are ready to get started.
Sanding and Preparing the Damaged Area
Before starting with the repair process, it is important to sand and prepare the damaged area properly. This is critical as the outcome of the repair process depends on it. To get started, you will need some sandpaper with different grits, ranging from rough to fine. You can get sandpaper from a local store that deals with automotive supplies, or online stores.
The first step in preparing the damaged area is to sand down the damaged section with rough-grit sandpaper. You can start by using 80-grit sandpaper and move to 120-grit after the section is sufficiently sanded down. Sanding the affected area removes any burrs, nicks, or rough edges created by the curb rash, and to give the repair materials a surface to bond with.
After sanding, clean the rim with a soft cloth or microfiber cloth. Make sure that there are no dust or residue left, as this may affect the outcome of the repair process. If there is still dirt or residue, use some alcohol to remove it completely.
The next step is to fill the damaged area with a filler material that bonds well with the rim’s material. In this case, use epoxy filler to cover the damaged area. Epoxy filler creates a hard, durable, and paintable surface when cured. Mix the filler according to the manufacturer’s instructions and apply it to the damaged area. Make sure to apply it evenly to avoid any bumps or uneven surfaces when cured.
After applying the filler, let it cure for a few hours or overnight, depending on the manufacturer’s instructions. When the filler has cured, use fine-grit sandpaper, 400-grit in this case, to sand down any high spots and make the surface smooth and even. This is also a perfect opportunity to make any necessary, finer details.
Lastly, clean the surface and the surrounding area using a soft cloth. You can use some water and dish soap to do this, then let it dry. Once dry, inspect the rim and see if the repaired area is even with the adjacent area. If everything looks good, you can start painting the area using a color that matches your rim, for a seamless finish.
By following these simple steps, you can repair curb rash on your machined rims, and give them a new look that will enhance your car’s appearance. Be sure to take your time and follow the manufacturer’s instructions to the letter for best results. When in doubt, don’t hesitate to consult a professional or an auto body shop for guidance, to ensure the repair is done correctly.
Applying Filler and Paint for a Seamless Finish
After sanding down the damaged area and cleaning the rim, the next step in fixing curb rash on machined rims is to apply filler. Filler is a putty-like substance that fills in any gaps or holes in the surface of the rim created by the curb rash.
When choosing a filler, it is important to choose one that is specifically made for use on rims and that can withstand the high temperatures of the brakes. Before applying the filler, make sure to read the instructions on the packaging and follow them carefully.
To apply the filler, use a plastic applicator that comes with the filler. Apply the filler in a thin layer over the damaged area, making sure to spread it evenly. Do not over-apply the filler, as this will create an uneven surface that will be difficult to remove. Allow the filler to dry for the amount of time specified on the packaging, which is usually around 20 minutes.
Once the filler is dry, use a fine-grit sandpaper or sanding block to sand down any excess filler and smooth out the surface of the rim. The goal is to create a smooth, seamless surface that blends in with the rest of the rim.
After sanding down the filler, it is time to apply paint. Choose a paint that matches the color and finish of the rim as closely as possible. For machined rims, this will usually be a silver or metallic paint.
Before applying the paint, make sure the rim is clean and dry. Use a soft-bristled brush or compressed air to remove any dust or debris from the surface of the rim.
The best way to apply the paint is to use a spray can. Hold the can about eight inches away from the rim and spray in a sweeping motion. Apply two to three thin coats of paint, allowing each coat to dry for at least 10 minutes before applying the next.
After the final coat of paint has dried, inspect the rim for any imperfections. If there are any spots that need touch-up, sand them down and apply another coat of paint.
Once the paint has dried completely, it is time to apply a clear coat. The clear coat will protect the paint from chipping and will give the rim a glossy finish. Apply the clear coat in the same way as the paint, using two to three thin coats. Allow each coat to dry for at least 10 minutes before applying the next.
After the final coat of clear coat has dried, inspect the rim one last time. If there are any imperfections, sand them down and apply another coat of clear coat.
Once you have finished applying filler and paint, your machined rim should look as good as new. It may take some time and effort, but the end result is worth it. With the right tools and techniques, you can fix curb rash on machined rims and make them look like they were never damaged in the first place.
Finishing Touches and Ongoing Maintenance
Once you’ve completed the necessary steps to fix curb rash on your machined rims, there are a few finishing touches you can apply to make your wheels even more impressive. The first step is to clean your wheels thoroughly. Use a non-acidic wheel cleaner to remove any dirt or debris from your rims. Make sure to dry your wheels completely after cleaning them, as leaving moisture on the rims can cause water spots.
If your wheels have any chrome accents, you can use a chrome polish to bring out their shine. Apply the polish to a soft cloth and buff the chrome until it shines. Be sure to avoid getting any chrome polish on your machined finish, as this can cause smudging. If you’re unsure about how to use chrome polish, consult with an auto detailing professional for advice.
Another finishing touch you can consider is adding a protective coating to your machined rims. A ceramic coating or another high-quality sealant can help protect your rims from future damage. The coating will act as a barrier between your wheels and any debris, and can even repel water and other liquids to prevent staining. Talk to an auto detailing specialist to learn more about which coating might be right for your rims.
Finally, ongoing maintenance is crucial to keeping your machined rims looking great for years to come. Regular cleaning is essential, as is avoiding any further curb rash. Drive carefully and avoid parking too close to curbs whenever possible. Be mindful of bumps or potholes on the road, as these can also damage your wheels.
If you do notice any new curb rash, address it as soon as possible to prevent the damage from worsening. Overall, taking care of your machined rims requires some effort, but the reward of having stunning wheels that enhance your car’s appearance is worth it.