

Understanding the Causes of Frayed Paint Brushes
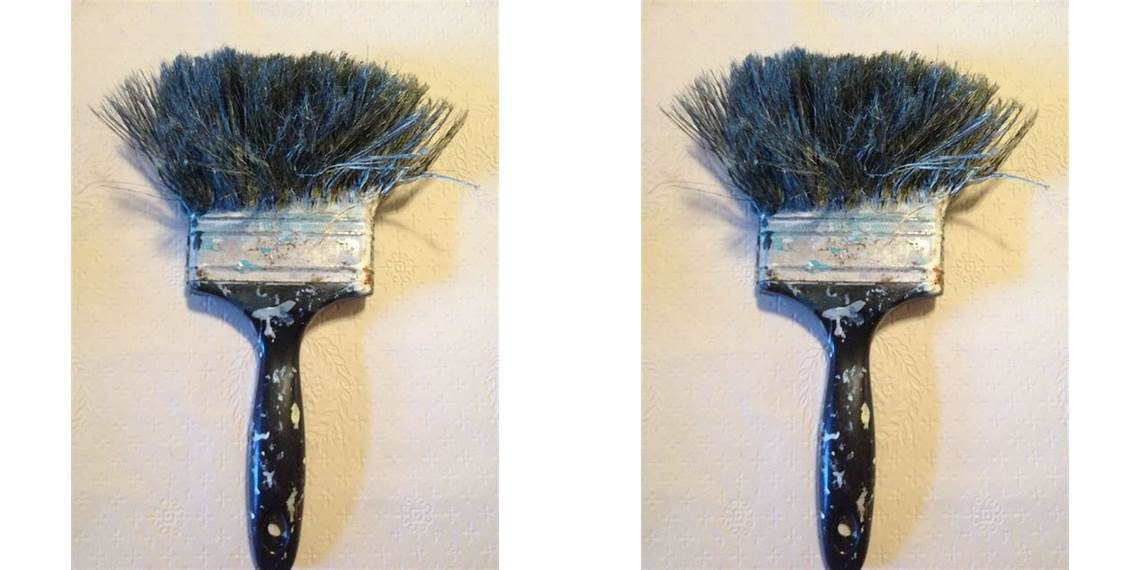
If you’re an artist, a hobbyist, or a professional painter, you know the importance of investing in high-quality paint brushes. They are essential tools that can make or break your artwork. However, no matter how expensive your paint brushes are, they are still prone to wear and tear. One of the most common problems you may encounter with your paint brushes is fraying. The bristles of your brush can become frayed and damaged over time. Frayed paint brushes can affect the quality of your work, making painting difficult and frustrating.
Understanding the causes of frayed paint brushes is the first step in preventing and fixing this common problem.
One of the primary causes of frayed paint brushes is age. As you use your brush repeatedly, the bristles become thinner and start to break down over time. Using the same brush for an extended period can cause the bristles to split and splay, leading to fraying.
Another cause of frayed paint brushes is using the wrong brush for the job. Each painting technique requires a different type of brush, and using the wrong brush can lead to fraying. For example, using a stiff bristle brush on delicate watercolor paper can damage the paper and cause the brush to fray.
Improper cleaning and storage can also contribute to frayed paint brushes. Failing to clean your brushes properly after use can leave paint and debris in the bristles. These particles can harden, causing the bristles to stick together and become stiff. Storing your brushes in a damp or humid environment can also lead to fraying and damage over time.
Lastly, using excessive force when applying pressure to your brush can cause fraying. Some artists tend to press their brushes too hard when applying paint. This can cause the bristles to splay and fray, especially if the brush is old or not designed for the job.
Now that you know the common causes of frayed paint brushes, it’s essential to take proper care of your brushes to prevent further damage. Always use the right brush for each painting technique, clean your brushes thoroughly after use, and store them in a cool, dry place. By taking good care of your brushes, you can prevent fraying and extend the life of your valuable tools.
Preparing Your Materials for Brush Repair
Paint brushes are tools that need a lot of care and maintenance to get the most out of them. If you’re a frequent painter, you’ll know that paint brushes can quickly become frayed and lose their shape, making it almost impossible to achieve clean strokes and a professional finish. But don’t worry, fixing frayed brushes is actually quite easy to do. In this article, we’ll teach you how to prepare your materials for brush repair.
The materials you’ll need are: a paintbrush comb, a bowl of warm water, a mild liquid soap, and a clean towel. Once you have all the materials, you’re ready to start the repair process.
First, start by taking your paintbrush and gently combing the bristles with the comb. This will help straighten out any stray hairs or frays in the brush. This step is essential as it prepares the brush for the next cleaning stages. You should do this process carefully because it’s possible to pull hairs out of the brush if it’s too frayed.
Next, you’ll need to clean your brush gently. Pour some mild liquid soap into a bowl of warm water. Swirl the brush around in the bowl until the soap and water are evenly mixed. Avoid using hot water as it can damage the brush fibers and melt the glue holding the bristles together.
Dip the paintbrush into the soapy water mixture and swish it around gently to loosen up any paint that might be stuck on the bristles. Rinse the brush with clean water until the water runs clear.
It’s essential to note that you shouldn’t soak your brushes in the water as this can harm the brush, damage the bristles and dissolve the glue that holds the entire brush together.
Once you’ve rinsed out all the soapy water from your brush, use a clean towel to remove any excess water and then reshape the brush tip to its desired shape. You’ll also need to remove any additional liquid by patting your brush dry with a towel or by shaking it slightly.
Finally, allow your brush to dry completely before using it again. Don’t put your brushes to dry in the sun as this can damage and fade the brush bristles. Instead, lay your brushes flat on a clean surface in a shaded area. It’s also important to hang your paintbrush upside down during storage to prevent the bristles from bending or becoming misshapen.
In conclusion, if you want to restore your frayed brushes and prevent them from getting damaged further, it’s essential to prepare your materials correctly. By following the above steps, you’ll easily revive your brushes and extend their lifespan, saving you money in the long run and ensuring that you’re able to create beautiful works of art with ease.
Step-by-Step Guide to Fixing Frayed Paint Brushes
Now that we have looked into identifying the causes of frayed paint brushes and discovering how to prevent the fraying, it’s essential to understand how to repair a frayed paintbrush. In this guide, we provide a step-by-step instruction on how you can fix your frayed paintbrushes and make them good as new.
Contents
Step 1: Cleaning Your Frayed Paint Brush
The first thing to do is to clean your paintbrush before repairing the frayed bristles. This is to ensure that there is no dirt or residual paint that can interfere with the repair process. You can use paint thinner, soap, or mineral spirits to remove any dried paint from the bristle. After cleaning, rinse the brush thoroughly and dry it completely using a paper towel to remove any residue.
Step 2: Separating the Frayed Bristles
With a magnifying glass or tweezers, separate the frayed bristles from the rest of the brush. Make sure not to pull too hard as you may cause more damage to the bristles. Gently tug and pull the frayed bristles until they are separated from the rest of the brush. If the damage is too severe, and the brush is not worth fixing, consider replacing it instead.
Step 3: Straightening the Frayed Bristles
Once you have separated the frayed bristles, it’s time to straighten them out. Use your fingers to pull the bristles in the opposite direction and across the length of the brush, ensuring that they are in the correct position. For best results, coat them with hair conditioner or fabric softener to soften and protect the bristles. After straightening the bristle, let it dry overnight.
Step 4: Trim the Frayed Bristles
Trim any remaining frayed hairs or bristles using a pair of scissors. Cut as close to the base as possible without damaging the brush’s core. To ensure that you cut only necessary bristles, it’s best to cut frequently and in small increments until you achieve the desired shape.
Step 5: Reshaping the Brush Head
Finally, use a brush comb or a toothbrush to reshape the brush head. Do this by gently combing the bristles in the correct direction, starting from the base of the brush and working your way up. Remember to be gentle with the bristles and avoid pulling too hard as this can cause more damage. Once you have reshaped the brush head, your frayed paintbrush is as good as new.
In conclusion, whether you are an artist or a DIY enthusiast, a frayed paintbrush can be frustrating. However, fixing it is not as tricky as it seems. With this step-by-step guide, you can now repair your frayed paintbrush and ensure that it serves you for an extended period. With proper care and maintenance, you can prevent your brushes from fraying, thus saving you the trouble of going through this process in the future. Happy painting!
Tips and Tricks to Extending the Life of Your Brushes
Paintbrushes can be an expensive investment in your craft, and whether you’re a professional artist or just someone who likes to indulge in casual painting, getting the most out of your brushes is essential. Nearly everything about a paintbrush is customizable, from the materials it’s made of to the shape of its bristles. But there’s one aspect that you can’t buy: durability. When you notice the bristles of your paintbrush have become frayed, it can be tempting to toss it out and buy a new one. But wait! There’s hope yet. Here are some tips and tricks you can use to fix frayed paint brushes.
Clean Them Regularly
The first and most important step to prolonging the life of your brushes is to clean them regularly. Paintbrushes should be cleaned after every use to prevent leftover paint from drying on the bristles and hardening, which will cause the bristles to stick together and eventually fray. There are many ways to clean paintbrushes, but the most effective is to use a paintbrush cleaner solution. Pour the solution into a container and let the dirty brush soak for ten minutes before working the bristles back and forth against the side of the container, releasing the paint.
Condition Them
Conditioning your paintbrush can also help to extend its life. Brush conditioner is a product that will soften the bristles of your brush, preserving its shape and preventing them from splitting or fraying. Just like hair conditioner, paintbrush conditioner is applied after cleaning and left on the brush for several minutes before rinsing it out.
Shape the Brush
To help prevent fraying, shape the bristles of your brush after it has been cleaned. When the brush dries, the bristles might become bent, which can cause them to fray more easily. To reshape the brush, wet the bristles and then tap the brush against a hard surface, like a table or countertop, to help reshape the bristles. Pinch the bristles together at the top of the brush, shaping them into a point and then gently reshape them into their natural shape. Allow the brush to dry completely before using it again.
Use Some Heat
If the bristles of your brush are already frayed, you can try using some heat to reshape them. To do this, dip the bristles of the brush into boiling water for a few seconds. This will soften the bristles and allow you to reshape them using your fingers or a pair of pliers. Once you have reshaped the bristles, rinse them in cold water and then shape them properly. Allow the brush to dry completely before using it again.
By using these tips and tricks to fix frayed paint brushes, you can save yourself some money and the frustration of constantly having to replace your favorite brushes. Proper cleaning, conditioning, reshaping, and using heat can help you get the most out of your brushes. With these tricks, your brushes will last longer and will remain in good condition for many painting sessions to come.
Knowing When It’s Time to Replace Your Paint Brushes

Painting with frayed paint brushes can be frustrating, but it can also be tempting to continue using them rather than spending money on new ones. However, using brushes that are in poor condition can cause problems with your finished work. Here are five signs that it may be time to replace your paint brushes:
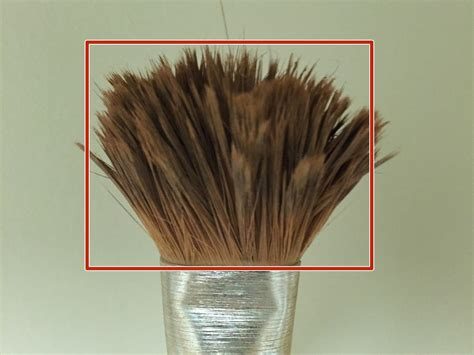
1. Splitting Bristles
%3aformat(webp)%3acompress()%2fbuyers-guide-hair-and-bristle-paintbrushes-4085459-08-2e41b986d9334eccbd88b097c37b320f.jpg)
If the bristles on your paint brush are beginning to split, it’s time to replace it. Broken or frayed bristles can ruin the texture of your paint and create an uneven finish. You may also notice bristles coming out of the brush and sticking to your project, which can be a nightmare to get rid of.
2. Bent Tips
Bent or curled brush tips can make it difficult to get precise lines or curves. It can also make it tough to cover small gaps or corners. Even after cleaning your brushes, if the bristles are still bent or out of shape, it is a good sign that it’s time for a new brush.
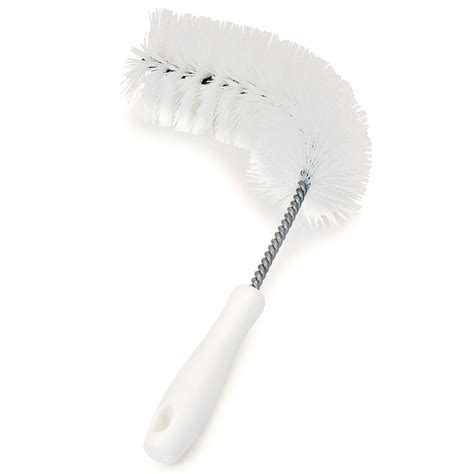
3. Splayed Bristles
%3abackground_color(ffffff)%3aformat(jpeg)%3aquality(80)%2fhow-to-un-suck-a-dried-out-clogged-up-paintbrush-4164623-10-5b37ecdfc9e77c001a0a9dfe.jpg)
When the bristles on your brushes start to spread out in different directions, this is called splay and can make it harder to control your paint. You may also notice that the brush holds too much paint and doesn’t distribute it evenly. This can lead to drips and blobs on your canvas or walls.
4. Stubborn Stains
No matter how much you clean your brushes, some stains can be impossible to remove. If there are remaining stains, it could be that the brush is just too old to be fully cleaned. Also, paint buildup can cause damage to the bristles, resulting in stiffness and bristle loss. Even if it seems like you have removed all residue, your brush may have been damaged beyond repair.
5. Frequent Replacements
If you’re constantly replacing the same brush, then there may be other issues that you need to address. Perhaps you’re using the wrong brush for the type of paint or surface you’re applying it to. Or, you may not be cleaning your brushes properly. Make sure to use the correct brush for the job and keep them clean and conditioned by washing them with mild soap and water and storing them properly.
While it can be frustrating to have to replace paint brushes, it’s important to know when to let go of old brushes that are in poor condition. Knowing when to replace your paint brushes can save you time, money and ultimately give you better results on your next project.