
Identifying the Problem
A button-down shirt is considered a go-to option for many people due to its versatility. You can wear it for a formal or casual event, and it never goes out of fashion. But often, you may be faced with a common problem when wearing a button-down shirt – the gap between buttons. A gap in your shirt can make you feel uncomfortable and ruin your overall appearance. It can also make your outfit look unprofessional or sloppy, especially in a formal setting. Fortunately, fixing this problem is not too difficult, and there are a few ways to go about it.
Identifying the cause of the gap is the first step in fixing it. A gap between buttons may occur for different reasons, and identifying the cause will help to determine the most appropriate solution. One of the key reasons for this problem is when the shirt is too small or too tight, and the buttons pull apart, leaving a visible gap in the middle. Alternatively, a gap may occur when the buttons are too small and don’t properly secure the fabric. In some cases, the gap may be caused by a combination of these problems.
Therefore, the first thing to do is to check whether the shirt fits properly. You can do this by buttoning up the shirt and paying attention to how it pulls around your chest and arms. If you notice any tightness or pulling, then that’s a sign that the shirt is too small. On the other hand, if the shirt feels loose and there is a lot of fabric around the chest that bunches up, then that’s a sign that the shirt is too large. In either case, you may need to get a shirt that fits correctly to avoid the gap between buttons.
Another cause of the gap may be the distance between the buttons. Sometimes, the distance between the buttons is too far apart, leaving gaps in between. This problem can occur in shirts that are designed for larger or taller people, where the buttons are spaced out more than they need to be. If this is the case, then you may consider getting a shirt with buttons closer together. You can also move the buttons closer to the edge of the shirt, but this may affect the overall appearance of the shirt.
Another common cause of gaps in shirts is body shape. People have different body types, and that can affect how shirts fit. For instance, if you have broad shoulders or a large bust, you may find that a shirt fits you well around your chest but leaves a gap between buttons. One solution for this could be to get a shirt that fits your body shape better, but this may require custom tailoring. An alternative solution is to add some extra buttons between the existing ones. This is a quick fix that can improve the fit of the shirt and prevent gaping.
In conclusion, the first step in fixing the gap in your button-down shirt is identifying the cause. Once you know what is causing the gap, you can then decide on an appropriate solution. Whether it be getting a well-fitted shirt, moving the buttons closer together, or adding some extra buttons, there are several ways to fix a gap in a shirt. By making some adjustments to your shirt, you can feel more comfortable and confident in your appearance, no matter the occasion.
Equipment Needed
If you want to fix a gap in a button-down shirt, the first and foremost thing you’ll need to do is to invest in a basic sewing kit. But, if you’ve never dealt with a needle and thread before, don’t worry because it’s pretty simple. You’ll require a few basic tools like a sharp pair of scissors, a measuring tape, some pins, a seam ripper, a thimble, and some fabric glue. But of course, the most important items that you’ll require are needles and threads.
Needles come in a variety of sizes, which are determined by the diameter, length, and shape. So it would be ideal if you have a mixed bag of needles in your kit, as some might be too small to use or too long to handle. Moreover, Keep in mind that different needles are meant for different fabrics, so make sure you select the right one for the fabric you’re working with. Additionally, there are different types of threads—the choice of which thread to use is also dependent upon the fabric. If you’re fixing a gap in a button-down shirt, then opt for thread that matches the shirt’s color.
Apart from a sewing kit, an iron and an ironing board would also come in handy. When you’re done sewing the gap, an iron will help you to make the shirt look smooth and wrinkle-free. So, before you begin fixing the button-down shirt, ensure you have all the tools required right next to you.
Another helpful equipment that you can use is a sewing machine. If you’re not confident about your hand-sewing skills, you can use a sewing machine for more precise and quick stitching. But, before you use the sewing machine, you’ll have to ensure that it’s threaded correctly and that you’re using the correct stitch setting.
In conclusion, you won’t need too many things to fix a gap in a button-down shirt, but the equipment you require should be of high quality. When shopping for a sewing kit, make sure you invest in one that contains all the necessary items, and consider buying a good quality sewing machine if you’re planning to sew regularly.
Sewing Techniques
If you own a button-down shirt, you understand that they are a timeless wardrobe staple. They are the perfect combination of sophistication and casualness and that effortlessly chic vibe that you can wear almost anywhere you go. However, no matter how well-made a shirt may be or how careful its wearer may be, it can still get a gap between the buttons. This gap can be irritating when showing off your clothes. It can even make you feel uncomfortable, or worse, insecure. Don’t worry! With the right knowledge and sewing techniques, you can repair the gap in your shirt. Here are a few sewing techniques to help you fix your button-down shirt:
Contents
Pinning Technique
The pinning technique is a basic method of sewing that involves stitching the button to the shirt. You will need to get a small sewing needle and a thread to match the color of your shirt and button. Start by pinning the button to the shirt using one of the gaps. This will provide a framework for you to follow when you start stitching. After pinning the button, sew it onto the shirt using small stitches. Make sure to pull the thread tight, so the button sits snugly against the shirt. You can use this technique to fixed the gap completely or to prevent it from gaping again.
Overlap Technique
Another useful technique is the overlap technique. This technique involves overlapping the fabric behind the button to close the gap. For this technique, never use a thick fabric, or it will make the button up too tight. Instead, use a thin and lightweight fabric. Cut the fabric to the size of the gap and place it behind the button. Pierce the button through the fabric and shirt, making sure you stitch it in place correctly. This technique creates a neatly finished edge behind the button and provides support for the closure.
Fabric Glue Technique
The other technique is the most straightforward technique and involves using fabric glue. Fabric glue is an excellent solution if you do not have a sewing kit. Apply a small amount of fabric glue to the gap and wait for it to dry completely. Once the glue is dry, press the shirt firmly, making sure the button closes correctly. The glue will create a permanent bond between the fabric and the button, creating a seamless finish.
Now that you can repair the gap in your shirt without removing the buttons, you need not worry about your shirt losing its shape or looking worn out. Rather than wasting time and money purchasing new shirts, use these simple sewing techniques to repair the gap, improve your concentration, and create a comeback for what would have been a ruined outfit. Remember to follow the instructions closely for each technique and purchase the right equipment. Implement what you have learned, and before you know it, you will repair your gap with ease.
Alternatives to Sewing

Have you ever had a button down shirt that you love but can’t wear because of a gap in the chest areas? Or maybe you just don’t feel confident in a shirt that has gaps in it. It can happen to almost any shirt, and for a variety of reasons; one shirt may be from the dryer, and another shirt may need an additional tension. Along with all these options, there are many different ways to address this fashion emergency. There is no reason to let a gap ruin your confidence and ruin your outfit, so we are here to give you simple and easy solutions for the gap in your shirt. Here are some alternatives to sewing which may work better for your situation:
Adhesive Tape
Adhesive tape is an excellent fix and remarkably effective for small gaps. You can find them the adhesive tape easily at any office supply stores or local craft stores. Pick one that has strong adhesion and clear color so that the tape will look invisible when applied. Peel off a strip of tape slightly longer than the gap, thin enough to adhere to shirt fabric, and carefully apply it to the underside of the shirt making sure that both sides of the gapped area stick to the tape. Smooth out the tape to avoid wrinkles and gaps then press firmly to ensure it sticks in place. Test out the shirt after applying the tape, and you can be sure that the adhesive tape will keep the shirt perfectly held together.
Safety Pins
Safety pins are an old-time remedy for the gap in shirts, and still, they serve as a quick and simple solution. They are tiny, so they won’t be liked by everyone, but they are easy to use and incredibly sturdy. Choose a safety pin with small size relative to button holes of your shirt and considering the gap size. Stick the pin through both sections of the buttoned placket, attaching the shirt with a small pin to ensure that the shirt does not slip from the correct position. You should make sure that the pin is concealed either by wearing a jacket or positioning it so that it is not too noticeable.
Clothing Tape
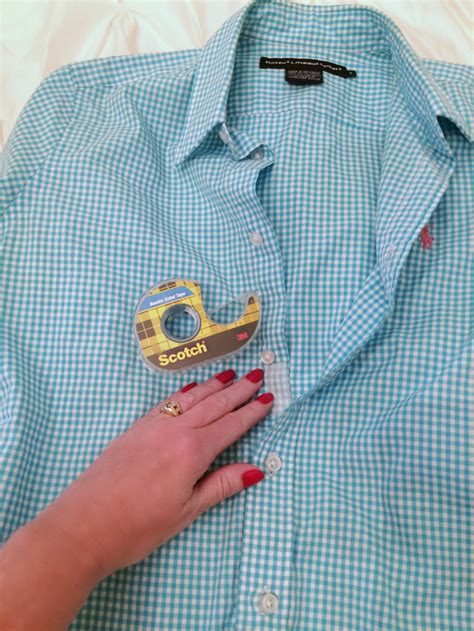
A double-sided clothing tape is a helpful and discreet solution for gap issues. Clothing tape can be found in most drug stores or can be ordered online. This solution applies to the same concept as adhesive tapes, only with a specialized product made specifically for clothes. Just cut the tape to the required length and apply it to the gaps. Unlike adhesive tapes, clothing tapes can be worn with confidence as the product is specially designed for use on clothing.
Iron-On Mender
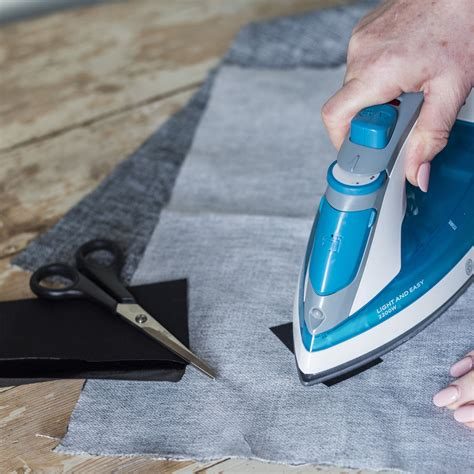
By using Iron-mender, all kinds of clothing issues such as fractures, cuts, and tears can be quickly and effortlessly repaired. Ironing patches is a comfortable and handy way to transfer patches onto fabric easily, and it is also perfect for covering gaps. Purchase an iron-on mender from a mercantile store to apply the patches that match the color and texture of your shirt, cloth or other garments. Take the mendable piece and align it over the gap. Place a light fabric over it, and run a hot iron over it depending on the product instructions. Peel off the excessive glue which remains after iron before wearing the shirt.
Conclusion:
There are many reasons for a gap to exist in our favorite shirts, and those gaps shouldn’t keep you from wearing your favorite outfit. While sewing is always an option, it’s time-consuming, and not everyone has these skills. The probability of a better alternative is always there. The adhesive tape, safety pins, clothing tape and Iron-on menders are just a few options that work great for fixing gaps. Remember to choose an alternative that works best for you and your wardrobe.
Final Touches and Maintenance
After you have successfully fixed the gap in your button down shirt, you want to ensure that it stays that way. This is where maintenance comes in. Maintenance involves the things you do to preserve your shirt and make it last longer. There are several things you can do to maintain and take proper care of your shirt.
1. Follow the Washing Instructions:
The first thing you need to do is to follow the washing instructions on your shirt. This information is usually printed on the label on the inside of the shirt. Different materials require different types of washing, so it is essential to follow the instructions carefully. Do not mix different colors when washing your shirt to avoid discoloration, and use a gentle cycle to avoid damaging the buttons and the fabric. Always remember to take out the collar stays before washing the shirt.
2. Iron Your Shirt:
Ironing your shirt is another essential tip to consider when taking care of your button down shirt. It helps your shirt to look neat and well-maintained. Before ironing, button up your shirt and lay it flat on the ironing board with the collar facing upwards. Take out the collar stays to ensure they do not get damaged. Iron from the collar towards the tail, and make sure you do not iron over the buttons as this can damage them. Hang your shirt after ironing to maintain the straightness of the collar and the cuffs.
3. Store Your Shirt Properly:
The way you store your shirt goes a long way in maintaining it. After ironing, you should hang your shirt in the closet to avoid wrinkling. You can use a padded hanger to maintain the shape of the shirt. Avoid putting other clothes on top of your shirt, as this can cause creases and wrinkles. If you do not have enough space in your closet, you can fold your shirt neatly and place it in a drawer or shelf. If you are traveling, pack your shirt in a garment bag to prevent it from getting wrinkled in transit.
4. Repair Any Loose Buttons:
Buttons can become loose or fall off after several washes. To prevent further damage, you should repair the loose buttons by sewing them back onto the shirt. Choose a thread that matches the color of the button and the fabric of the shirt. Thread your needle and tie a knot at the end of the thread. Insert the needle through the back of the fabric, pass it through the holes of the button, and then back through the fabric. Repeat this process several times until the button is secure. Knot the thread behind the fabric and cut off the excess thread.
5. Take Care of the Collar:
The collar is the most important part of the button down shirt. It frames the face and draws attention to the necktie. Therefore, you must take extra care of the collar to keep it looking crisp and neat. To avoid wearing out the collar, unbutton it and lay it flat after wearing the shirt. This will also give it ample time to dry out any sweat and oil that might have accumulated. You can use collar stays to keep the collar straight and flat. After washing your shirt, iron the collar from the top of the collar points to the center. This will help maintain the shape and the crispness of the collar. Before ironing, remove the collar stays to avoid damaging them.
By following these tips, you can maintain and take proper care of your button down shirt, and ensure that it stays in pristine condition for a long time. Remember to always follow the washing instructions, iron your shirt, store it properly, repair any loose buttons, and take proper care of the collar.