
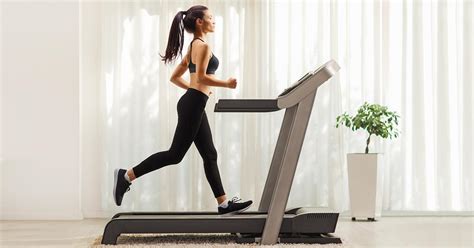
Identifying the Problem: Why is Your Treadmill Slipping
If you’re an avid runner, or just like to keep in shape by running on a treadmill, you know how frustrating it can be when your treadmill starts slipping. Not only can it interrupt your workout, but it can also be dangerous. It can cause you to lose your balance and fall, possibly causing injury. So, why is your treadmill slipping? There are a few common reasons why this might happen.
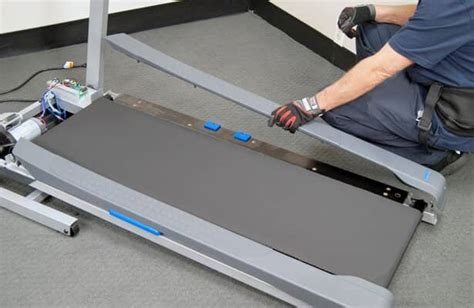
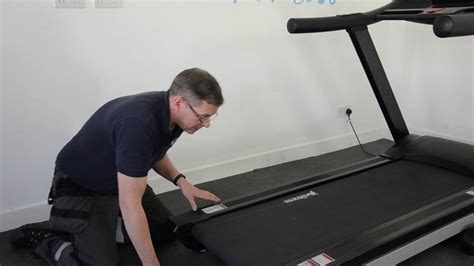
The first thing to check is your treadmill’s belt. If the belt is old and worn, it may not provide enough friction with the treadmill deck to maintain a secure grip, causing it to slip. This can be caused by regular use, age, and even exposure to the elements if your treadmill is stored outside or in an area with high humidity. To check the condition of your belt, turn off the treadmill and unplug it, then lift up the belt and check its condition. If it is cracked, frayed, or appears worn in any way, it’s time to replace it. You can find replacement belts online or through your treadmill manufacturer.
If the belt appears to be in good condition, the next thing to check is the treadmill’s deck. Over time, the deck can become worn, reducing the grip between the belt and the deck. To check this, you’ll need to remove the belt from the deck. This will require some disassembly, so you’ll want to reference your treadmill manual or call a professional for assistance. Once the belt is removed, examine the deck for any signs of wear or damage. If the deck appears to be worn, it may need to be replaced. Again, you can find replacement decks online or through your manufacturer.
If neither the belt nor the deck appear to be the issue, another common cause of slipping is a loose or worn drive belt. The drive belt is what connects the motor to the front roller, which drives the treadmill belt. If the drive belt is loose or worn, it can cause the treadmill belt to slip. To check this, turn off your treadmill and unplug it, then remove the motor cover and examine the drive belt. If it appears to be loose, you may need to tighten it. If it appears worn, it may need to be replaced. It’s best to refer to your treadmill manual or call a professional for help with this repair.
In some cases, slipping can also be caused by improper assembly or alignment. If your treadmill wasn’t properly assembled or the components aren’t aligned, it can cause the belt to slip. If you’re handy with tools, you may be able to fix this yourself, but if not, it’s best to call a professional to assist you with this issue.
Finally, if none of these issues appear to be the cause of your treadmill slipping, it may be time to call in a professional technician. There may be underlying mechanical issues that only a trained professional can diagnose and repair.
Overall, there are a few common reasons why your treadmill might start slipping. By examining the belt, deck, drive belt, and assembly, you can usually determine the cause of the issue and take the necessary steps to fix it. In some cases, it may require professional repair, but in most cases, with a little bit of troubleshooting, you can get your treadmill back to working properly in no time.
Tightening the Belt: Step-by-Step Guide
One of the common issues with a treadmill is that the belt starts slipping. It is not only annoying but can also be dangerous if not addressed on time. The belt slipping can make you lose balance and fall off the treadmill. Luckily, it is a problem that can be fixed with a few simple steps. In this article, we will discuss a step-by-step guide to tighten the belt of your treadmill and make it work like new again.
Step 1: Turn Off the Treadmill
Before you start any repair work, the first thing you should do is turn off the machine. It will prevent any injury or accident. Make sure to unplug the treadmill as well to avoid any electric shock while working on the machine.
Step 2: Loosen the Belt
The second step is to loosen the belt. You can do this by using the Allen wrench. Find the bolts on either side of the rear roller. Insert the wrench into the bolt to turn it counterclockwise. This will loosen the belt. Do not loosen it too much; just enough to lift it a bit.
Now that you have loosened the belt, clean it and the treadmill deck. The dust and debris can also cause the belt to slip. In case you find any wear and tear in the belt, now it is the right time to replace it. A damaged belt will not only increase the chances of slipping, but it can also damage the motor of the treadmill.
Step 3: Adjust the Belt
After you have cleaned the belt, it is time to adjust it. First, center the belt by turning the rear roller bolts clockwise and anticlockwise equally. Ensure that the belt is even on both sides.
Next, you need to lift the belt at the center point of the treadmill. Hold the belt with one hand, and with the other hand, adjust the tension bolts located on the sides of the treadmill frame. Tighten the bolts equally, a quarter turn at a time, until the belt does not slip when walked on. Make sure to step on the treadmill to test the belt, and adjust it more if required.
Step 4: Realign the Belt
After you have tightened the belt, it is time to align it. A misaligned belt can also cause slipping and friction. First, check the alignment of the belt by standing behind the treadmill and turning it on. Inspect if the belt is straight and aligned or not. If it is not, then it will require further adjustment.
To align the belt, use the Allen wrench again to turn the bolts on the rear roller. Tighten the bolts to bring the belt back into the center. Again, check the alignment by standing behind the treadmill and turning it on. Repeat the process until the belt is straight.
Step 5: Conduct a Test Run
Now that you have tightened, cleaned, and aligned the belt, it’s time to conduct a test run. Turn on the treadmill and walk on it gradually, increasing the speed slowly. Test it for at least five minutes to ensure that the belt is not slipping anymore.
If the belt still slips even after tightening and adjusting it, then it may be time to take the treadmill to a professional for a complete examination of the belt and motor.
In conclusion, tightening the belt of a slipping treadmill is not a difficult task. With the right tools and steps, you can easily do it yourself. It is essential to address the issue as soon as possible to avoid any accident and keep your treadmill functioning efficiently.
Adjusting the Tension: Finding the Right Amount
One of the most common issues that treadmill users face is slipping. This can be very frustrating, especially if you have a good workout planned! Fortunately, fixing this issue is not difficult. It just requires a bit of knowledge and some tools.
One factor that can cause treadmills to slip is tension. If the belt is too loose, it will not grip the motor properly, causing it to slip. The good news is that adjusting the tension is a simple and straightforward process that you can do yourself. Here’s how you can find the right tension for your treadmill:
Contents
1. Consult Your Treadmill Manual
Take a look at the instruction manual that came with your treadmill. It should have a section that explains how to adjust the belt tension. The instructions may vary depending on the make and model of your treadmill, so it’s essential to follow the manufacturer’s guidelines carefully.
2. Locate the Adjustment Bolts
Once you have the manual, the next step is to locate the adjustment bolts. These bolts are usually found at the back of the treadmill near the end of the belt. You may need to use a wrench to access them.
3. Adjust the Tension
To adjust the tension, you will need to turn the adjustment bolts. Turn them clockwise to increase the tension or counter-clockwise to decrease it. It’s essential to make small adjustments at a time, so you don’t over-tighten the belt. A good rule of thumb is to turn the bolts a quarter-turn at a time.
Once you have made the adjustments, turn the treadmill on and walk on it slowly to check the belt’s tension. If it still seems too loose or too tight, make additional adjustments. Keep in mind that the belt should be tight enough so that it doesn’t slip, but not so tight that it’s difficult to move.
Conclusion
Adjusting the tension on your treadmill is a simple process that you can do yourself. By following the manufacturer’s guidelines and making small adjustments at a time, you can find the right tension for your treadmill and prevent slipping. Remember to consult your manual and use the correct tools, and you’ll be back to enjoying your workout in no time!
Lubricating the Deck: Getting a Better Grip
One of the common problems that treadmill owners face is the slipping of the belt while running or walking. If you have recently encountered this problem, then lubricating the deck of your treadmill can help you fix it. Lubricating the deck will reduce the friction between the deck and the belt, so the belt will get a better grip on the deck which ultimately leads to a smooth and stable run or walk. So, how can you actually lubricate the deck? Here’s the step-by-step process:
1. Power off and unplug the treadmill:
Before starting the lubrication process, make sure that the treadmill is turned off and unplugged. It is important to remove the power source to avoid any accidents during the lubrication process.
2. Lift the belt and clean the deck:
Before applying the lubricant, lift the belt of the treadmill motor. Make sure to clean the deck with a dry cloth or towel. Remove the dirt, dust, or debris from the deck that might hinder the application of lubricant.
3. Apply lubricant:
Choose any lubricant that is suitable for your treadmill. There are three different types of lubricants that you can use. These are silicone-based, wax-based, and petroleum-based. All three of them work great. However, the best one to choose usually depends on the type of treadmill you have. Silicone-based lubricant is ideal for most of the treadmills. Pour the lubricant onto the deck surface as instructed by the manufacturer and spread it evenly with a clean cloth or towel. Make sure the lubricant is distributed equally all over the deck surface.
4. Run the treadmill for a few minutes:
After the lubrication process, start the treadmill for a few minutes. This will allow the lubricant to spread equally under the belt. It will also help in reducing the friction between the belt and the deck. Walk or run at a slow pace for a few minutes in order to help the lubricant spread evenly on the deck. Once you are done with the lubrication process and the trial run, wipe off any excess lubricant from the deck and belt with a clean cloth or towel. Finally, plug your treadmill back in and enjoy the smooth and stable running or walking experience.
5. Schedule regular lubrication:
Lubrication is not a one-time fix. Regular maintenance is essential for proper functioning and a longer life span of your treadmill. Even if your treadmill is not showing any signs of slipping, regular lubrication is recommended. Check the owner manual of your treadmill to find out the maintenance schedule recommended by the manufacturer. Scheduling regular maintenance can even save you money in the long run by reducing the wear and tear on your treadmill parts and its motor.
Lubricating the deck of your treadmill is a simple and easy process. It is essential for proper functioning and long-lasting use of your treadmill. In this way, you can ensure your workouts are safe, stable, and efficient. So, don’t wait for any further damage – lubricate your treadmill deck today!
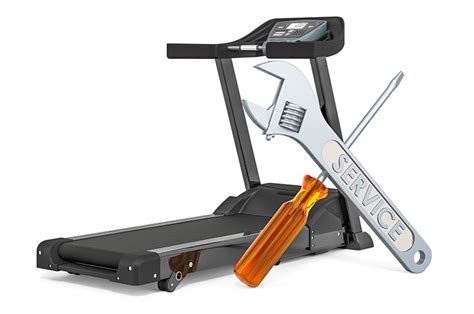
When to Call a Professional: Sign of More Serious Issues
If you are experiencing problems with your treadmill, it may be difficult to decipher whether or not they require the attention of a professional. While some issues can be easily fixed with some minor adjustments or maintenance, others can be a sign of more serious problems that require the expertise of a professional. Here are some signs that you may need to call in a treadmill repair professional to diagnose and fix your machine:
1. The Belt Slips
If the belt on your treadmill slips or is loose, it can be a dangerous problem that needs to be addressed by a professional. This problem can occur due to a number of different issues ranging from worn-out belts or bearings to worn-out pulleys or a lack of maintenance.
When the belt slips or is improperly adjusted, it can cause numerous issues. It can cause injuries to the person using the machine as well as cause wear and tear to the machine itself. Therefore, it is essential to seek the help of a professional to examine and fix the issue before it becomes more hazardous.
2. Strange Noises
If your treadmill is making strange noises, it could be a sign of a malfunctioning motor, broken rollers, or a loose belt. Any of these issues might require the assistance of a professional. If the machine is making squeaking sounds, it could be caused by a lack of lubrication or worn-out belts. A certified technician can troubleshoot the problem and help replace or fix any damaged parts.
3. Electrical problems
If your treadmill is tripping the circuit breaker or is not turning on at all, it could be a sign of electrical problems. As the electrical components within your treadmill are not easily accessible, it is best to contact a professional for help. Certified technicians are skilled in fixing electrical issues and working with the wiring inside the machine. They can help diagnose the issue and suggest the best course of action to fix the problem.
4. Displays error messages
Modern treadmills come with various built-in safety features that help monitor the machine’s performance. If the machine displays error messages or shows inconsistent readings, it could indicate a more significant issue. The error message may reveal the cause of the malfunction, or you may need to seek assistance from a professional. A knowledgeable technician can identify the problem and suggest the necessary repairs.
5. Failing Parts
If any of the components in your treadmill wear out and they’re not checked, it can cause further damage to other parts of the machine. A skilled treadmill technician can identify failing parts and replace them with new ones. Some of the common parts that wear out and need replacement include the belt, deck, rollers, and bearings. But, also, subsections like speakers and jacks need professional attention if they cause poor sound quality or don’t work at all.
In conclusion, when you are experiencing issues with your treadmill, it might be tough to know whether or not to call a professional. But, if you notice that the belt is slipping, strange noises, electric glitch, error messages, or any failing part, you should seek the help of a professional repair technician.