
Understanding the Nike VaporMax Bubble
The Nike VaporMax is a popular line of shoes that have been making waves in the fashion industry. It is one of the most comfortable and stylish shoes available, making it a must-have for sneakerheads. However, the Nike VaporMax is not immune to problems, and one of the most common issues is the bubble. The Nike VaporMax bubble is the large air pocket located at the bottom of the shoes. It is designed to provide cushioning and support to the wearer. However, due to wear and tear, the bubble can burst, rendering the shoes uncomfortable and even unsightly. Here, we will explore how to fix your Nike VaporMax bubble before it becomes a major problem.
Before attempting any repair, it is important to identify the extent of the damage. In some cases, the bubble may have completely burst, while in others, it may have simply deflated. The good news is that in most cases, it is possible to fix the bubble without having to replace the entire shoe.
The first step in repairing a Nike VaporMax bubble is to locate the puncture or tear. This can be done by carefully examining the bottom of the shoe. Once the damage has been identified, you can proceed with the repair.
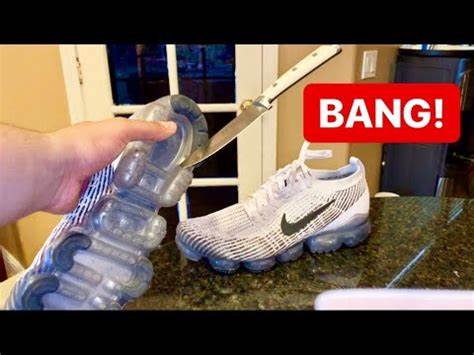
The most common method for repairing a Nike VaporMax bubble is to use a hot needle to seal the puncture or tear. To do this, you will need a needle, a candle, a pair of pliers, and a small container of water. First, hold the needle with the pliers and heat it over the flame of the candle. Once the needle is hot, use it to carefully melt the edges of the puncture or tear. Be sure to move the needle in a circular motion around the puncture to ensure that it is fully sealed. Once the puncture has been sealed, dip the shoes into the water to cool them down.
If you are uncomfortable with using a hot needle, you can also use a shoe repair adhesive. These adhesives are specially designed to fix punctures and tears in shoes and are available at most shoe stores. To use the adhesive, simply apply it to the puncture or tear, and then apply pressure to the area until the adhesive has dried.
It is important to note that while these methods are effective, they may not be a long-term solution. If the bubble has burst due to excessive wear and tear, it may be necessary to replace the entire shoe. However, if the damage is minor, repairing the Nike VaporMax bubble can help extend the life of the shoe.
In conclusion, the Nike VaporMax bubble is a common issue that many sneakerheads face. However, with a little bit of knowledge and some simple tools, it is possible to fix the bubble and extend the life of your shoes. Whether you use a hot needle or a shoe repair adhesive, it is important to identify the extent of the damage before attempting any repairs. With these tips, you can keep your Nike VaporMax shoes looking and feeling great for years to come.
Materials Needed to Fix a Nike VaporMax Bubble
If you own a pair of Nike VaporMax shoes, you may have experienced the annoying problem of a bubble forming in the sole. This can make your shoes uncomfortable to wear and can cause some embarrassment when you’re out and about. Fortunately, there is a way to fix this problem without having to buy a new pair of shoes. All you need are a few materials and some time to dedicate to the repair.
Materials Needed:
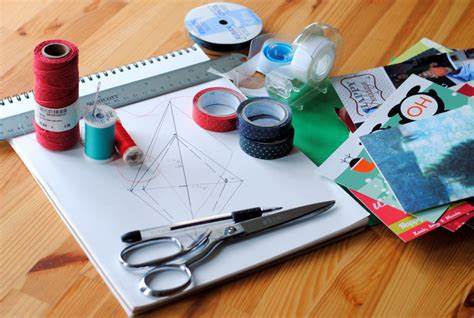
To fix a Nike VaporMax bubble, you will need the following materials:
- Sharp scissors or a craft knife
- A patch of clear duct tape or shoe repair tape
- A Super Glue gel
- A wooden stick, such as a popsicle stick or toothpick
- A clean cloth
- A hair dryer, if available
Step-by-Step Guide:
Once you have gathered your materials, here is how you can fix the bubble in your Nike VaporMax shoes:
Step One: Assess the Damage
Examine the sole of the Nike VaporMax shoe to identify the size and location of the bubble. If the damaged area is less than an inch, then it is fairly easy to fix. However, if the damage is more than an inch, it would be best to take it to a shoe repair shop for professional help.
Step Two: Cut a Patch
The next step is to make a patch with clear duct tape or shoe repair tape. Cut a piece of tape into a size that can cover the whole damaged area with extra edges around it to stick to the shoe surface. Make sure the patch can cover the bubble well enough to be pressed onto the surface evenly.
Step Three: Apply the Super Glue
After you have a patch ready, you need to apply the Super Glue gel onto the bubble. Start by putting a small amount of the gel on a wooden stick and spreading it around the bubble’s edges. Make sure to apply the glue only on the edges that stick out from the inner part of the sole.
Step Four: Press the Patch onto the Bubble
With the glue applied, press the patch carefully onto the bubble with your fingers, making sure it is flat and sticking evenly to the shoe surface around the bubble area. Use a clean cloth to gently press the patch onto the surface and ensure there are no bubbles or wrinkles on the patch’s surface. If possible, use a hair dryer on low heat to help the glue set quickly.
Step Five: Wait for the Glue to Dry
Allow the glue to dry for at least 48 hours before using the shoes again. Do not apply too much weight or pressure on the glued area. If you need to wear the shoes while the glue is still drying, try to avoid running or intense activities.
By following these simple steps, you will have fixed the bubble in your Nike VaporMax shoes, and they will be as good as new. Remember, prevention is better than cure, so always take good care of your shoes from the get-go. Take them off when not in use, and keep them clean and dry. This way, you can avoid having to repair them too often.
Step-by-Step Guide on How to Fix a Nike VaporMax Bubble
One common problem encountered by Nike VaporMax shoe owners is the formation of bubbles which occur due to defects or tear on the air unit. The good news is, the bubbles can be fixed if you follow this step-by-step guide on how to fix a Nike VaporMax bubble.
Step 1 – Gather Materials
The first step is to gather all the necessary materials. You will need a sharp knife, a sewing needle, a syringe, adhesive tape, and a strong glue.
Step 2 – Identify the Bubble
The next step is to identify the bubble. You can easily locate it by pressing your finger on the sole of the shoe. Once you locate the bubble, mark it with a pen so that you can identify it during the repair process.
Step 3 – Deflate the Bubble
The most crucial part of fixing a Nike VaporMax bubble is deflating the bubble. To do this, you need to insert the sewing needle into the bubble and pierce it. Next, carefully press on the bubble using your thumb to release the air. It is essential to ensure that all the air is squeezed out of the bubble to avoid damage to the shoe during the repair process.
Another way to deflate the bubble is to use a syringe. Insert the needle of the syringe inside the bubble and slowly press down, releasing all the air. Be careful not to puncture the airbag further while doing this. Once the bubble has been deflated, wipe the area with a clean cloth and get ready to apply the glue.
Step 4 – Apply Glue to the Bubble

Next, apply a small amount of strong glue to the surface of the bubble. Be sure to spread the glue evenly and ensure it completely covers the entire surface of the bubble. Take note not to use too much glue as it may result in further defects on the shoe. Use a toothpick or a cotton swab to spread the glue carefully.
Step 5 – Press the Bubble and Seal
After applying the glue, press down on the surface of the bubble with your thumb to even out the surface and distribute the glue evenly. Ensure you get rid of any air pockets that may have formed during the process. Once you have spread the glue, you can use a small piece of adhesive tape to cover the area to seal the area well.
Step 6 – Let the Glue Dry
The final step is to let the glue dry completely, which usually takes 24 hours. Be patient and let the glue cure completely before wearing the shoe again. After the glue has dried, remove the adhesive tape and put the shoe back on. The bubble on your Nike VaporMax shoe is now repaired.
Fixing a Nike VaporMax bubble is relatively easy, and you can do it by yourself. However, if you don’t feel confident doing it yourself, you can always take it to a professional shoemaker to fix it for you.
Tips for Preventing Nike VaporMax Bubbles
/cdn.vox-cdn.com/uploads/chorus_asset/file/8357947/nike_vapormax_4.jpg)
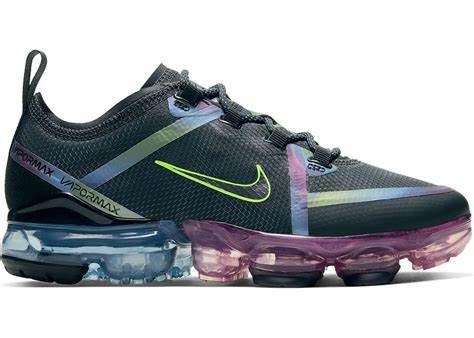
Nike VaporMax is a popular sneaker brand that is known for its unique bubble soles. However, like most shoes, the bubble soles of Nike VaporMax sneakers can be prone to damage over time. This damage can cause the bubbles to burst, making the shoes uncomfortable to wear and reducing their durability. To help you prevent this problem, here are four tips to keep your Nike VaporMax bubbles intact for longer.
1. Be Mindful of Where You Wear Them

The first tip to prevent Nike VaporMax bubbles from bursting is to be mindful of where you wear them. While these shoes are designed to be worn casually, they are not suitable for every type of activity. Trying to run or engage in any high-intensity activity in these shoes can put too much pressure on the bubble soles, leading to damage. Therefore, it is best to save your Nike VaporMax sneakers for easy-going activities like walking or running errands.
2. Keep Them Clean

Keeping your Nike VaporMax shoes clean is another essential step in preventing bubble damage. Dirt and debris can be abrasive and can wear down the bubbles over time, causing them to weaken and eventually burst. To keep them clean, wipe the shoes down with a soft cloth or brush every time you wear them. Regular cleaning will also help to remove any small rocks or objects that can get lodged in the bubbles, posing a risk for potential damage.
3. Store Them Carefully

Proper storage of your Nike VaporMax sneakers is crucial to keep the bubbles intact. Never store them in a cramped, confined space, as this can place too much pressure on the bubbles and cause them to weaken over time. Make sure to store them away from direct sunlight and keep them in a cool, dry place to prevent damage and discoloration. Also, try to avoid stacking other shoes or objects on top of them, as this can cause compression and stress to the bubbles.
4. Treat Them with Care

One of the most straightforward ways of preventing Nike VaporMax bubbles from bursting is by treating them with care. Avoid putting too much wear and tear on the shoes, and never use aggressive motions or movements that can damage the bubbles. Additionally, try to walk on smooth surfaces instead of rough or uneven surfaces that can strain the bubbles.
By following these tips, you can prevent Nike VaporMax bubbles from bursting, ensuring that your shoes remain comfortable, fashionable, and long-lasting. Be mindful of where you wear them, keep them clean, store them carefully, and treat them with care, and you will get years of usage from your Nike VaporMax sneakers.
How to Fix Nike VaporMax Bubble
When to Seek Professional Help for a Nike VaporMax Bubble
If your Nike VaporMax sneakers have a bubble issue, you may be wondering whether you need professional help or not. Here are the factors to consider before seeking professional assistance:
Contents
Severity of the bubble
The first thing to consider when deciding whether to seek professional help is the severity of the bubble. If it’s a small bubble that hasn’t burst yet, you might be able to fix it yourself. However, if the bubble is large, has burst and is causing discomfort when you wear the shoes, it’s best to seek professional help.
Your shoemaking skills
If you have experience in fixing sneakers, you might be able to fix the bubble yourself without professional help. If you’ve never fixed sneakers before or don’t have any experience with shoemaking, it’s best to leave the fixing to professionals.
The age of the sneakers
If your Nike VaporMax sneakers are relatively new, it’s best to seek professional help from Nike. They may be able to fix your sneakers for free or for a nominal fee. If your sneakers are old and out of warranty, professional help may not be worth the cost.
Your budget
Professional help can be expensive, especially if you’re seeking help from a shoemaker instead of the manufacturer. If you’re on a tight budget, it’s best to try fixing the bubble yourself before seeking professional help.
Your location
If you live in a remote area, it may be difficult or expensive to seek professional help. If there are no shoemakers in your area or the nearest Nike store is far away, it may be more cost-effective to fix the bubble yourself.
These are the factors to consider when deciding whether to seek professional help for a Nike VaporMax bubble. In general, it’s best to seek professional help if the bubble is large, has burst, and is causing discomfort. If you have experience fixing sneakers, you may be able to fix the bubble yourself. However, if you’re on a tight budget or live in a remote area, fixing the bubble yourself may be the best option.