
Understanding the anatomy of shoelaces
Most people might think that shoelaces only have one part, but in reality, they are made up of several components that work together to keep your shoes securely fastened. Knowing the anatomy of shoelaces is important in fixing the plastic ends of the laces.
The first part of the shoelace is called the aglet. It is the small plastic or metal tip that is attached to the end of the lace. The aglet’s primary function is to prevent the end of the shoelace from fraying. This component of a shoelace has been around since ancient times and was designed to make it easier to thread the laces through the eyelets of the shoes.
The next part of the shoelace is the lace body. It is the long, thin, and flexible cord that runs through the eyelets of the shoes. The lace body can be made of various materials such as cotton, nylon, or polyester. The type of material used in making the lace decides on its durability and longevity.
The shoelace’s core is the innermost part of the lace body. It is made up of several braided or twisted fibers that give the laces their strength and durability. The core of the shoelace is responsible for ensuring that the lace does not break or tear under tension when it is being pulled tightly.
Lastly, the lace ends are the final part of the shoelace. It is the wedge-shaped plastic tips that fit over the ends of the lace body. The lace ends are designed to keep the core from unraveling and protect the delicate fibers of the shoelace. Plastic lace ends are often used in today’s laces since they are more durable, provide better grip, and are more cost-effective than metal lace ends.
Understanding the anatomy of shoelaces can help you diagnose where the damage occurred when your shoelace ends break. Generally, the shoelace’s lace ends are damaged when they are accidentally cut, pulled, or weakened due to overuse. These laces can either be repaired or replaced.
Now that you have an understanding of the anatomy of shoelaces, it will be easy to understand what part has broken and how you can fix it. Repairing or replacing damaged plastic ends of shoelaces can be done quickly, and with little expense.
Tools and materials needed for the repair
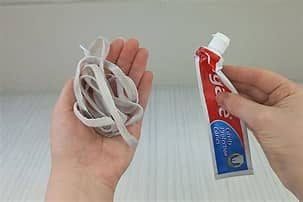
If you’re having trouble with your shoelaces by damaging the plastic ends, you don’t have to worry about buying new laces. You can easily fix them at home with some basic tools and materials.
Contents
Tools Required for the Shoelace Repair
Firstly, you will require a pair of scissors that are sharp enough to cut the plastic ends of your laces. If you do not have scissors, you can use a sharp craft knife or a razor blade. Be careful when using these tools to avoid cutting yourself.
You also need a lighter or matches to melt the plastic ends and seal them so that they do not come unraveled again. The flame emitted by the lighter should be controlled, and you need to use it cautiously to avoid accidents. Alternatively, you can use a candle or a stove with a small flame.
Materials Required for the Shoelace Repair
The second essential thing on the list is the material itself. Shoelace ends are made of plastic, so you will require a material that can melt and fuse with the plastic to avoid fraying or loosening. Here are the materials that you need to prepare:
1. Heat Shrink Tubes
Heat shrink tubes are the easiest and most efficient method to fix the plastic ends of the shoelaces. These tubes come in different sizes, so you have to choose the right size that matches the diameter of your shoelace. The heat shrink tube should easily slide over the shoelace.
Insert the heat shrink tube over the frayed end of the shoelace, and use a lighter to heat up the tube. When you heat the tube, it will start to shrink and bond to the shoelace. Make sure the tube melts correctly, and there are no air bubbles left in it.
2. Glue
You can also use a supercar glue, which is a powerful adhesive that can stick to plastics and other materials. To use it as a fixative, apply a small amount of glue to the tip of the frayed end and bind it with the shoelace. Press the ends together for a few minutes until the glue starts to set. Let it dry completely before you wear your shoes.
3. Thread and Needle
If you do not have heat shrink tubes or glue, you can also sew the ends of the shoelaces together. This method is the most time-consuming one. Take a needle and a thread that match the color of the shoelaces and sew them along the frayed ends. Ensure that the thread is double stitched and it holds the frayed ends firmly together. Knot the thread at the end for a strong finish.
4. Electrical Tape
If you’re looking for a quick, easy, and more affordable solution, then electrical tape can be your savior. Electrical tapes are used for insulating electrical wires, but they can also act as a temporary fix for frayed shoelaces. You have to wrap the electrical tape tightly around the end of the shoelace. Make sure you overlap every wrap to avoid it from being too thick to slide through the holes of your shoes. This solution can last for a few days to a week depending on the frequency of use.
Now that you know the tools and materials required for repairing your shoelaces, you can easily fix them without any hassle. With these simple and easy methods, you can prolong the life of your shoelaces by keeping them intact and organized.
Steps to fix a frayed plastic end
If you have a pair of shoes with frayed shoelaces, it can be frustrating to know what to do. Thankfully, fixing a frayed plastic end is a quick and simple process that anyone can do at home. Here are the steps you need to take to fix your shoelaces and get back to walking in comfort.
Step 1 – Cut the Frayed End
The first step in fixing a frayed plastic end is to cut off the frayed part of the shoelace. Use a pair of sharp scissors or a knife to make a clean cut as close to the fray as possible. It’s important to make a clean cut to prevent further fraying or unraveling.
Step 2 – Melt the End of the Shoelace
Next, use a lighter or match to melt the end of the shoelace. Hold the end of the shoelace near the flame, and be careful not to get too close to it. Move the shoelace slowly and carefully back and forth across the flame, allowing the heat to melt the plastic end. Be sure to melt only the tip of the shoelace and not the rest of the shoelace. The melted plastic will cool quickly, creating a solid end that will not fray again.
Step 3 – Flatten the Melted Plastic End
After melting the end of the shoelace, wait for a few seconds to allow it to cool down. While it’s still soft, use a flat object (such as a knife blade or a ruler) to flatten the melted plastic end. This will ensure a neat and tidy appearance and prevent the melted plastic from catching on anything. Gently apply pressure until the end is completely flat. Be careful not to apply too much pressure or you may crack the plastic and have to start the process over again.
Step 4 – Trim the End of the Shoelace
Once you’ve melted and flattened the end of the shoelace, the final step is to trim any excess plastic. Use your scissors or knife to carefully trim away any remaining melted plastic that you do not need. Use a light touch to avoid cutting the shoelace itself. This will ensure that the melted end of the shoelace is the correct length and will fit properly into the eyelets of your shoe.
Following these simple steps, you can fix your frayed plastic ends in a matter of minutes. It’s an easy and affordable way to keep your shoelaces looking and functioning as good as new.
Tips for preventing future damage to shoelaces
Shoelaces are a fundamental part of footwear, and it can be frustrating when they break or become damaged. While fixing them is a quick and easy task, it’s even better to take care of them in the first place. Follow these tips to prevent future damage to shoelaces and keep them looking brand new:
1. Choose the right laces
The first step in preventing damage to shoelaces is to choose the right ones. Pay attention to the material of the laces you’re purchasing, as some are more durable than others. For example, flat laces tend to be harder to tie, but they are more durable and less likely to break than round laces. Another option is waxed laces, which are more resistant to water and dirt.
2. Properly tie your shoelaces
One of the most common reasons shoelaces become damaged is improper tying. Be sure to tie your laces properly to reduce the amount of stress they endure. The optimal way to tie your laces is to loop each side into a bunny ear, cross them over each other, and loop one under and through the resulting opening. Pull each bunny ear to tighten the knot, and you’re good to go!
3. Keep shoelaces away from sharp objects

Sharp objects such as scissors can easily damage shoelaces. Keep sharp objects away from your laces and shoes whenever possible to prevent accidental cuts. Additionally, avoid dragging your feet and shuffling, as this may also lead to frayed or damaged laces.
4. Regularly clean your shoelaces
Regularly cleaning your shoelaces is an excellent way to ensure they stay in good condition. Use a mild detergent and warm water to clean your shoelaces, and let them thoroughly dry before wearing your shoes again. Avoid using harsh chemicals or bleach, as these can damage the material of your laces.
5. Use shoelace protectors
If you’re someone who frequently engages in activities that may cause your shoelaces to become damaged, such as hiking or skateboarding, consider investing in shoelace protectors. These protectors are designed to keep your laces from getting caught, stepped on, or dragged, which can cause them to fray or break. They’re a great option for those who want to preserve the longevity of their shoelaces.
By following these tips, you’ll be able to prevent future damage to shoelaces and keep them looking their best for longer. Remember, taking care of your laces means taking care of your shoes, and investing a little time and effort now will pay off in the long run.
Alternatives to repairing shoelaces with plastic ends
Replacing plastic-ended shoelaces is a common solution for fixing shoelaces. However, for those who don’t want to replace them, there are several alternatives to repairing shoelaces with plastic ends. Here are some of the common alternatives:
1. Lace Anchors
Lace anchors are tiny devices that can be added to shoelaces to hold them in place. They come in two types—clip-on and thread-through. Clip-on lace anchors are the easier choice since they don’t require any tools. Thread-through anchors require threading the lace through a small hole in the anchor and then tying a knot to hold it in place.
Lace anchors are useful for keeping shoelaces in place and preventing them from coming undone. They are perfect for those who don’t want to tie shoelaces repeatedly and those who have difficulty tying knots. However, lace anchors can be difficult to fit on shoelaces with plastic ends, and using them may require removal of the plastic tip before the anchor can be attached.
2. Rubber Stopper
Rubber stoppers or shoelace stoppers are small rubber tubes that can be added to the end of the shoelaces to halt them from fraying. They are available in different sizes and colors and are especially useful for younger kids. Rubber stoppers work best with flat shoelaces that are not too thick but when tied and tightened well, they can work with rounded shoelaces as well.
The downside to using rubber stoppers is that they may slide off over time, especially if the shoelaces are not tightly tied. However, they are cheap and easy to replace if they wear out or become lost.
3. Knots
Another way to fix plastic-ended shoelaces is by tying a knot at the end. This can be done by tying a basic knot around the plastic tip or making a loop and tucking the end of the lace through the loop before pulling it tight. These knots will secure the ends of the shoelaces and stop them from fraying and coming undone.
However, knots can be difficult to remove if you need to adjust the length of the shoelace or replace it entirely. They also may not look neat and tidy and can come undone if not tied correctly.
4. Lace Locks
Lace locks are a fantastic way to prevent fraying and keep shoelaces tied up tightly. Lace locks work by threading the shoelace through a small locking device which helps to keep the laces in place, to tighten the laces, hold the elastic laces in the same place, lace locks are an excellent solution.
Lace locks are easy to use and can be added to shoelaces with plastic ends without the need to remove the plastic tips. However, they can become loose if not tightened properly, requiring re-tightening from time to time.
5. Elastic Shoelaces
If plastic-ended shoelaces keep getting damaged or require replacing regularly, using elastic shoelaces might be a better fix. Elastic shoelaces remove the need to tie shoelaces altogether by providing a stretchy lace that can easily be slipped on and off.
Elastic shoelaces are perfect for those with mobility problems, small children, or those who don’t want to waste time tying shoelaces. They come in different colors and are adjustable to different lengths and can be cut to size to match a shoelace’s size. However, they may not be suitable for sports activities and running, or on shoes with long thin tongues.
As shown above, there are several different alternatives to repairing shoelaces without plastic ends. Each of these alternatives comes with its strengths and weaknesses, so it is essential to choose the option that best suits your needs. With the right kind of protectors, you can prolong the lifespan of your shoelaces, and keep them looking neat and tidy for longer.