
How to Fix Squeaky Brakes on Your Bike
Identifying the Squeaky Brake Problem
Do you hear a loud noise coming from your bike brakes? It’s not a pleasant sound, but it’s a common occurrence for cyclists. A squeaky brake can be dangerous because it can cause distractions that might make it difficult for you to focus on the road. Furthermore, it can create a false impression of your brakes being weak, which can cause panic, leading to a potential accident. If you experience a squeaky brake, you should take it seriously and address it as soon as possible. But before you do that, you need to identify the root cause of the problem.
There could be various reasons why a brake becomes squeaky. The first one could be due to dirty or contaminated brake pads. If the brake pad surface gets dirty or oily, it can slip while braking, leading to vibrations, which causes the squealing sound. The second reason could be due to worn-out brake pads. Worn-out brake pads do not make full contact with the rim, leading to uneven wear, and that can cause the squeaky noise. The third reason could be due to the poor installation of the brake pads. If they are not seated correctly, they can shift and cause the pads to rub against the rim at a slight angle, leading to vibrations, which can cause the squeaky sound.
To identify the root cause of the problem, you can check your brake pads and look for the following signs:
Contents
1. Visual Inspection
The first thing you need to do is conduct a visual inspection of the brake pads. Begin by holding the bike steady and pressing on the brake lever. While doing that, check the pads to see if they contact the full surface of the rim. If the pad only touches the top of the brake track, it’s a sign that they are worn out and require replacement.
If you notice that the pads contact the full surface of the rim but they appear dirty and contaminated, you can try cleaning them with soap and water. Using rough materials or solvents to clean your brake pads might damage them, so it’s best to avoid them. If the pads are contaminated with oil, most likely, you will need to replace them since they won’t perform optimally and cleaning them won’t entirely remove the contamination.
2. Auditory Inspection
The second inspection method involves an auditory check. You can conduct it by rotating the wheel and listening for any unusual sounds. If you hear a rubbing sound, it’s an indication that your brake pads are rubbing the rim too hard. This could be an indication that your brake pads are misaligned or that the wheel is out of true. If you hear a squeak, it’s a sign that the brake pads are worn out and need replacing.
3. Tactile Inspection
The third inspection method is a tactile test. You can conduct it by running your fingers over the brake pads. If you notice any raised edges, it’s a sign that the pads are worn out and require replacement. The pads should be smooth, even, and have a level surface.
In conclusion, a squeaky brake can be a result of various reasons. However, a visual, auditory, and tactile inspection can help you identify the root cause of the issue. Once you have determined the problem, you can take the necessary action to resolve it. Addressing the problem early can extend the lifespan of your brakes and avoid potential accidents.
Cleaning the Brake Components
Cleaning the brake components is one of the most important steps in fixing squeaky brakes. Whether you have rim or disc brakes, the brake pads, rotors or rims, and calipers need to be free from dirt, dust, and debris for the brakes to perform efficiently without squeaking.
If you have rim brakes, clean the rims first. Rub a sponge or brush against the rims while the wheels are spinning. Do this until the rims are shiny and clean. If the rims are too dirty, consider using soap and water to clean them. But ensure you dry them well before riding the bike, as wet rims can affect braking power.
Next, remove the brake pads from the calipers. Check for debris on the pads’ surface, as it can cause unnecessary friction and squeaking. If you notice dirt, clean the pads using a dry cloth or sandpaper gently. Be careful not to damage the surface or smooth the pads too much, or you’ll need to replace them.
Alternatively, you can put rubbing alcohol on a piece of cloth and clean the surface of the brake pads. The alcohol will remove any dirt or contamination on the pads, which can cause them to squeak.
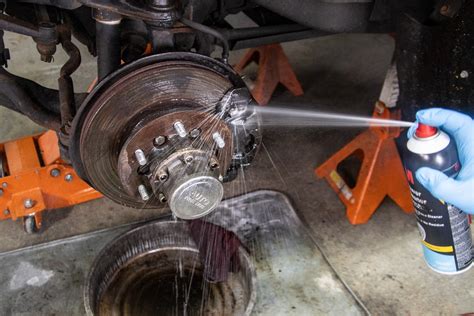
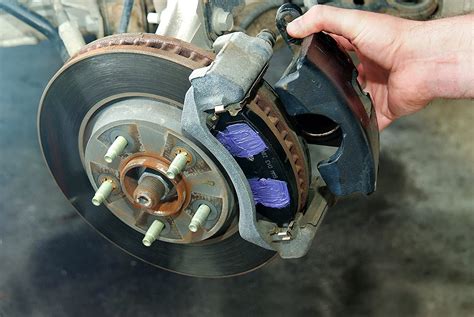
With disc brakes, the rotor needs to be clean. If it has grease and oil on it or has rust, it will cause the brakes to squeak. Clean the rotor surface with isopropyl alcohol. If that doesn’t work, sand the rotor slightly using sandpaper until smooth. If the rotor has deep grooves or scratches, it is time to replace it.
The caliper is another part that may accumulate dirt or grime. To clean it, remove it from the bike and the brake hose. Then, spray it with brake cleaner or a degreaser and let it soak for a few minutes. After that, use a dry cloth to remove the dirt. Reinstall the caliper back onto the bike and try the brakes to see if the squeaking has stopped.
Finally, ensure your bike’s cables are free from dirt or rust, as this can affect braking power. Remove the cables from the housing and wipe them with a dry cloth. You can also use chain lube or cable oil to lubricate them. However, avoid over-lubricating them as this can attract dust and dirt and cause the brakes to squeak again.
Cleaning the brake components is a crucial step in fixing squeaky brakes. Ensure you clean all the parts that come into contact with the brake pads and reduce the friction between them. By regularly cleaning the components, you will enjoy a smooth and safe ride.
Lubricating the Brake Assembly
One of the most common reasons for squeaky brakes is the lack of lubrication in the brake assembly. The brake levers, cables, and calipers all need to work together seamlessly to provide efficient braking power. Over time, dirt and grime can find their way into the brake assembly, causing friction that can lead to a squeaky noise when the brakes are applied. Applying a lubricant to the brake assembly can help eliminate this friction, resulting in smooth and quiet braking action.
Before lubricating the brake assembly, it is important to give it a thorough cleaning. This can be done using a mild detergent and water solution and a soft-bristled brush. Make sure to remove any dirt or debris from the brake components and then rinse them off with clean water. Allow the components to dry completely before applying any lubricant.
When lubricating the brake assembly, it is important to use the correct type of lubricant. Lubricants that are specifically designed for bicycles are recommended as they are formulated to withstand the harsh conditions that bike components are exposed to.
There are two main types of lubricants that can be used on the brake assembly: grease and oil. Grease is a heavier lubricant that provides long-lasting protection against wear and tear. It is best used on the brake calipers and other components that experience heavy wear and tear. Oil, on the other hand, is a lighter lubricant that is best used on the brake cables and levers. It helps to reduce friction and provide smooth and consistent braking action.
To lubricate the brake assembly, first, apply a small amount of lubricant to a cloth or rag. Then, apply it to the areas that need lubrication. For brake calipers, use a small brush to apply the grease to the moving parts. For the brake cables, apply drops of oil to the cable ends, allow it to penetrate for a few minutes, and then wipe off any excess lubricant. For the brake levers, apply a few drops of oil to the pivot points and then work the lever back and forth to distribute the lubricant.
After lubricating the brake assembly, it is important to ensure that the brakes are working properly. Test the brakes by squeezing the brake levers and making sure that the wheels come to a complete stop without any noise or hesitation. If the brakes still squeak after lubrication, it may be necessary to check the brake pads for wear or other issues that may be causing the noise.
In summary, lubricating the brake assembly is an easy and effective way to eliminate squeaky brakes on your bike. Make sure to use the correct type of lubricant and follow the proper lubrication procedure for each component. A well-lubricated brake assembly will not only provide smooth and quiet braking action but will also help extend the life of your bike’s components.
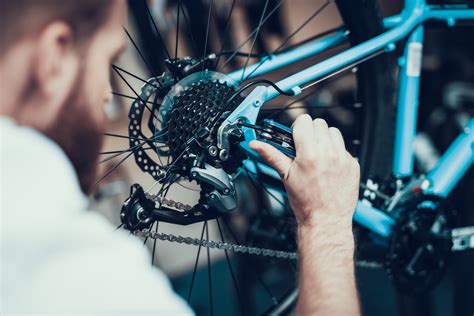
Adjusting the Brake System
Do you hear a high-pitched squeaking sound every time you apply your bike’s brakes? Don’t worry! It’s a common problem that most bikers encounter, but it can be easily fixed. Although it may seem like a trivial issue, it is essential to have a well-functioning brake system to ensure your safety when cycling. In this article, we will guide you step-by-step on how to adjust your bike’s brake system to eliminate the squeaking sound.
There are different ways to go about adjusting your bike’s brake system. First, you have to identify whether the problem is in the brake pads or the calipers. In most cases, the squeaking sound is due to worn-out brake pads, which rub against the rims when you apply pressure on the levers. Here’s what you need to do to fix the problem:
Step 1: Inspect the Brake Pads
The first step to adjusting the brake system is to inspect the brake pads. Remove the wheels and inspect the brake pads by looking at the rubber compound. If your brake pads are worn out and the grooves are no longer visible, it indicates that it’s time to replace them. You can find a replacement brake pad at your local bike store or online. On the other hand, if the rubber compound is still in good condition, clean the brake pads with soapy water and a soft-bristled brush. Rinse the pads with clean water and let them dry before re-installing them.
Step 2: Align the Brake Pads
The next essential step is to check the alignment of the brake pads. Misaligned brake pads can cause the bike to pull to one side when you apply the brakes and can also cause squeaking. To align the brake pads, loosen the bolt that attaches them to the caliper arm. Position the brake pads correctly, using your fingers to center them on either side of the rim. Be sure to keep equal clearance between the rim and the brake pads. Once you are satisfied with the alignment, re-tighten the bolt.
Step 3: Clean the Rims
If the squeaking sound persists, it’s time to check the rim’s cleanliness. Clean the rim’s braking surface thoroughly using a clean rag and rubbing alcohol, especially if you apply a lot of lubricant on your chain. Brake dust and other particles stick to the rims and can cause squeaking. Rubbing alcohol helps to effectively break down any build-up without damaging the rims. Once you have cleaned both wheels, re-install them and pump the brake levers to ensure the braking system is working smoothly and quietly.
Step 4: Check the Calipers
At times, the squeaking sound may originate from the calipers and not the brake pads. To fix this, clean the calipers thoroughly with a clean rag dipped in alcohol. By doing so, you will remove any dirt or accumulated debris that may be causing the squeaking sound. If the squeaking continues, it may be due to a worn-out spring or cable. You may need to replace these components or adjust the tension accordingly.
In conclusion, having properly-functioning brakes is crucial for your safety when cycling. Once you follow the above steps to adjust your bike’s brake system, you can confidently and safely cruise down the road without worrying about the annoying squeaking sound. Remember, prevention is better than cure, so always keep an eye on your brake pads and keep them clean. Practice regular maintenance and clean them after every ride to extend their lifespan. If you encounter any complex brake issues, take your bike to your local bike shop for further assistance from a professional technician.
Seeking Professional Help When Needed
If you have tried all the DIY fixes to get rid of your squeaky bicycle brakes, it may be time to seek the help of a professional bike mechanic. Here are some reasons why:
1. Your bike may require specialized tools.
There are certain bike problems that can only be fixed with specialized tools, and sometimes, this is the case with squeaky bike brakes. A professional bike mechanic will have the necessary tools to diagnose and fix your bike’s issues.
2. You may not have the expertise to fix the problem.
If you’re not familiar with bike repair or have limited experience, it’s best to seek professional help to avoid causing further damage to your bike. A professional bike mechanic has the necessary expertise to safely and efficiently fix your squeaky brake problem.
3. It may be a sign of a more significant issue.
Squeaky bike brakes may be a sign of a more significant issue, such as worn brake pads, loose ball bearings, or a damaged rotor. An experienced bike mechanic can examine your bike and determine if the problem is more significant than you initially thought.
4. You may have to replace parts.
If your brake pads are worn out or your rotor is damaged, you may need to replace the parts to get your brakes functioning correctly. A bike mechanic can source the necessary parts and replace them for you to ensure optimal brake performance.
5. You may need a proper adjustment and tuning.
Brakes that are not adjusted correctly can also lead to squeaking. A professional bike mechanic can examine your brake system and tune it precisely to ensure proper adjustments and eliminate squeaks. The mechanic can also inspect and clean the brake system to prevent dirt and grime buildup that can cause squeaks.
Conclusion:
Sometimes, the best solution to your squeaking bike brake problem is to seek professional help. A bike mechanic has the required expertise, tools, and knowledge to diagnose and fix the precise problem, ensuring your bike stops smoothly and quietly. Always remember, regular bike maintenance can prevent common problems and extend the lifespan of your bicycle.