
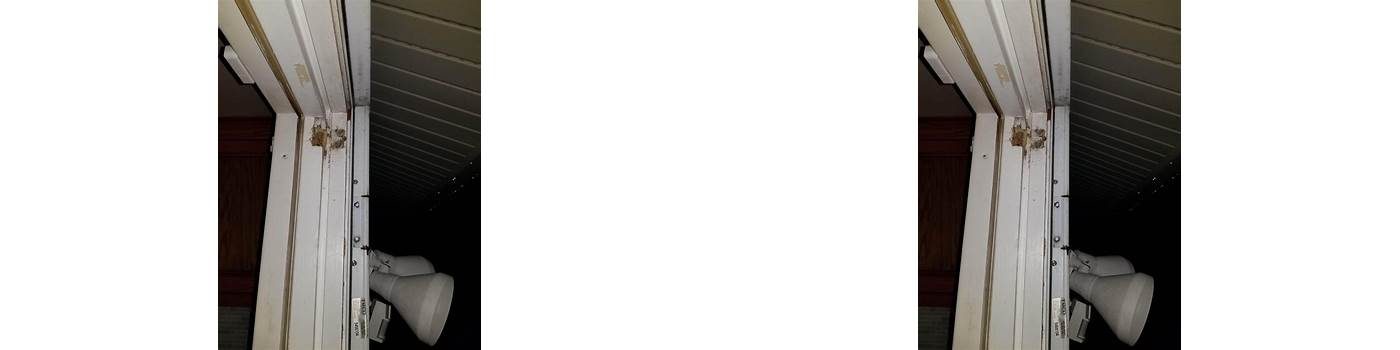
Identifying the problem hinge
Storm doors are designed to add an extra layer of protection against the elements. However, like any door, they are susceptible to wear and tear over time. One of the most common issues with storm doors is hinge problems. If you are experiencing difficulty opening or closing your storm door, it could be due to a problem with one of the hinges. Here’s how to identify the problem hinge and address the issue.
The first thing you need to do is determine which hinge is causing the problem. Open the door and inspect the hinges on both the top and bottom of the door. Examine the pins, screws, and other components to see if there are any obvious signs of damage. Look for rust, corrosion, or bending in the hinge components. Try to move the door to see if there is any excess movement or if it feels loose. If there is, then it’s likely that the problem lies with the hinge on that side of the door.
Next, you should test the door’s alignment. Stand inside your home with the door closed and take a look at the gap between the door and the frame. Is there an even gap around the entire perimeter of the door? Is the gap bigger at the top or bottom of the door? If you notice an uneven gap, this could be a sign that the hinges are misaligned. Misaligned hinges can cause the door to drag or rub against the frame, making it difficult to open and close.
If you are still unsure which hinge is causing the problem, you can try a simple test. Open the door and ask someone to hold it in place while you remove the pins from one hinge at a time. The hinge that causes the door to sag or feel loose is likely the problem hinge. Once you’ve identified the problematic hinge, you can move on to fixing the issue.
Overall, identifying a problem hinge on your storm door is relatively straightforward. It requires a visual inspection of the hinge components and testing the door for alignment and movement. By taking the time to identify the issue, you can save yourself time and hassle in the long run by fixing the problem sooner rather than later.
Gathering Necessary Tools and Materials
Are you having trouble with your storm door hinges? Do they creak, squeak, or refuse to close properly? Fortunately, fixing your storm door hinge is a simple DIY task that you can easily master with the right tools and materials. Before beginning, make sure you have the following:
Contents
- 1 Tools:
- 2 Materials:
- 3 Gather the necessary tools and equipment
- 4 Remove the hinge pins
- 5 Remove the hinge plates
- 6 Clean the area
- 7 Wrap-up
- 8 Step 1: Assess The Damage
- 9 Step 2: Choose The Right Hinge
- 10 Step 3: Remove The Old Hinge
- 11 Step 4: Install The New Hinge
- 12 Step 5: Test The New Hinge
- 13 Tips and Warnings
Tools:
- Screwdriver (Phillips or flathead)
- Hammer
- Drill (optional)
- Chisel (optional)
Materials:
- Replacement screws (if necessary)
- Silicone lubricant
- Steel wool or sandpaper
- Wood filler (if necessary)
- Paint or stain (if necessary)
Once you have gathered all of the necessary tools and materials, you’re ready to get started!
Removing the problematic hinge
If your storm door hinge is broken, then you might want to replace it with a new one. Before you dive into repairing or replacing, it’s important to remove the problematic hinge first. This guide will walk you through step-by-step on how to remove the hinge properly.
Gather the necessary tools and equipment
Before anything else, make sure you have everything you need to remove the hinge and its parts. The following are the tools and equipment you need for this process:
- Wrenches, pliers, or screwdrivers
- Hammer
- Utility knife
- Protective gear (gloves, goggles)
- Plastic bags or containers for screws, bolts, and nuts
Remove the hinge pins
The hinge pins are the long, cylindrical rods that hold the hinge plates together. To remove the hinge pins, follow these steps:
- Open your storm door and position it in a way that the hinges and hinge pins are easily accessible.
- Insert a flathead screwdriver or an awl at the bottom of the hinge pin head. Make sure to keep the screwdriver or awl perpendicular to the hinge pin.
- Tap the screwdriver or awl with a hammer gently until the hinge pin pops out from the top of the hinge plate. If it’s challenging to remove the pin, you may need to use pliers or a wrench to get a better grip.
- Pull the hinge pin out carefully, making sure not to damage the hinge plates or the door frame.
- Repeat the process with the remaining hinge pins, then place them in a plastic bag or container to avoid losing them.
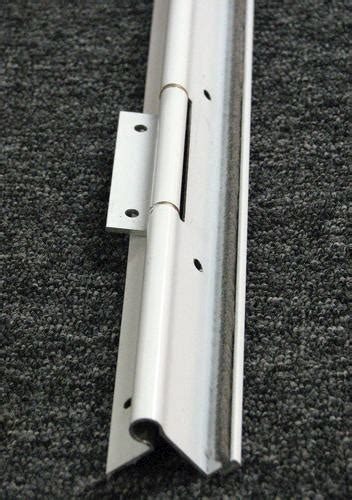
Remove the hinge plates
The hinge plates are the metal pieces that attach to the door frame and the door panel itself. Follow these steps to remove them:
- Locate the screws or bolts that connect the hinge plates to the door frame and door panel.
- Use a wrench, pliers, or screwdriver to unscrew the screws or bolts. Make sure to keep them in a separate bag or container.
- Gently tap the hinge plate with a hammer to loosen it from the door frame. Be careful not to damage the door or frame.
- Repeat the process with the remaining hinge plates. Once all hinge plates are removed, inspect them for any signs of damage that might cause the problem. If needed, you might want to replace them with new ones.
Clean the area
After removing the hinge plates, make sure to clean the area thoroughly. Scrub it with a cleaning solution to remove dirt and debris that might impair the new hinge’s performance. Also, remove any screws, nails, and other objects that might damage the door or the new hinge.
Wrap-up
Removing a problematic hinge in a storm door might take a while, but with patience and the necessary tools, you can do it successfully. To reduce the risk of damaging the door or the new hinge, make sure to follow these steps properly. Once you’ve removed the hinge, you can inspect it for any damage, decide whether to replace it or repair it, and proceed with the next steps.
Installing a new hinge
Replacing a broken or malfunctioning hinge is a common repair task for a storm door. You can easily install a new hinge by following these steps:
Step 1: Assess The Damage
Before purchasing a new hinge, carefully examine your storm door and assess the extent of the damage. Check if the hinge is damaged, corroded or bent out of shape. If the hinge is rusted, you can try cleaning it and applying some WD-40 to loosen it up. If it is beyond repair, then you need to get a new one.
Step 2: Choose The Right Hinge
Once you have determined that you need a new hinge, you need to choose the right one for your storm door. Measure the size of the old hinge and look for a replacement that matches the size and shape of the old hinge. You can find hinges at your local hardware store or online.
Step 3: Remove The Old Hinge
To remove the old hinge, you need to unscrew it from the storm door frame. Use a screwdriver to loosen the screws and take out the hinge from the frame. If the screws are stuck, you can use pliers or a wrench to unscrew them.
Step 4: Install The New Hinge
Once you have removed the old hinge, place the new hinge in the same position as the old one and align it properly. Make sure that the screw holes on the new hinge match the holes on the door frame. Then, screw the new hinge in place using the same screws that you took out of the old hinge. Tighten the screws using a screwdriver or a wrench, but don’t over tighten them so as not to strip the threads.
Step 5: Test The New Hinge
After installing the new hinge, test the door to make sure it opens and closes smoothly. Check if there are any gaps or misalignments between the door and the frame. If everything looks good, then you have successfully installed a new hinge on your storm door.
Tips and Warnings
- Always wear safety goggles and gloves when working with power tools or sharp objects.
- If you are unsure of how to install a new hinge, seek the help of a professional.
- Regular cleaning and maintenance of your storm door hinges can help prevent damage and prolong their lifespan.
- Always use the right size and type of screws when installing a new hinge.
- Make sure that the door is properly aligned and adjusted after installing a new hinge to avoid future issues.
Replacing a storm door hinge may seem like a daunting task, but with the right tools and guidance, it can be done easily and quickly. Follow these simple steps to install a new hinge and improve the functionality of your storm door.
Adjusting the hinge for proper function
Storm doors are an essential part of any home, as they offer protection and insulation to the main door and the house as a whole. However, storm door hinges may become compromised, leaving them unable to provide the necessary protection. A failing storm door hinge may make it impossible to open or close the door properly or even cause damage to the door or the frame. In this article, we will cover how to fix a storm door hinge by adjusting it for proper function.
Steps for Adjusting the Hinge
Before you begin, make sure you have the necessary tools, including a screwdriver, a level, and a plumb tool. Follow these easy steps:
Step 1: Inspect the hinge
The first step in fixing a storm door hinge is to inspect it thoroughly. Check for any visible damage, like rust or bends, which may compromise its function. Also, make sure the screw holes are aligned correctly and that the hinge moves smoothly. If you identify any problems, it may be time to replace the hinge entirely.
Step 2: Identify the problem
The next step is to determine what exactly is wrong with the hinge. If the storm door is not aligned correctly, the hinge may be out of position or have loose screws. If the round end of the hinge pin is sticking out, then it needs to be hammered back into its original position. If the hinge is loose, it may need to be tightened or even lubricated.
Step 3: Tighten the screws
To determine if the screws are loose, inspect each screw and tighten them with a screwdriver as needed. However, avoid overtightening the screws as they may strip the holes or cause further damage. Check to ensure that the hinge is secure and that there’s no wobbling or shaking.
Step 4: Line up the hinge
If the hinge is out of position, you’ll need to reposition it to align properly. With the door open, use a level or plumb tool to ensure that the hinge is perpendicular to the door frame. Tighten any loose screws to secure the hinge in the correct position.
Step 5: Use lubrication
In some cases, a storm door hinge may require grease or oil to function correctly. If you notice the hinge is squeaking or feels tight when you try to open it, use a lubricant to oil the hinge. Apply the lubricant on the moving parts of the hinge to ensure that it’s moving freely and without obstruction.
Additional Tips to Consider
In cases where the hinge is beyond repair, homeowners can consider replacing the hinge entirely. You should also make sure that the storm door is installed correctly to avoid putting additional strain on the hinges. Make sure the storm door fits well within the door frame, and that there is no rubbing or scraping against the frame. Regular maintenance and inspection of the storm door hinge can help prolong its lifespan and prevent future problems from occurring.
In conclusion, fixing a storm door hinge is a relatively easy process that any homeowner can complete. By inspecting the hinge, identifying the problem, tightening screws, lining the hinge up properly, and using lubrication, you can adjust a storm door hinge for proper function. Remember to follow the steps outlined in this article, and consider additional tips to ensure your storm door hinge lasts a long time.