
Understanding Tracking Lost on Oculus Quest
The Oculus Quest is an incredible standalone virtual reality headset that allows you to fully immerse yourself in virtual worlds. One of the features that make this headset so impressive is the Oculus Insight tracking system, which uses built-in sensors to track your movements and translate them into VR experiences. However, like any other electronic device, the Oculus Quest is not immune to technical issues, and one of the most common issues is tracking lost.
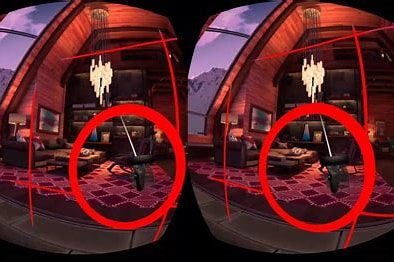
Tracking lost occurs when the Oculus Quest loses track of your location in the real world and thus loses track of your movements in the virtual world. This issue can be caused by different factors such as poor lighting conditions, reflective surfaces, and signal interference from other Bluetooth devices in the room.
When tracking lost occurs, you will notice that your virtual hands and controllers become jittery or even unresponsive, and your virtual world may become unstable or appear to move around as you move your head, which can lead to motion sickness.
The good news is that tracking lost on the Oculus Quest can be fixed with a few simple solutions. In this article, we will discuss some of the most effective ways to fix tracking lost on Oculus Quest.
Checking Your Oculus Quest Setup
If you’re experiencing tracking issues with your Oculus Quest, the first and most important thing to do is check your setup. The following are some things you can do to ensure that your Oculus Quest is set up properly and that there are no hardware or software issues:
- Make sure your Guardian system is properly set up and calibrated. The Guardian system is what creates a virtual boundary around your play space to help prevent you from running into walls or objects.
- Ensure that you have adequate lighting in your room. For the Quest to track properly, it needs to be able to see the environment around you. If your room is too dark, the Quest may not be able to track properly.
- Ensure that there are no reflective surfaces in your room. Reflective surfaces such as mirrors and glass can interfere with the Quest’s tracking system.
- Make sure your room is not too cluttered. Clutter in your play space can interfere with the Quest’s tracking system. Try to clear out as much space as possible to give the Quest the best chance to track your movements.
- Ensure that your Quest is fully charged. A low battery can cause tracking issues, so make sure your Quest is fully charged before using it.
- Check your firmware. Sometimes issues with tracking can be caused by outdated firmware. Make sure your Quest is running the latest firmware version.
- Ensure that your Quest is positioned properly on your head. If the Quest is not positioned correctly on your head, it may not be able to properly track your movements. Adjust the straps and make sure the Quest is snug on your head.
- Finally, if none of the above steps work, restart your Quest and try again. Sometimes a simple restart can fix tracking issues.
If you’ve gone through all of the above steps and your tracking issues are still not resolved, there may be a hardware issue with your Quest. In this case, you should contact Oculus Support for further assistance.
Cleaning Your Oculus Quest Sensors
Now that you know how to properly set up your Oculus Quest, you should know that maintaining your VR headset will ensure that you get the best possible experience. One of the most important things you can do to keep your Oculus Quest working well is to clean your headset’s sensors. If your headset’s sensors become dirty or cloudy, it can affect the tracking and cause your in-game experience to suffer. That’s why you want to make sure your sensors are clean and clear of any obstructions. Here’s how you can properly clean your Oculus Quest sensors:
Contents
- 1 1. Use a Microfiber Cloth
- 2 2. Don’t Use Water or Cleaning Solutions
- 3 3. Use a Compressed Can of Air
- 4 4. Keep Glasses Away from the Lenses
- 5 Step 1: Clear Your Play Area
- 6 Step 2: Turn On Your Oculus Quest and Controller
- 7 Step 3: Go to the Guardian Settings
- 8 Step 4: Follow the on-screen instructions
- 9 Step 5: Confirm Your Play Area
1. Use a Microfiber Cloth
You’ll want to use a soft, non-abrasive microfiber cloth to clean your Oculus Quest sensors. Using anything other than a soft microfiber cloth could scratch the lenses or sensors, which can severely damage your VR headset. The most common example of a microfiber cloth is the one you get with your glasses or smartphones. If you don’t have one of these, you can purchase them easily online or in any glasses store.
2. Don’t Use Water or Cleaning Solutions
It’s important to avoid using any water or cleaning solutions on your Oculus Quest sensors. These can damage the lenses, sensors, and even the device itself. If you need to clean your headset, you can use a dry microfiber cloth to remove any dirt or debris that may have accumulated on the lenses or sensors. Water or cleaning solution will cause severe damages to sensors and render your device useless.
3. Use a Compressed Can of Air
If there is any dirt or debris that has been caked on to the sensors, then it is better to use a can of compressed air to remove it. It will also remove any dust on it. You should be slow and apply only small amounts of air pressure at a time and keep it a safe distance of around one inch or so from the lenses. This will prevent accidental scratches or damage to the sensors due to pressure and proximity.
4. Keep Glasses Away from the Lenses
You always want to make sure that your glasses don’t touch the lenses or sensors, as this can cause scratches, smudges, and even damage the sensors over time. If you do wear glasses, make sure they are clean and don’t touch the lenses. You might also want to consider using prescription lenses with your headset, which can be easily attached and removed from the headset, which can give you a clear and comfortable VR experience.
By following these tips, you can ensure that your Oculus Quest stays in the best possible condition. Regular cleaning and maintenance of your sensors, lenses, and headset can help you avoid any issues that may affect your tracking or overall VR experience. Just remember to be gentle and patient when cleaning your headset and avoid using any liquids or abrasive materials that could damage your device.
Adjusting the Lighting in Your Play Area
If you’re experiencing tracking loss on your Oculus Quest, one possible culprit may be the lighting in your play area. The Quest relies on a system of cameras and sensors to track your movements, and certain types of lighting can interfere with this system. Here’s a closer look at some of the factors that can affect tracking and how to address them:
1. Natural Light
Natural light can be one of the trickiest factors to account for when it comes to tracking. The Quest is designed to work in a variety of lighting conditions, but direct sunlight can cause problems. If your play area is near a window, try closing the blinds or drawing the curtains to minimize the amount of light coming in. Bright reflections or glares on surfaces like walls or floors can also interfere with tracking, so be sure to check for these as well.
2. Artificial Light
Certain types of artificial light can also cause tracking issues. Fluorescent lights, for example, can introduce flicker that can confuse the Quest’s cameras. If you have fluorescent bulbs in your play area, consider swapping them out for LED bulbs. If you’re still experiencing tracking loss, try adjusting the placement of your lights or using a dimmer switch to reduce brightness.
3. Colored Lighting
Colored lighting can make for a fun and immersive VR experience, but it can also interfere with tracking. The Quest’s cameras use infrared light to detect your movements, and certain colors can reflect or absorb that light in unexpected ways. Avoid using colored lightbulbs or lamps in your play area, and be cautious of any nearby surfaces that might be reflecting colored light.
4. Shadows
Shadows can be a major source of tracking loss, especially if you have bright or uneven lighting in your play area. When your body or controllers cast shadows on nearby surfaces, it can confuse the Quest’s cameras and cause jittery or inaccurate tracking. To address this, try moving your lights around so that your play area is evenly lit. You can also try adjusting the angle of your Quest’s cameras or moving your play area to a different spot in your room.
By taking a closer look at the lighting in your play area, you can help reduce tracking loss and improve your overall VR experience on the Oculus Quest. Remember to keep your play area well-lit but not too bright, and avoid any lighting conditions that might interfere with the Quest’s cameras or sensors.
Re-Calibrating Your Guardian System
The Guardian System is how the Oculus Quest knows your play area. If the system isn’t working as it should, you may find yourself walking into walls, tripping up on furniture, or repeatedly getting the “lost tracking” message. There are many reasons why tracking can be lost, but one of the most common reasons is because the Guardian System has become misaligned. Re-calibrating your Guardian System is usually straightforward and can often fix the problem.
Here are 5 steps to re-calibrate your Guardian System:
Step 1: Clear Your Play Area
Before you start, clear any obstacles in your play area. This is so the Oculus Quest can map out an accurate space. Take a few minutes to tidy up any furniture or objects that are in your way.
Step 2: Turn On Your Oculus Quest and Controller
%2Fcdn.vox-cdn.com%2Fuploads%2Fchorus_image%2Fimage%2F62479983%2Fjb_recode_vr_ovr_quest_1005_01.0.jpg&w=800&h=533&c=7&rs=1&qlt=90&o=6&dpr=1.5&pid=Bot)
Turn on your Oculus Quest and controller. From your home screen, go to the Settings menu and select Devices. Check that your controller is connected and has a full charge.
Step 3: Go to the Guardian Settings
From the Devices menu, select the Guardian option. There will be a few different settings available to you. Stop when you find “Setup Guardian”.
Step 4: Follow the on-screen instructions
The Oculus Quest will now guide you through the setup process. This usually involves drawing and confirming your play area. Carefully follow the on-screen instructions, making sure the space you draw accurately reflects your play area. If you make any mistakes, you can start again until you get the perfect boundary.
Step 5: Confirm Your Play Area
Once you’ve drawn your boundary, double-check that it accurately represents your play area. If you’re happy with it, select “Confirm”. If you’re not, redraw your boundary and check again until it’s accurate.
After you’ve re-calibrated your Guardian System, make sure you stick to the play area you set up. If you wander out of the boundary, the Oculus Quest may lose tracking and you’ll need to start the process again.
In conclusion, re-calibrating your Guardian System can solve many issues that cause the Oculus Quest to lose tracking. Make sure you have plenty of room, follow the instructions on the screen carefully, and double-check that your play area is accurate before confirming. Happy virtual reality gaming!