
Assess the Damage

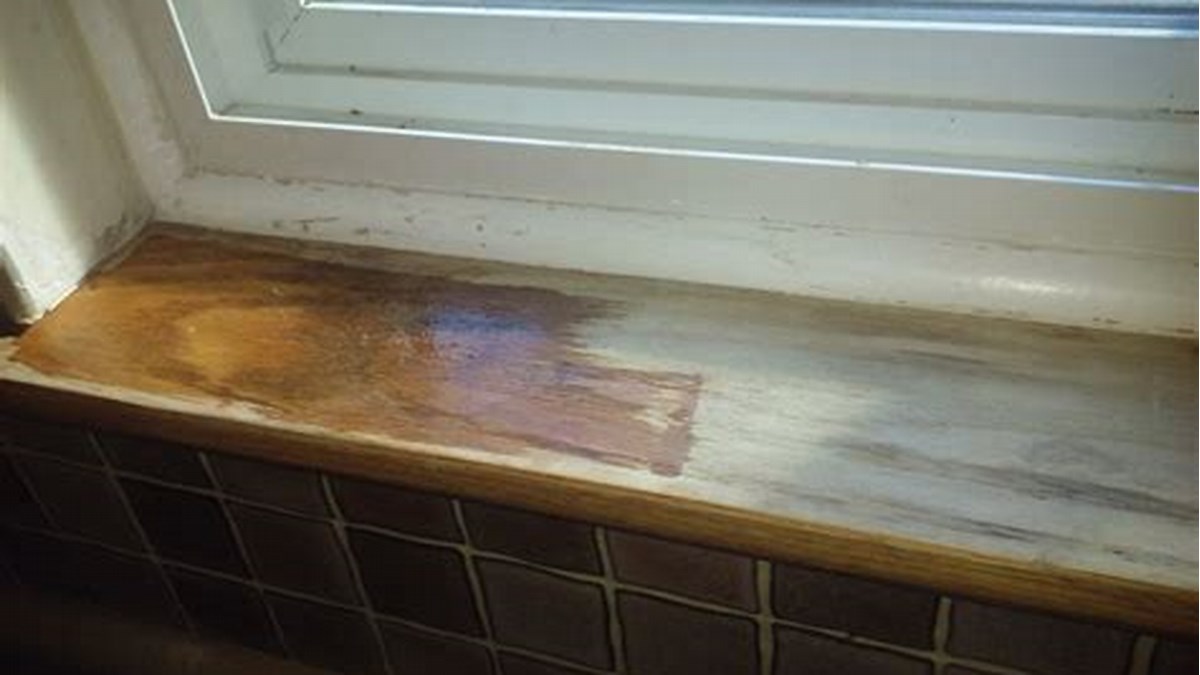
If you’re a pet owner, you most likely have experienced your furry friend chewing on items they’re not supposed to. One of the common things they like to dig their teeth into is wooden window sills. While it’s a frustrating sight to behold, it’s not something that can’t be fixed. Before you start the repairing project, you must first assess the extent of the damage the dog has caused to the window sill. This step will help you know what materials you need, how much work needs to be done, and how much you’re likely to spend on repairs.
Start by examining the damaged area. If it’s a tiny chunk of wood that’s been chewed off, you might be able to fix it by sanding and filling the area with wood filler. However, if the damage is more severe, that could be a different story altogether. You might need to replace the whole window sill, and that will require advanced skills and knowledge on how to work with wood.
Another thing to assess is the type of wood used on the window sill. Different types of wood react differently to damage caused by dogs. For example, softwood such as pine can be easily chewed on by dogs, while hardwood such as oak is likely to hold up much better against dog bites. Knowing the type of wood used on your window sill will help you decide whether you need to replace part of it or the entire sill.
In conclusion, assessing the damage is an essential step in fixing a window sill that has been chewed by a dog. Evaluate the damage, the type of wood, and determine the extent of the work that needs to be done, so you can know where to start. Having a plan will help you stay focused and reduce the likelihood of overspending or making unnecessary repairs.
Remove Loose or Damaged Wood

If you have a dog, you know that sometimes they have a tendency to chew on things that they shouldn’t. If your dog has chewed on your window sill, you’ll want to take care of it right away before it gets any worse. The first step to fixing a chewed window sill is to remove any loose or damaged wood.
To start, use a screwdriver or chisel to remove any loose or damaged wood. Make sure you go deep enough to remove any parts that have been chewed through. This can be a tedious process, but it’s important to remove as much of the damaged wood as possible. If you don’t remove all of the damaged wood, the repair won’t last as long as it should.
Once you’ve removed all of the loose and damaged wood, use sandpaper to smooth the edges around the area where you’ll be making the repair. This will help the new wood bond better with the old wood and prevent any rough edges from causing problems later.
If the damage is not too extensive, you may be able to repair it using wood filler. To do this, apply the wood filler to the damaged area, making sure to fill in any gaps or holes caused by the chewing. Use a putty knife to smooth the surface of the wood filler, and let it dry completely according to the manufacturer’s instructions.
Once the wood filler has dried, sand it down using fine-grit sandpaper until the surface is smooth and level. If necessary, apply a second coat of wood filler and repeat the sanding process.
If the damage is more extensive, you may need to replace the entire window sill. To do this, measure the length and width of the window sill and purchase a piece of wood that is the same size. To make sure the new window sill fits properly, you may need to use a jigsaw or circular saw to cut it down to the correct size.
Next, apply a bead of wood glue to the bottom of the new window sill and press it firmly into place. Use clamps to hold the new window sill in place while the glue dries. Once the glue has dried, use wood filler to fill in any gaps or holes around the edges of the window sill.
Finally, sand the entire window sill to ensure that it’s smooth and level. You may also want to add a coat of paint or stain to match the rest of the window frame.
Overall, repairing a window sill that has been chewed by a dog is a relatively easy process as long as you remove any loose or damaged wood first. Whether you use wood filler or replace the entire window sill, taking the time to do the repair properly will help ensure that it lasts for years to come.
Sand the Surface
When dogs chew on window sills, it can be frustrating and costly to repair. However, there is a simple solution that can help you fix the damage without breaking the bank. Sanding the surface of the window sill is one of the most common and effective ways to fix dog chews on window sills. This process not only helps remove the damaged area but also creates a smooth surface for future painting or coating. Here are the steps to take when sanding the surface:
Contents
- 1 Step 1: Preparation
- 2 Step 2: Sanding the Surface
- 3 Step 3: Smoothing the Surface
- 4 Step 4: Cleaning Up
- 5 Step 1: Remove the old finish
- 6 Step 2: Fill in the damaged areas with wood filler
- 7 Step 3: Sand the window sill
- 8 Step 4: Apply a new coat of paint or stain
- 9 Step 5: Protect the newly refinished window sill
Step 1: Preparation
Before you start sanding, clean the area by removing any loose wood chips, dust, or debris from the surface. Clean the area using a damp cloth or brush and let it dry. Once done, put on your protective gear, including safety glasses, gloves, and a dust mask. This is crucial as it will protect you from inhaling any dust or debris created during sanding.
Step 2: Sanding the Surface
For this process, you will need to use fine-grit sandpaper (150-grit would be sufficient). Sandpaper is available in most hardware stores and can be purchased in sheets or rolls. Fold the sandpaper into a small rectangle, holding it with both hands. Using light pressure, start sanding the chewed area. Sand in the direction of the grain and avoid sanding too deep into the wood. You only need to sand the damaged area until it’s smooth to the touch. Be careful not to round the corners or edges during sanding, as this may alter the shape of the window sill and make it difficult to paint later.
Step 3: Smoothing the Surface
After sanding the damaged area, use a finer-grit sandpaper (such as 220-grit) to smooth out the surface. This will remove any rough or jagged edges and create a more polished look. By this stage, you should start to feel that the window sill is becoming smoother, and there are no longer any rough patches on the surface.
You can also use a sanding block to ensure a smooth surface. Hold the block flat against the surface and move it in a circular motion. This will help smooth out any bumps or uneven areas and create a uniform texture across the surface of the window sill.
Step 4: Cleaning Up
Once you’re happy with the surfaces’ feel, use a damp cloth to wipe away any dust or debris created during sanding. Take a few minutes to inspect the window sill carefully. Check that the surface is even and that there are no rough edges. If there are any small indentations or scratches remaining, repeat the sanding process. Once satisfied, let the surface dry completely before painting or coating.
As you can see, fixing a damaged window sill from dog chews isn’t difficult, especially if you follow these simple steps. With patience, the right tools, and a little bit of elbow grease, you can restore your window sill to its former glory and give it a smooth, polished look. So, get your sandpaper and protective gear ready and start sanding your way to a beautiful-looking window sill.
Fill Gaps and Holes
Dogs are adorable and can be our best friends. However, they have a habit of chewing on furniture and other household items. The window sill is not an exception, and a chewing dog can leave your window sill damaged. The damage can range from teeth marks to large gaps and holes. Whatever the extent of the damage, it can be fixed. Here are some tips on how to fix window sill dog chewed, focusing on filling gaps and holes.
The first step in filling gaps and holes in a window sill is to clean the area thoroughly. Use a scraper or sandpaper to remove any old paint or debris and ensure that the surface is smooth. You can then use a vacuum cleaner or a brush to remove any remaining dust or debris.
Once the surface is clean and dry, you can then proceed to fill the gaps and holes. One of the most effective products for filling gaps and holes in window sills is a wood filler. Wood fillers come in different colors, and you can choose one that matches your window sill color. Some of the most popular wood fillers include DAP Plastic Wood and Elmer’s Carpenter’s Wood Filler.
When using a wood filler, it is essential to follow the manufacturer’s instructions. Apply the wood filler to the gap or hole using a putty knife, and then smoothen the surface using a damp cloth. You should then let the filler dry completely, which can take several hours or even overnight.
After the wood filler has dried, you can then sand the surface to ensure that it is smooth. You can use a sanding block or sandpaper to do this. After sanding, you can wipe the surface with a damp cloth or a tack cloth to remove any remaining dust or debris.
If the gap or hole is too large, you may need to use a combination of wood filler and a piece of wood. Cut the wood to fit the gap or hole, and then apply the wood filler around the edges to smoothen the surface. Once the filler has dried, you can sand the surface and then paint or stain as desired.
If you prefer a quicker fix, you can also use a wood putty. Wood putty is similar to wood filler but dries faster. Apply the putty to the gap or hole using a putty knife, and then smoothen the surface using a damp cloth. You should then let the putty dry completely, which can take a few hours.
After the putty has dried, you can then sand the surface to ensure that it is smooth. You can use sandpaper or a sanding block to do this. After sanding, you can wipe the surface with a damp cloth or a tack cloth to remove any remaining dust or debris.
In conclusion, fixing a window sill dog chewed is not rocket science. With a little effort and the right products, you can restore your window sill to its former glory. However, it is essential to take measures to prevent your dog from chewing on the window sill in the future. One of the best ways to do this is to provide your dog with chew toys and train it to use them instead of your furniture. You can also use deterrent sprays or cover the window sill with a protective cover to prevent your dog from accessing it.
Refinish and Paint the Window Sill
If the damage done to your window sill is beyond repair, you might want to consider refinishing it. Refinishing involves removing the old layer of finish, filling in the damaged areas with wood filler, sanding the surface, and applying a new coat of paint or stain. Here’s how to refinish and paint a window sill that’s been chewed by your pooch:
Step 1: Remove the old finish
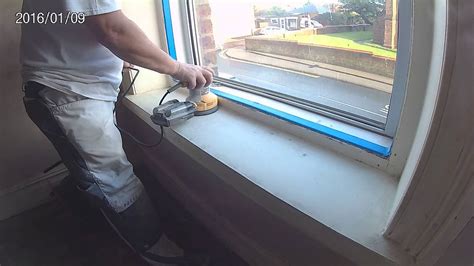
The first step in refinishing a window sill is to remove the old layer of finish. You can use a paint stripper or a sanding machine to do this. Be sure to wear protective gear like gloves and goggles when using a paint stripper. If you’re using a sanding machine, start with a coarse grit sandpaper and gradually move to a fine grit sandpaper as you work your way around the window sill.
Step 2: Fill in the damaged areas with wood filler
Once you’ve removed the old finish, inspect the window sill for any damage caused by the dog’s chewing. If you find any holes or gouges, fill them in with wood filler. Use a putty knife to apply the filler and smooth it out. Let it dry for the amount of time specified on the package before sanding it smooth.
Step 3: Sand the window sill
After the wood filler has dried, use a sanding block and sandpaper to smooth out the surface of the window sill. Be sure to sand in the direction of the wood grain. Start with a coarse grit sandpaper and gradually move to a finer grit as you work your way around the window sill. Once you’ve sanded the entire sill, wipe it down with a damp cloth to remove any dust.
Step 4: Apply a new coat of paint or stain
Now it’s time to apply a new coat of paint or stain to your window sill. If you’re painting the sill, use a high-quality acrylic paint that’s formulated for use on wood surfaces. For staining, choose a wood stain that matches the color of your window frame. Apply the first coat of paint or stain using a brush or roller, making sure to spread it evenly over the entire surface. Let it dry for the amount of time specified on the label before applying a second coat. Once the second coat has dried, your window sill should look as good as new!
Step 5: Protect the newly refinished window sill
After you’ve refinished your window sill, it’s important to protect it from future damage. Make sure your dog has plenty of chew toys and bones to prevent them from turning to the window sill for entertainment. You can also train your dog to stay away from the window area using positive reinforcement techniques. Additionally, consider installing a window guard or adding a protective covering to your window sill to prevent future damage.
Refinishing and painting a window sill that’s been damaged by a dog can be a time-consuming process, but with a little elbow grease and patience, you can restore your window sill to its original beauty. Just follow these steps, and soon your window sill will look as good as new!