

Understanding the Cause of the Yellow Line Issue
It can be frustrating when you experience a yellow line issue in Premiere Pro. This problem occurs when the software is unable to render your video smoothly during playback. This can result in choppy or laggy playback, and it can be particularly troublesome when you are trying to edit a large project. However, before you can fix the yellow line issue, you need to know what causes it. Here are some of the reasons why you might be experiencing the problem:
Contents
- 1 1. Your Computer is not Powerful Enough
- 2 2. Your Sequence Settings are Incorrect
- 3 3. Your Hard Drive is Too Slow
- 4 4. You Have Too Many Effects Applied
- 5 Step 1: Apply the Fast Color Corrector to your video clip
- 6 Step 2: Adjust the color temperature
- 7 Step 3: Adjust the tint
- 8 Adjusting Levels
- 9 Adjusting Curves
- 10 Method 1: Using Premiere Pro’s Built-in Effects
- 11 Method 2: Using Third-Party Plugins
- 12 Method 3: Using After Effects Dynamic Link
- 13 Method 4: Manual Noise Reduction
- 14 1. Check Your Export Settings
- 15 2. Clear Your Media Cache
- 16 3. Check Your Hard Drive Space
- 17 4. Update Your Software
- 18 5. Split Your Timeline
1. Your Computer is not Powerful Enough

One of the most common reasons why you might be seeing a yellow line in Premiere Pro is because your computer does not have enough processing power to handle the video. If your computer is older or does not have a good graphics card, you may struggle to render your video smoothly. This is especially true if you are working with high-resolution footage or effects.
To fix this problem, you may need to upgrade your computer’s hardware. This could mean investing in a new graphics card, adding more RAM to your system, or even buying a new computer altogether. Alternatively, you might be able to work around the issue by lowering the resolution of your footage or simplifying your effects.
2. Your Sequence Settings are Incorrect

If your sequence settings are incorrect, you may experience a yellow line issue in Premiere Pro. This is because Premiere Pro needs to match the settings of the footage you are working with to the settings of your sequence. If there is a mismatch between these two things, you may experience playback problems.
To fix this problem, you should make sure that your sequence settings match the settings of your footage. You can do this by going to your sequence settings and adjusting them accordingly. For example, if you are working with footage shot at 1080p, you should make sure that your sequence is set to 1080p as well.
3. Your Hard Drive is Too Slow

If your hard drive is too slow, you may experience problems with playback in Premiere Pro. This is because Premiere Pro needs to access your video files quickly in order to render them smoothly. If your hard drive is too slow, it may struggle to keep up with the demands of the software.
To fix this problem, you should consider upgrading your hard drive to a faster model. Alternatively, you could try using an external hard drive or a solid-state drive (SSD) instead. These options can provide faster read and write speeds, which may help to alleviate the yellow line issue.
4. You Have Too Many Effects Applied

If you have too many effects applied to your footage, you may experience a yellow line issue in Premiere Pro. This is because applying effects can be a taxing process, and if you have too many of them applied at once, it can cause playback problems.
To fix this problem, you should try to simplify your effects or reduce the number of them that you have applied. Consider whether each effect is necessary for your project and whether you can achieve the same result in a different way. By reducing the number of effects, you may be able to improve performance and eliminate the yellow line issue.
Understanding the causes of the yellow line issue in Premiere Pro is the first step to fixing it. By identifying the root of the problem, you can take steps to improve performance and render your video smoothly. Whether you need to upgrade your computer, adjust your sequence settings, or simplify your effects, there are usually solutions available to help you get back on track.
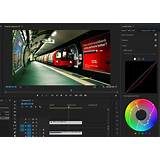
Using the Fast Color Corrector Tool
If you have a yellow line in your Premiere Pro video, you can easily fix it by using the Fast Color Corrector tool. This tool is designed to help you adjust the color balance, saturation, and brightness of your video clips, including removing yellow tint that can occur due to poor lighting or incorrect white balance settings.
The Fast Color Corrector can be found in the Lumetri Color panel, which can be accessed by clicking on the Color workspace tab. Once you have located the Fast Color Corrector tool, you can begin the process of fixing the yellow line in your video by following these simple steps:
Step 1: Apply the Fast Color Corrector to your video clip
The first step is to apply the Fast Color Corrector to the video clip that has the yellow line. To do this, click on the clip in the timeline and then go to the Effects panel. Type in “Fast Color Corrector” in the search bar and then drag the effect onto the video clip in the timeline.
Once the effect has been applied, you will see the controls for the Fast Color Corrector in the Effect Controls panel. These controls will allow you to make adjustments to the color balance, saturation, and brightness of your video clip.
Step 2: Adjust the color temperature
The next step is to adjust the color temperature of your video clip. The color temperature refers to the warmth or coolness of the colors in the clip. To remove the yellow line, you will need to adjust the color temperature so that the clip has a more neutral color balance.
To adjust the color temperature, go to the Fast Color Corrector controls in the Effect Controls panel. Under the Temperature section, you can use the slider to adjust the color temperature of the clip. Move the slider to the left to cool down the colors or to the right to warm them up. Adjust the color temperature until the yellow line disappears from your video clip.
Step 3: Adjust the tint
After adjusting the color temperature, you may still notice some yellow tint in your video clip. To remove the remaining yellow tint, you will need to adjust the tint of the clip. The tint refers to the balance of green and magenta in the clip.
To adjust the tint, go to the Fast Color Corrector controls in the Effect Controls panel. Under the Tint section, you can use the slider to adjust the balance of green and magenta in the clip. Move the slider to the left to add more green or to the right to add more magenta. Adjust the tint until the yellow line has been completely removed from your video clip.
By following these simple steps, you can easily fix the yellow line in your Premiere Pro video using the Fast Color Corrector tool. However, it is important to note that the quality of your video footage can greatly affect your ability to correct color issues. Make sure to use proper lighting and white balance settings when shooting your video footage to avoid color problems in post-production.
Adjusting Levels and Curves for Better Color Grading
Color grading is an important aspect of video editing that takes visual storytelling to the next level. But sometimes, no matter how great your camera footage is, a few errors may show up that can ruin the final product. One such issue is the yellow line that some clips show, which can quickly throw off the color balance of the entire video. Yellow lines can happen due to several reasons, such as incorrect white balance, lighting issues, and incorrect camera settings.
However, the yellow line is fixable, and the process is quite simple. In this article, we will explore some useful tips on how to fix the yellow line in Premiere Pro. In the previous sections, we have discussed basic adjustments to correct the color gradient. Now let’s talk about some more advanced tools we can use to refine the coloring further.
Adjusting Levels
Levels help adjust the brightness contrast and tonal range of the footage. This often includes the process of adjusting Black and White points to bring contrast and saturation back into normal. Here is how to do it in Premiere Pro:
- Click on the clip in the timeline that has the yellow line.
- Go to the Effects Control Panel and select the Lumetri Color Effect.
- Find the option for Levels and click on it.
- You will see three sliders for Shadows, Midtones, and Highlights.
- Adjust the Shadows, Midtones, and Highlights until you’re happy with the color balance.
Using levels can help bring out the darker and brighter areas of a shot. By dragging the shadows slider to the left, darker areas of the image become more darker, for a more cinematic and moody look. Pulling the highlight slider to the right brings out more information from the bright areas, revealing more detail. All these adjustments should be done slowly and subtly for the most natural-looking image.
Adjusting Curves
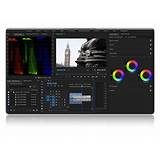
Curves help adjust the shadows and highlights, making it possible to fine-tune the color balance more directly. In Premiere Pro, this can be done by:
- Selecting the clip in the timeline that contains the yellow line.
- Going to the Effects Control Panel and select the Lumetri Color Effect.
- Find the option for Curves and click on it.
- You will see a diagonal line in the box that represents the tonal range of the clip.
- To change the color balance, click and drag the points on the line up or down, which correspond to the Brightness, Shadows, Midtones, and Highlights.
The key to a successful color correction lies in selective adjustments, meaning only fix what is necessary, and keep the rest untouched. When using curves, sometimes it is better to use several points on the curve to adjust different values, such as the shadows or highlights.
Keep in mind that sometimes too much of a good thing can lead to some serious issues. Overdoing the adjustments can quickly throw off the skin tone balance, making the footage look unnatural. Always make subtle adjustments and go back through to check the final version in the context of the whole sequence.
By practicing a bit and finding the best techniques for your own footage, it’s possible to ensure a fantastic color grading that will enhance the storytelling aspect in your videos.
Applying Video Noise Reduction to Clean Up the Footage

Video noise reduction is a process of removing visual noise or grain from a video clip. This is an important step to take when trying to clean up the footage. There are many types of video noise, but the most common ones include grain, compression artifacts, and sensor noise. In Adobe Premiere Pro, there are several methods to apply video noise reduction, and in this article, we will discuss some of them.
Method 1: Using Premiere Pro’s Built-in Effects

The first method is to use Premiere Pro’s built-in effects. Under the ‘Effects’ panel, search for ‘Noise and Grain’ and select ‘Median’ or ‘Gaussian Blur.’ These two effects are designed to remove visual noise from a video clip. Median can be used for static shots, while Gaussian Blur is best for moving footage as it helps to smooth out the motion. Adjust each effect’s settings until the yellow line disappears from the video clip.
Method 2: Using Third-Party Plugins

The second method to reduce video noise in Premiere Pro is by using third-party plugins. There are many plugins available, such as Neat Video, Red Giant Denoiser, and Magic Bullet’s Denoiser III. These plugins use advanced algorithms to remove noise from videos and usually provide better results than the built-in effects. To use these plugins, install them through the Premiere Pro’s Extension Manager and apply them to the noisy footage. Fine-tune the settings to get the best results.
Method 3: Using After Effects Dynamic Link

The third method involves using After Effects dynamic link integration. Premiere Pro and After Effects are both Adobe software, and they integrate seamlessly with each other. To use this method, first, right-click on the footage in Premiere Pro and select ‘Replace With After Effects Composition.’ This action will open a new After Effects project with the selected footage. Then, add the video noise reduction effect to the footage in After Effects, and save the project. Return to Premiere Pro, and the updated version of the footage will automatically be reflected in the Premiere Pro timeline with the noise removed.
Method 4: Manual Noise Reduction

The fourth and final method involves using the manual noise reduction technique in Premiere Pro. This process is time-consuming, but it can produce accurate results. To reduce noise manually, first, go to the ‘Effect Controls’ panel and use the ‘Luma’ and ‘Chroma’ sliders to adjust the luminance and color levels. Then, use the ‘Sharpen’ effect to sharpen the edges of the footage, and the ‘Mosaic’ effect to blur the noise. This technique requires a lot of precision and patience, but the results are impressive.
In conclusion, there are many methods available to fix the yellow line in Premiere Pro, and using video noise reduction is an effective way to clean up the footage. Whether you choose to use Premiere Pro’s built-in effects, third-party plugins, After Effects dynamic link integration, or the manual noise reduction technique, the key to getting the best results is to fine-tune the settings until the noise disappears from the video clip.
Exporting the Fixed Footage and Troubleshooting Tips
Once you have fixed the yellow line in your footage, the next step is to export it. Premiere Pro offers a range of export options. You can export your footage in a variety of formats such as H.264, MPEG-2, and ProRes. Before exporting your footage, make sure to review your project and ensure that all edits have been made correctly. Also, check that the audio sync is correct.
To export your footage, go to the File menu and choose Export. From the options provided, select the format you want to export your footage in. You can also select the location where you want to save the exported footage. Once you have selected your export settings, click on the Export button and Premiere Pro will begin exporting your footage.
If you encounter any issues while exporting your footage, here are some troubleshooting tips:
1. Check Your Export Settings
Double-check your export settings to ensure that they match your project settings accurately. If the settings do not match, you may experience issues while exporting your footage. Make sure to check the resolution, frame rate, and aspect ratio to ensure that they match your project settings precisely.
2. Clear Your Media Cache
If you discover that your export is taking longer than usual or is stuck, it could be because of your media cache. Clearing your media cache can help resolve the issue. You can find your media cache settings under Preferences > Media Cache. Once you have located the media cache settings, click on the Clean button to clear your media cache.
3. Check Your Hard Drive Space
Ensure that you have enough hard drive space to export your footage. Exporting large files require a significant amount of free storage space in your hard drive. If your hard drive is running low on storage, try freeing up some space and try exporting again.
4. Update Your Software
Adobe frequently updates Premiere Pro to fix issues and improve performance. Updating to the latest version of Premiere Pro can resolve many exporting issues. To check for updates, go to the Help menu and click on Updates or go to the Creative Cloud application and check for software updates.
5. Split Your Timeline
If your export is failing at a particular point in your sequence, try splitting your timeline at that point. Then export the sections separately and join them after exporting. This method helps resolve the issues caused by a specific frame or clip in your sequence.
By following these troubleshooting tips, you can resolve any issues you may encounter while exporting your footage in Premiere Pro. These tips should help you save time and prevent frustration while working on your projects.