
Introduction to Inno Setup
Installation and distribution of software applications are vital elements of software development. It enables the end-users to access the functionality of the software application. The installation process should be easy to perform and should provide a smooth experience to the end-users. This is where Inno Setup comes into the picture. Inno Setup is a free and open-source installer for Windows-based applications.
Inno Setup was created by Jordan Russell in 1997, who aimed to provide a better installation experience to end-users than the existing installers. Inno Setup is Unicode-based and supports several languages. It is capable of installing 32-bit and 64-bit versions of applications. It is lightweight, stable and feature-rich, which makes it an ideal choice for developers for all sizes of software applications. Inno Setup supports command-line parameters, supports creating shortcuts, can run scripts during installation and uninstallation.
Inno Setup is easy to use and provides complete control over the installation process through its graphical user interface that guides the user through the installation process. The user interface of Inno Setup is customizable, which ensures consistency with the developer’s branding or theme. Inno Setup is capable of consistently branding the installation experience for all versions of the application.
Inno Setup script file is written in Pascal programming language, which is one of the easiest programming languages to learn and use. The script file contains all the necessary information required for the installation process, including filenames, supported languages, application version numbers, registry keys, and more. The script is easily customizable and can configure the installation process based on the end-user system requirements, making the installation process smooth and error-free.
Inno Setup also provides an extensive list of pre-built functionality for developers to use, which simplifies the installation process and saves development time. These pre-built functionalities include file copying, registry editing, running external programs, and more. The developers can also add custom functionality by writing additional code in the script file.
Inno Setup also provides excellent documentation and extensive community support, making it easy for developers to use and understand. The documentation is available in multiple languages and provides comprehensive information on Inno Setup’s capabilities, usage examples, and more.
Inno Setup’s easy-to-use interface, customization, pre-built functionality, and documentation make it a popular choice for developers and users worldwide. Its extensive community support also ensures that developers receive quick and helpful responses to their queries and issues. Inno Setup offers a smooth installation experience that matches the quality of the software application, which benefits both developers and end-users.
Setting Up a Basic Inno Installer

If you’re new to Inno Setup, the process of setting up a basic installer may seem complex at first. However, with some practice, you can be creating customized installers in no time. Here is a step-by-step guide to setting up a basic Inno Setup installer.
Contents
- 1 Step 1: Download and Install Inno Setup
- 2 Step 2: Create a New Project
- 3 Step 3: Configure the Installer Settings
- 4 Step 4: Build the Installer
- 5 Step 5: Test the Installer
- 6 Step 6: Distribute the Installer
- 7 1. Custom Pages
- 8 2. Code Integration
- 9 3. Uninstall Options
- 10 4. Inno Setup Script Preprocessor
- 11 5. Digital Signatures
Step 1: Download and Install Inno Setup
To get started, you first need to download and install Inno Setup. You can download the latest version from the official Inno Setup website. Once you have downloaded the installer, simply run the setup wizard and follow the prompts to install Inno Setup on your computer.
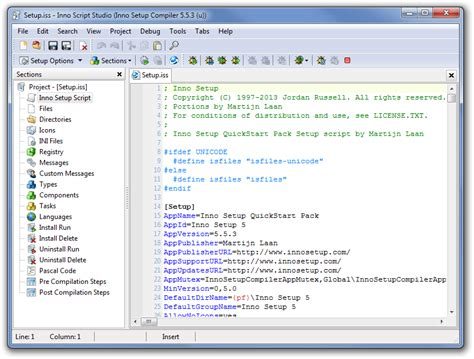
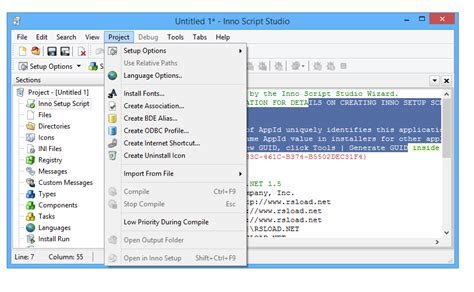
Step 2: Create a New Project
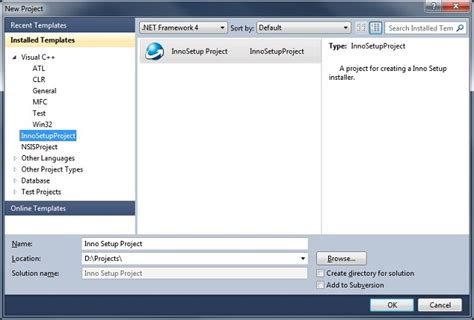
Open Inno Setup and click on the “New” button to create a new project. In the “Welcome” screen, you can enter the application name and select the location of the application files.
Step 3: Configure the Installer Settings
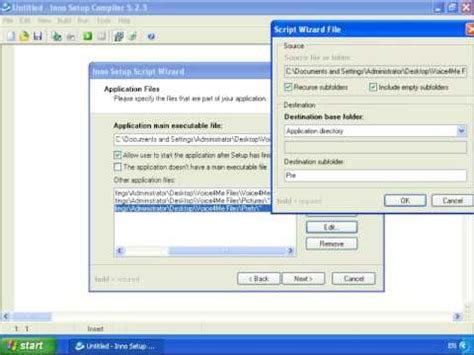
Next, you will need to configure the installer settings. This includes setting up the installation folder, the application icon, and specifying the files and folders to be included in the installer. You can also customize the installation process by specifying the installation components, creating shortcuts, and defining uninstall options.
Step 4: Build the Installer
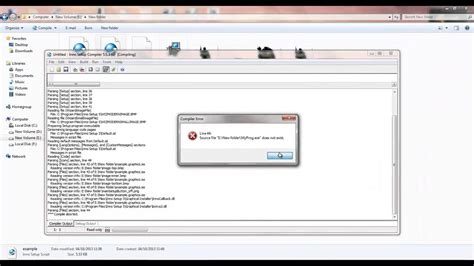
Once you have configured all the necessary settings, click on the “Build” button to compile the installer. Inno Setup will create an executable file that can be distributed and run by your users.
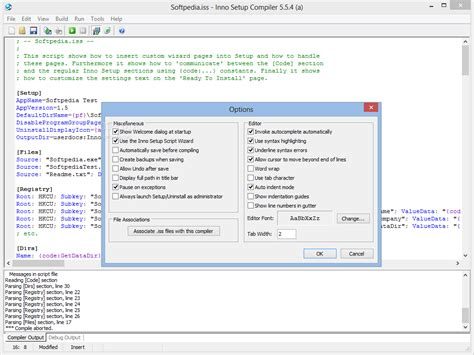
Step 5: Test the Installer
Before distributing the installer, it is always a good idea to test it to make sure it works properly. You can run the installer in “test” mode by clicking on the “Run” button in the Inno Setup Compiler. This will allow you to see how the installer will look and behave when it is run.
Step 6: Distribute the Installer
Once you have tested the installer and are satisfied with its functionality, the last step is to distribute it to your users. You can distribute the installer via email, download from a website or through a CD-ROM or USB drive.
By following these simple steps, you can create a basic Inno Setup installer to distribute your applications to your users. There are many advanced features and customization options available in Inno Setup, so be sure to explore them as you become more comfortable with the program.
Inno Setup Tutorial: Customizing Your Inno Installer
Customizing the Wizard Pages
One of the main features of the Inno Setup installer is its customizable wizard pages, which allow you to create a personalized user interface for your software installation process. You can add, remove or modify pages in the installer wizard according to your requirements.
The Inno Setup script file contains a section called [Setup], which defines the wizard pages. In this section, you can specify the components to be installed, the destination folder, the license agreement, and other settings. For example, you can use the AppVerName parameter to set the name of your application, or the OutputDir parameter to set the output directory for the installer file.
Here’s an example of how to add a custom wizard page to your Inno Setup installer script:
[Code]
var
  MyPage: TInputQueryWizardPage;

procedure InitializeWizard;
begin
  MyPage := CreateInputQueryPage(wpWelcome, 'Contact Information', 'Please enter your name and email address.', '');
  MyPage.Add('Name:', False);
  MyPage.Add('Email:', False);
end;
This code will create an input query wizard page that asks the user for their name and email address. It will be displayed after the Welcome page and before the Installation folder page.
You can customize the appearance of the wizard pages by modifying the [Setup] section in your Inno Setup script. For example, you can add a custom background image, change the font color, or adjust the spacing between the controls. To do this, you can use the various parameters available in the [Setup] section, such as WizardImageFile, WizardFontColor, and WizardSmallImageFile.
Overall, customizing the wizard pages in Inno Setup is a powerful feature that can help you create a professional-looking installer for your software. You can use it to add branding, collect user information, or provide additional information about the installation process.
Customizing the Installation Process
Another area where you can customize your Inno Setup installer is the installation process itself. This includes tasks such as creating shortcuts, adding registry entries, or running custom scripts.
The [Files] section in your Inno Setup script contains a list of files to be installed and their destination directories. You can use this section to include additional files such as data, assets, or documentation to be included in your installer.
The [Icons] section allows you to create shortcuts to your application in the user’s Start menu, desktop, or quick launch bar. You can specify the icon file for the shortcut and the working directory.
The [Run] section allows you to execute custom scripts or commands during the installation process. For example, you can run a batch file to set up environment variables or create a new user account.
The [Registry] section allows you to add or modify registry keys and values during the installation process. This can be useful for associating file extensions with your application, or setting default values for certain settings.
Finally, you can add custom messages or prompts during the installation process using the MsgBox function or the CustomMessage parameter. This can be useful for providing instructions to the user or collecting additional information.
Customizing the installation process in Inno Setup can help you automate tasks and provide a better user experience for your software users. By using the various sections available in the script file, you can customize the installation process according to your requirements.
Creating Custom Pages
Another way to customize your Inno Setup installer is by creating custom pages. These are wizard pages that you can design and program yourself, using the various controls and functions available in Inno Setup.
To create a custom page, you need to define a new class that inherits from the TFormWizard class. This class represents a wizard page and allows you to add controls and handle events. Here’s an example of how to create a custom page in Inno Setup:
[Code]
type
  TMyCustomPage = class(TFormWizard)
    private
      Edit1: TNewEdit;
    protected
      procedure InitializeWizard; override;
      procedure NextButtonClick(Sender: TWizardPage); override;
  end;

var
  CustomPage: TMyCustomPage;

procedure TMyCustomPage.InitializeWizard;
begin
  Edit1 := TNewEdit.Create(Self);
  with Edit1 do
  begin
    Parent := Surface;
    Left := ScaleX(12);
    Top := ScaleY(8);
    Width := ScaleX(250);
    Height := ScaleY(21);
    Text := '';
  end;
end;

procedure TMyCustomPage.NextButtonClick(Sender: TWizardPage);
begin
  if Edit1.Text = '' then
  begin
    MsgBox('Please enter a value in the textbox.', mbInformation, MB_OK);
    Abort;
  end;
end;

procedure InitializeWizard;
begin
  CustomPage := TMyCustomPage.Create(nil);
  CustomPage.PageID := wpWelcome + 1;
end;
This code will create a custom wizard page with a text box control. The InitializeWizard method is called when the page is first displayed, and it creates the text box control. The NextButtonClick method is called when the user clicks the Next button, and it checks if the text box is empty.
You can use the various controls available in Inno Setup, such as labels, check boxes, radio buttons, and list boxes, to create custom wizard pages that suit your needs. You can also handle events such as button clicks, mouse movements, and key presses to add interactivity to your pages.
Overall, creating custom pages in Inno Setup is a powerful way to add additional functionality and customization to your installer. It allows you to tailor the installation process to your software’s specific needs and requirements.
Adding Features and Components to Your Inno Installer
If you want to create a professional and user-friendly installation experience, you need to offer users the right features and components. Inno Setup lets you add features and components by simply defining them in the script file, and in this tutorial, we’ll show you how to do it.
In Inno Setup, a feature is the highest level of organization. They are the options that the user can select when installing your application. You might include features for different components, such as the application itself, optional plugins, and language support.
To add a feature, you must first define it in the [Setup] section of the script file. For example:
[Setup]
AppName=My App
AppVersion=1.0
DefaultDirName={pf}\My App
DefaultGroupName=My App
OutputDir=userdocs:Inno Setup Examples Output
CreateAppDir=false
[Types]
Name: "full"; Description: "Full installation"
Name: "custom"; Description: "Custom installation"; Flags: iscustom
[Components]
Name: "main"; Description: "Main files"; Types: full custom; Flags: fixed
Name: "help"; Description: "Help files"; Types: full; Flags: fixed
Name: "readme"; Description: "Readme file"; Types: full; Flags: fixed
[Tasks]
Name: "desktopicon"; Description: "Create a &desktop icon"; GroupDescription: "Additional icons:";
Flags: unchecked
Name: "quicklaunchicon"; Description: "Create a &quick launch icon"; GroupDescription: "Additional icons:";
Flags: unchecked; OnlyBelowVersion: 0,6.1
[Files]
Source: "MyProg.exe"; DestDir: "{app}";
Dependencies: "vcl50.bpl", "rtl50.bpl";
[Icons]
Name: "{group}\My Program"; Filename: "{app}\MyProg.exe"; Comment: "My short
description"; MinVersion: 4,4
In the example above, we define a full and custom installation type under [Types]. We then define three components under [Components]: main, help, and readme. We also define two tasks, desktopicon and quicklaunchicon, under [Tasks]. Finally, we specify the files that will be installed under [Files] and add icons under [Icons].
To further organize your installation, you can add components to your features. Components are smaller units of functionality or content that can be individually selected or deselected by the user. For example, you might add components for different language packs or a specific version of a plugin.
To add a component, you must first define it in the [Components] section of the script file. For example:
[Components]
Name: "main"; Description: "Main files"; Types: full custom; Flags: fixed
Name: "help"; Description: "Help files"; Types: full; Flags: fixed
Name: "readme"; Description: "Readme file"; Types: full; Flags: fixed
[Tasks]
Name: "desktopicon"; Description: "Create a &desktop icon"; GroupDescription: "Additional icons:";
Flags: unchecked
Name: "quicklaunchicon"; Description: "Create a &quick launch icon"; GroupDescription: "Additional icons:";
Flags: unchecked; OnlyBelowVersion: 0,6.1
[Files]
Source: "MyProg.exe"; DestDir: "{app}";
Dependencies: "vcl50.bpl", "rtl50.bpl";
[Icons]
Name: "{group}\My Program"; Filename: "{app}\MyProg.exe"; Comment: "My short
description"; MinVersion: 4,4
In the example above, we define three components: main, help, and readme. Each component has its own set of installation options, such as the ability to specify whether a component is fixed or not. We also define two tasks, desktopicon and quicklaunchicon, under [Tasks], and specify the files that will be installed under [Files] and add icons under [Icons].
By organizing your installation in this manner, you can provide users with the flexibility to install only the functionality they need. This can help to reduce the size of your installation and improve the user experience.
Another way to optimize the installation experience is to use a wizard page to prompt the user to select the features and components they want to install. To add a wizard page, you must define it in the [Code] section of the script file. For example:
[Code]
procedure CurPageChanged(CurPageID: Integer);
begin
if CurPageID = wpSelectComponents then
begin
// Code to show/hide components
end;
end;
In this example, we define a wizard page under CurPageChanged. This procedure is called whenever the user changes the current wizard page. We can use it to show or hide components based on the user’s selection.
In conclusion, Inno Setup makes it easy to add features and components to your installer. By providing users with a flexible installation experience, you can improve the user experience and increase the adoption of your application. Whether you’re creating a simple or complex installation, Inno Setup has the tools you need to create a professional and reliable installer.
Advanced Techniques in Inno Setup
So you’ve been working with Inno Setup and have tried all the basic techniques but want to learn more? In this article, we’ll explore some advanced techniques that will help you take your Inno Setup skills to the next level.
1. Custom Pages
Custom Pages are a powerful feature that will allow you to add your own custom pages to the installation process, which can be used to gather additional information from the user or perform additional actions. You can create custom pages in the [code] section using the CreateCustomPage function. In addition to having your own custom pages, you can also use Inno Setup’s built-in custom pages such as the License Agreement page, the Select Destination Location page, and the Setup Type page.
2. Code Integration
With Inno Setup, you can integrate code into your installer that will be executed during the installation process. This code can be used to perform complex operations such as checking for the existence of specific files or folders, modifying system settings, and even running external programs. Inno Setup uses the Pascal Script language for coding, and you can access the code editor by selecting “Edit Script” from the “File” menu in the Inno Setup Compiler.
3. Uninstall Options
When you install an application using Inno Setup, an uninstaller is automatically created that allows the user to uninstall the application. Inno Setup gives you complete control over the uninstall process, including how the user is prompted for confirmation, what registry and file system keys are removed, and even what post-uninstall actions are taken.
4. Inno Setup Script Preprocessor
The Inno Setup Script Preprocessor is a powerful tool that allows you to use variables and constants in your Inno Setup scripts that can be replaced with their corresponding values at compile time. This means that you can use preprocessor directives to customize your installer based on the user’s system configuration or the version of your application that is being installed.
5. Digital Signatures
Digital signatures are essential for ensuring that your application is authentic and has not been tampered with. Inno Setup allows you to digitally sign your installer using a code signing certificate, which can be obtained from a trusted certificate authority. To sign your installer, you will need to add the /sign command-line switch when you compile your script. This will launch the Sign Tool, which will prompt you to select your code signing certificate and enter your password.
With these advanced techniques, you should now be able to create even more sophisticated and customizable installers using Inno Setup. Remember that Inno Setup is a powerful tool, and with a little bit of practice, you can become a master of it. Happy coding!