
Assessing the Damage: Identifying a Bent Rim
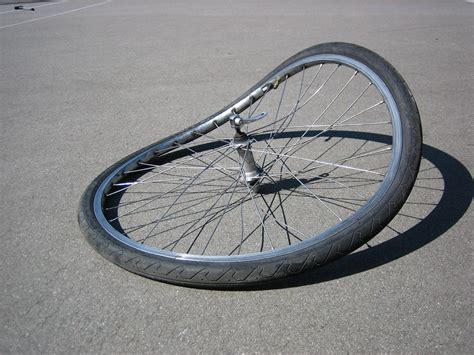
One of the most frustrating things that can happen on a bike ride is getting a bent rim. A bent rim will not only cause the bike to wobble and make an annoying noise, but it can also affect the bike’s braking power and overall performance. Here are some things you can do to assess the damage and identify a bent rim.
Firstly, the easiest way to tell if your bike rim is bent is to look at it. Tilt your bike on its side, and spin the wheel while you observe it. If the rim is bent, you will notice that it doesn’t spin smoothly. Instead, one part of the rim will move closer to the brakes, while another part will move away, making the rim look like it is wobbling. This wobbling movement is what causes the annoying noise and vibration.
The next thing you can do is to listen for any unusual noises. As previously mentioned, a bent rim can cause an annoying noise resembling a rubbing or scraping noise as the rim wobbles against the brakes with every wheel rotation. However, this noise can also be heard even when the brakes are not engaged. A bent rim can cause the bike to bounce when you ride, affecting the performance and stability of the bike.
You can also feel the damage while riding your bike. If you notice that your bike is riding bumpy or feels wobbly, it could be due to a bent rim. The wobbling of the rim will cause the bike to ride unevenly, making the ride more challenging and less comfortable. In some cases, you may even feel like your bike is slowing down or not rolling as smoothly.
Another method to identify a bent rim is to inspect the brake pads. If the brake pads are worn unevenly, it is an indication that the bike rim is bent. A wobbling rim makes the brake pads rub unevenly, causing them to wear out more quickly on one side than the other. If you notice that your brake pads are worn unevenly, it is recommended to take your bike to a professional bike mechanic to avoid any further damage.
Finally, if you’re still unsure, you can use a spoke wrench to adjust the spokes. By lightly pressing the spokes, you will be able to identify any looseness or tightness, and this will give an indication of where the bend is. If a section of the rim has become too loose, that means it is not in the correct position and may be causing the wobbling. Alternatively, if you notice the spokes are too tight and under significant tension, try loosening some spokes and adjusting them to even tension to make the rim more balanced.
In summary, identifying a bent rim is essential for the proper performance and longevity of your bike. Inspecting the rim visually, listening for any unusual noises, feeling the damage while riding, examining the brake pads, and adjusting the spokes are some ways you can evaluate the damage. If you are uncertain or feel uncomfortable attempting to fix the issue, it is always recommended to take your bike to a professional mechanic to ensure the safety of your ride.
Gathering Your Tools: What You’ll Need to Fix a Bent Rim
If you’re an avid cyclist, then you know that having a bent rim on your bike can be frustrating. A bent rim can make your ride uncomfortable, and it can also cause damage to your bike. Luckily, there are ways to fix a bent rim yourself, without having to take it to a professional. Here are the tools you’ll need to fix a bent rim on a bike:
Contents
- 1 1. A Bike Stand
- 2 2. Pliers and a Spoke Wrench
- 3 3. A Bike Pump
- 4 4. A Truing Stand (Optional)
- 5 1. Check for any loose spokes
- 6 2. Secure the wheel on a stand
- 7 3. Identify the area that needs truing
- 8 4. Tighten or Loosen the Spokes
- 9 5. Check for truing frequently
- 10 6. Double-check the balance
- 11 Use Proper Inflation
- 12 Observe Weight Limits
- 13 Check Road Conditions
- 14 Handle Your Bike with Care
- 15 Regular Maintenance
1. A Bike Stand
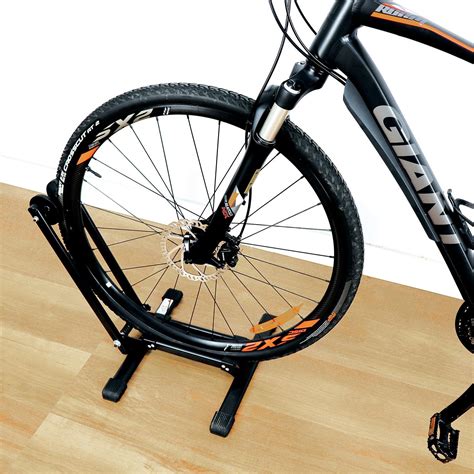
A bike stand is an essential tool to have if you’re a serious cyclist or if you’re planning on fixing your bike yourself. A bike stand will hold your bike in place, so you can work on the rim without the risk of it falling over. You can find bike stands at your local bike shop or online. Most bike stands are adjustable, so they’ll fit most types of bikes. If you don’t have a bike stand, you can use a workbench or a table to hold your bike in place.
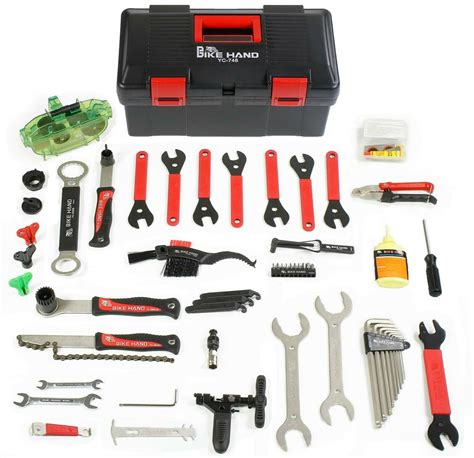
2. Pliers and a Spoke Wrench
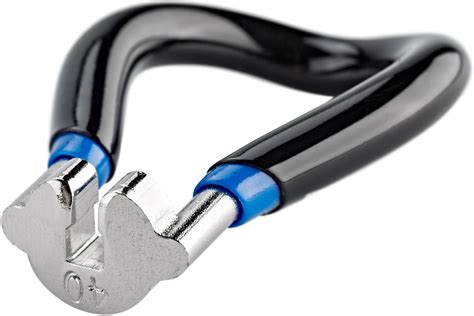
Pliers and a spoke wrench are necessary tools to straighten out a bent rim. Pliers are used to fix any small bends or kinks in the rim. You’ll need a spoke wrench to adjust the spokes and straighten out the rim. A spoke wrench is a tool that’s specifically designed to fit the nipples on the spoke and adjust their tension, allowing you to straighten out your bent rim. To use a spoke wrench, first, loosen the spoke opposite of the bend. Then tighten the spoke that’s causing the bend. Keep doing this until the rim is straight. It’s important to know that you should never use pliers to adjust the spokes, as they can damage the spoke threads and cause the spoke to break.
3. A Bike Pump
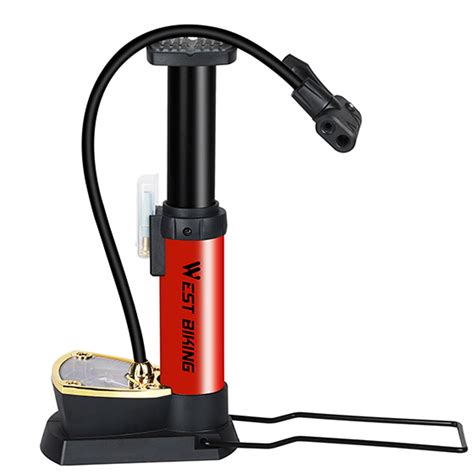
After you’ve straightened out your rim, you may need to inflate your tire. A bike pump is an essential tool to have to inflate your tire to the recommended pressure. Check the sidewall of your tire for the recommended tire pressure. Make sure to inflate your tire to the correct pressure to avoid any further damage to your rim or tire.
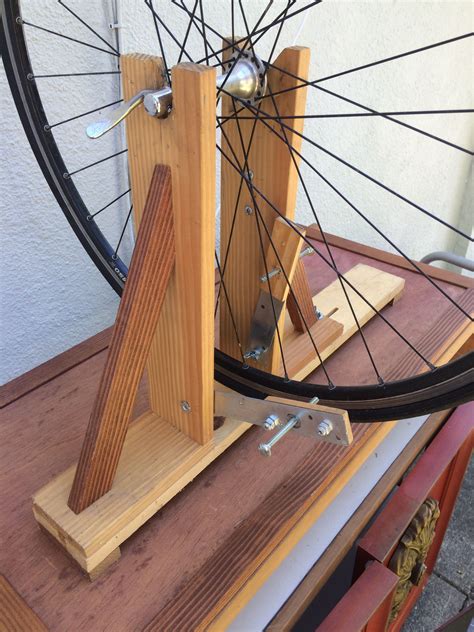
4. A Truing Stand (Optional)

A truing stand is an optional tool to have if you’re planning on fixing a lot of bent rims. A truing stand holds the wheel upright, so you can easily see where the bends are, making it easier to straighten out your rim. A truing stand is more precise than using a bike stand or workbench to hold your bike in place. However, truing stands can be expensive, so they’re not necessary for occasional bike repairs.
Now that you know the tools you’ll need to fix a bent rim, you’re ready to get started. Remember to take your time and be patient when straightening out your rim. With a little practice, you’ll be able to fix a bent rim like a pro!
Straightening Your Rim: Step-by-Step Instructions
When it comes to bikes, a bent rim can be downright dangerous. Not only can it make it difficult to ride, but it can even cause you to lose control and fall off the bike. In this guide, we’ll show you how to straighten your rim step-by-step to get your bike back into great riding condition.
Step 1: Identify the problem
The first thing you need to do is identify the problem. Sometimes, it’s not the rim that’s bent but rather the hub that’s causing the issue. To check, flip the bike over, spin the wheel and look at the distance between the rim and brake pad or frame. If it’s uneven, then the rim is indeed bent. If not, then it’s the hub that’s causing the problem.
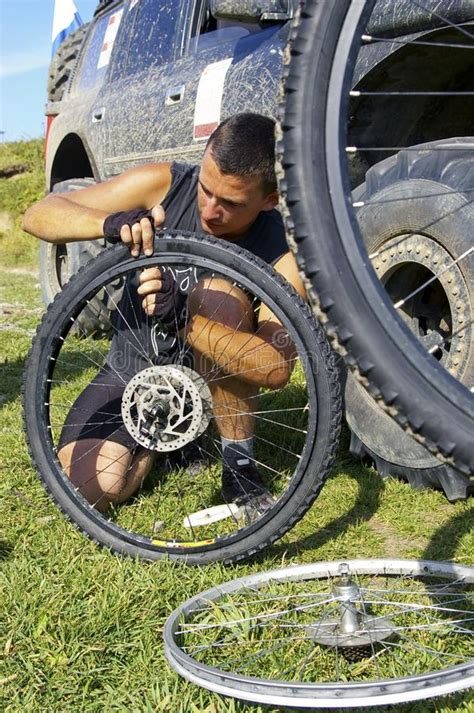
Step 2: Remove the wheel
To work on straightening the rim, you’ll need to remove the wheel from the bike. First, shift the chain onto the smallest cog to take pressure off the wheel. Then use a wrench to loosen the nuts or quick-release skewer and remove the wheel. Be sure to keep the parts in a safe place!
Step 3: Find the bend
Now that you have the wheel off the bike, it’s time to find the bend. You can do this by spinning the wheel and looking for any areas where the rim wobbles or moves from side to side. When you find the bend, mark it with a piece of tape so you can easily locate it during the next step.
Step 4: Fix the bend with a spoke wrench
Using a spoke wrench, begin to adjust the spokes that correspond to the area where you’ve marked the bend. If the rim is “out of true” to the left, tighten the spoke nipple that corresponds to the left side of the rim, which will pull it to the right. If the rim is out of true to the right, tighten the spoke nipple that corresponds to the right side of the rim. Keep adjusting the spokes until the rim becomes straight, using the marks on the rim as your guide.
Step 5: Check your work
Once you think you’ve fixed the bend, slowly spin the wheel and look to see if it’s still wobbling. If it is, then you need to make further adjustments. Keep this up until the rim is perfectly straight and spins smoothly without any wobbling. Remember, it can take a bit of trial and error to get it right, so be patient.
Step 6: Reattach the wheel
Once you’re happy with the straightness of your rim, it’s time to reattach the wheel. Simply slide it back into the frame dropouts and tighten the bolts or quick-release skewer. Remember to shift the chain back onto its original cog if you shifted it earlier.
Step 7: Test the bike out
Finally, take your bike out for a test ride to make sure everything is working as it should. Check to see if the rim is still straight, that you don’t hear any unusual noises, that the brakes are working properly and that the wheel is spinning smoothly. If all is well, then you’re good to go!
So there you have it, a step-by-step guide to straightening your bike rim. Although it may seem daunting at first, with a bit of patience and the right tools, you can have your bike back in great condition and riding smoothly once again. Happy riding!
Finishing Touches: Truing Your Wheel
So, your bike rim is no longer bent. Congratulations on completing a daunting task! Now, it’s important to make sure the wheel is trued, that is, adjusted so that it spins evenly and without any wobbling or rubbing against the brakes. Truing a bike wheel may seem difficult, but it’s an essential skill that any cyclist can learn. Here’s a step-by-step guide to help you true your wheel like a pro:
1. Check for any loose spokes
Before starting, make sure that all the spokes are tight. Check each spoke by turning the wheel and listening for any pinging or clicking sounds. If you hear any, it means that a spoke is loose, and you’ll need to tighten it.
2. Secure the wheel on a stand
Secure the bike wheel onto a truing stand or flip your bike upside down and use the brake pads as a reference. You’ll want the wheel to rest securely in the truing stand or on the frame before you start truing it.
3. Identify the area that needs truing
The first step is to locate the problem area. Spin the wheel slowly and use a marker or chalk to mark the section where the rim moves away from the brake pads or wobbles. This will give you a clear idea of the affected area.
4. Tighten or Loosen the Spokes
The idea is to adjust the tension on each spoke to pull the rim back into alignment. If the rim is rubbing against the brake pad on the left side, you’ll want to tighten the spoke on the right side pulling the rim towards the right. A good rule of thumb is that you should adjust spokes in the opposite direction of where you need to bring the rim. If the rim goes too far to the right, you’ll want to tighten the left spokes to bring it back to centered. The adjustment should be made in small increments by tightening or loosening the spoke tension using a spoke wrench. You can go around the wheel a few times until the truing is complete. The goal is to have an evenly-spaced gap between the rim and brake pads to ensure the brakes are activating smoothly.
5. Check for truing frequently
As you adjust spoke tension, continue to spin the wheel and check for any wobbles or unusual sound. Once you have accomplished this, double-check that every spoke is properly tightened and repeat step 4 until the rim is centered. Check that the wheel spins true looking at the rim’s distance from the brake pads and adjust spoke tension until the wheel is as straight as possible.
6. Double-check the balance
Once the truing is complete, check to make sure the wheel is balanced. Do this by spinning the wheel and checking to see if it doesn’t tilt at any point in the revolution. If the wheel is not balanced, adjust the tension until it’s perfect. A balanced wheel guarantees a smoother and more enjoyable ride.
Remember that truing a wheel takes practice, and it’s not always perfect on the first attempt. Take it slow, make small adjustments, and be patience. It’s always better to err on the side of caution and make minor corrections until you achieve the right balance. Remember that a properly trued and tensioned wheel is crucial for a safe and smooth ride, so take your time and don’t rush the process.
Preventing Further Damage: Tips for Avoiding Bent Rims in the Future
Having to fix a bent rim on your bike can be a hassle, not to mention the cost that comes with it. However, there are things you can do to prevent your bike rims from getting bent in the first place. Here are some tips for avoiding bent rims in the future:
Use Proper Inflation
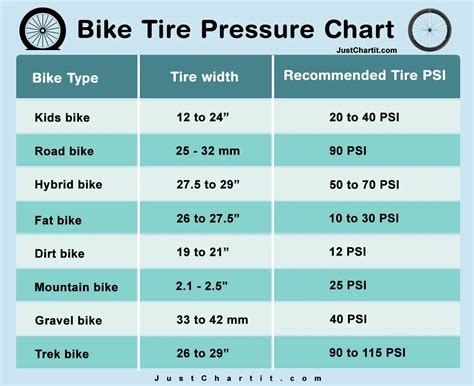
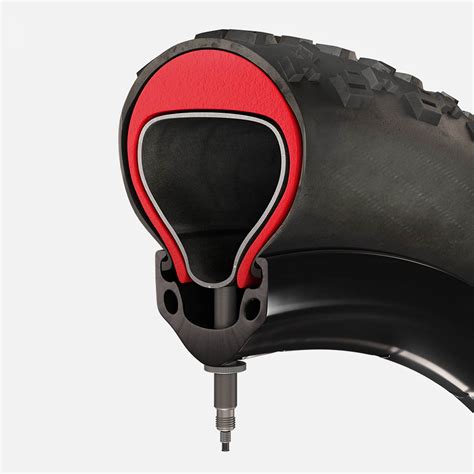
One of the main reasons that bike rims get bent is due to under-inflation or over-inflation of the tires. When your tires are under-inflated, they can’t absorb the shock from bumps and jumps, making your rims more vulnerable to damage. Conversely, over-inflating your tires can make them more rigid and less able to absorb shock. Therefore, it’s essential to use the proper inflation level as indicated on the tire’s sidewall. Make sure to check your tire pressure before each ride, especially during colder months. When the temperature drops, the air pressure inside your tires decreases as well.
Observe Weight Limits

Another reason why bike rims get bent is that many riders exceed the weight limit of their bikes. If you’re carrying a heavy backpack, saddlebags, or any other type of load, make sure you’re not exceeding your bike’s weight limit. Overloading your bike puts extra pressure on the wheels, making them more susceptible to damage. Some bikes have weight limits stated in the user’s manual. You can also check with the bike manufacturer or a specialist bike shop to determine the right weight limit for your bike.
Check Road Conditions

Riders should also consider the road terrain and conditions when cycling. Potholes, rocks, curbs, and other obstacles on the road can bend your rims. When riding off-road, it is recommended to use mountain bikes with wide, durable rims that can handle shocks and rough terrain. Hence, planning your route that avoids potholes, uneven roads, or rocky surfaces can reduce the risk of damaging your rims and other bike parts.
Handle Your Bike with Care
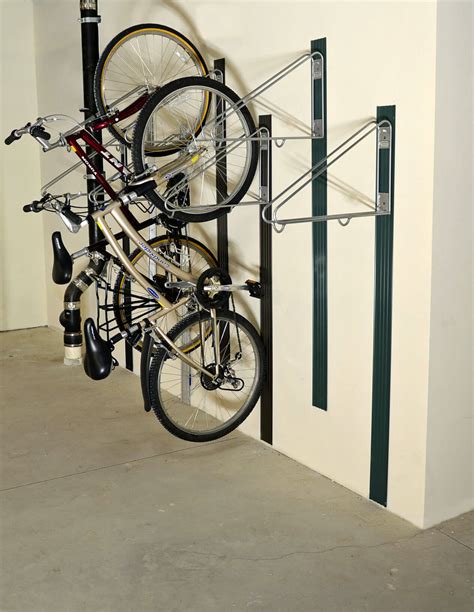
Treat your bike with respect and handle it with care as a bent rim can happen by mishandling it. Be careful when putting your bike on the bike rack or leaning it against the wall. Dropping or slamming the bike on the ground can quickly damage the rims. Always lock your bike securely when leaving it unattended. Always avoid standing or jumping on your bike’s rims when doing repairs or making adjustments. In short, be mindful of how you handle your bike, it will go a long way to avoid unnecessary repairs.
Regular Maintenance

Like all other things, regular maintenance is key to keeping your bike running smoothly and wheels intact. Visual inspections and cleaning can help assess your bike’s condition and quickly spot signs of rust, cracks, or bent rims. Regular cleaning can also help avoid debris, mud, and grime from accumulating on your bike’s wheels, which can affect their performance and durability. Bringing your bike to an experienced mechanic for professional tune-ups and repairs is also essential in maintaining your bike’s integrity.
By following these tips, you can significantly reduce the risk of damaging your bike’s rims and extend their lifespan. It can also help you save money and time on costly repairs. Your bike’s rims are a crucial part of your bike’s performance and safety, so treat them with the same care you give to your brakes, tires, and other bike parts.