

Identifying the Rusted Areas on Your Blackstone Grill
If you are an avid user of your Blackstone grill, you may have encountered the problem of rust on its surface. Rust is a common issue that Blackstone grill owners face over time because the griddle cooking surface is made of bare steel. This steel can easily rust if not adequately protected from moisture. Luckily, it is possible to salvage your rusted Blackstone grill with proper cleaning and care. The first step towards fixing a rusted Blackstone grill is identifying the problem areas.
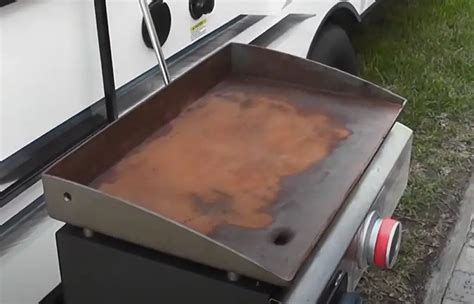
One of the common areas where rust forms is on the griddle cooking surface. If you notice brownish or reddish dots or flakes on the cooking surface, it is a sign of rust. The rust spots may appear small at first, but they will continue to grow if left unattended, and in no time, your grill becomes unusable. It is important to identify these spots early on and start the cleaning process immediately.
Another area where rust may form is on the grill’s exterior metal parts such as the legs, side tables, and frame. A rusted frame not only looks unattractive but can also weaken the grill’s structure, making it dangerous to use. Therefore, it is essential to check these parts for rust and clean them as soon as you notice any signs of rust.
Furthermore, the drip tray is another area where rust can form, which is usually caused by a combination of rust and grease build-up. The drip tray collects excess grease and oil while cooking, and if not cleaned regularly, can lead to a build-up of grease that can eventually mix with rust, causing the tray to become rusted.
Another way to identify rust on your Blackstone grill is by looking for stains and discoloration. Rust may cause stains and discoloration on the grill top and the exterior parts. It is essential to look out for these stains as they can signify early stages of rust formation.
To sum up, it is crucial to identify rusted areas on your Blackstone grill to start the cleaning and restoration process. The griddle surface, exterior metal parts, drip tray, and stains and discoloration are some of the areas to check for rust. Regular maintenance and cleaning of your grill can help prevent rust from forming and extend the lifespan of your Blackstone grill.
Removing the rust from your Blackstone
Blackstone griddles are loved by many people for their durability, versatility, and ease of use. However, due to their metal nature, they are susceptible to rust, particularly if not well taken care of. Rust may render the griddle unusable and even unsafe to use. But with the right tools and approach, rust on your Blackstone can be removed, and your griddle can be restored to its former glory.
The following are steps to follow when removing rust from your Blackstone:
Step 1: Gather your tools and supplies
You will need the following:
- Gloves to protect your hands
- A scraper or spatula to remove large rust flakes and debris from the surface of the griddle
- A hard-bristled brush
- A cleaning solution such as vinegar, baking soda, or commercial rust remover
- A scrubber or sandpaper to remove small rust spots
- Paper towels or a cloth to dry the griddle after cleaning
- A protective coating such as vegetable oil, rust inhibitor, or Blackstone seasoning spray to prevent future rust
Step 2: Clean the griddle surface
Using your scraper or spatula, remove any large debris and rust flakes from the surface of the Blackstone. Once done, use a hard-bristled brush to scrub away any remaining spots of rust. You can use a cleaning solution such as a mixture of vinegar or baking soda and warm water to augment the cleaning process.
It is essential to have the griddle cool down when cleaning it. Cleaning when it is hot can create steam that may be detrimental to your health. Once you have applied the cleaning solution, allow it to soak for a few minutes, then rinse off the surface thoroughly with cold water. Next, dry the surface using clean paper towels or a cloth. Repeat the process until the rust is entirely gone.
Step 3: Sand and polish the griddle
If there are still spots of rust remaining on the griddle, use a scrub pad or sandpaper to remove them gently. Ensure that you hold the scrub pad in your hand and position the sandpaper toward the remaining rust spots. This process can take a while, depending on the size of the spots and the duration of their exposure to water and air.
Once the rust and debris have been removed completely, use a polishing solution to restore the shine and finish of your Blackstone. You can use a commercial metal cleaner, but it is safer to use a homemade solution to avoid chemicals in commercial grade cleaners that can be harmful to your health. Using a paper towel or a clean cloth, apply a small amount of polish solution to the griddle and rub gently in circular motions.
Step 4: Protective coating
After cleaning and smoothing the surface of your Blackstone, it is crucial to protect it from rust and other damage. You can achieve this by wiping the surface with a long-lasting protective coating, such as vegetable oil or rust inhibitor. Applying an oil layer to your Blackstone is vital, especially when you are not using your griddle for prolonged periods.
The protective coating will not only safeguard your Blackstone from rust but also ensure longevity and optimum performance and cooking results.
Regularly cleaning and maintaining your Blackstone will ensure its longevity and optimal performance. By following the steps above, you can restore your rusted Blackstone and enhance your cooking experience. Good luck as you embark on bringing your Blackstone back to life!
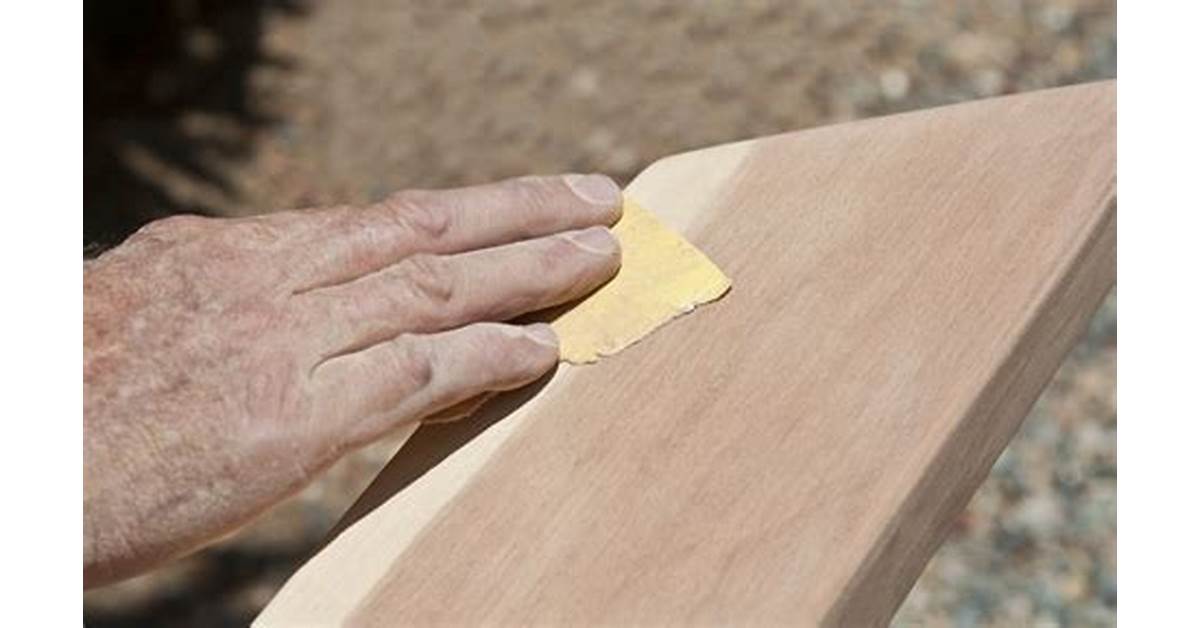
Sanding and smoothing the surface of your Blackstone
If your Blackstone has been rusting, there is a good chance that the surface will have become rough and pitted. This can make it difficult to cook on the griddle and might even lead to damage to your cooking tools. In order to get back to a smooth surface, you will need to do some sanding. It may take a bit of elbow grease on your part, but your efforts will pay off in the end with a cooking surface that is as good as new.
The first step is to use a wire brush or a scraper to get rid of any rust or other debris that may have built up on the Blackstone surface. Make sure to wear gloves and safety goggles for this step to protect your skin and eyes from metal shavings. Next, use a rough grit sandpaper, such as 60-grit, to smooth out any lumps or bumps on the surface. You can do this using a power sander or by hand, but be sure to follow the grain of the metal to avoid scratches.
Once you have finished with the rough sandpaper, move on to a finer grit such as 120-150. This will give you a smoother finish and help to remove any of the scratches left by the rough paper. Again, be sure to follow the grain and work in one direction. After you have finished with the fine sandpaper, use a clean cloth or sponge to wipe down the surface and remove any remaining dust.
At this point, you may want to clean the Blackstone surface further with a degreaser to remove any remaining rust or grime. Be sure to follow the instructions on the degreaser carefully, and use a clean cloth to dry the surface when you are finished. If there are any deep pits or scratches left on the surface, you may want to fill them with a product such as JB Weld or Bondo. Follow the instructions on the product closely and allow it to dry completely before sanding and smoothing again.
Once you have finished all the sanding and smoothing steps, it is important to protect the Blackstone surface to prevent future rusting. You can do this by seasoning the surface with oil or using a protective coating such as Rust-Oleum. Follow the instructions for your chosen method carefully, and make sure to keep the surface clean and dry between uses.
Remember, it is important to take care of your Blackstone griddle to ensure that it lasts as long as possible. By keeping it clean and free of rust, you can enjoy delicious meals cooked on a smooth and even surface for years to come!
Applying rust converter and primer to your Blackstone
If you have a rusted blackstone, there are steps you can take to fix it and bring it back to life. The first thing you need to do is remove any loose rust or debris that is on the surface. This can be done by using a wire brush or sandpaper. Once you have removed as much rust as possible, you can begin the process of applying rust converter and primer.
Rust converter is a chemical that is designed to neutralize rust, which will extend the life of your blackstone. There are many types of rust converters available, but it is important that you choose one that is suitable for your specific blackstone. You can ask for advice from the store where you purchased your blackstone or do some research online to find the best rust converter for your needs.
When applying rust converter, it is important to follow the instructions carefully. Make sure that the surface is clean and dry before you apply the rust converter. You can use a clean cloth or brush to apply the rust converter to the affected areas. Once you have applied the rust converter, leave it to dry for the recommended amount of time. This can vary depending on the type of rust converter that you are using, so be sure to follow the instructions to achieve the best results.
After the rust converter has dried, it is time to apply the primer. The purpose of the primer is to help the paint adhere to the surface of the blackstone and protect it from future rusting. There are many types of primers available, but it is important to choose one that is compatible with the rust converter that you are using.
Before applying the primer, make sure that the surface is clean and free of any debris. You can use a clean cloth or brush to remove any dust or debris that may be on the surface. Once you have cleaned the surface, you can begin applying the primer. You can do this by using a paintbrush or spray paint. Be sure to follow the instructions carefully and apply the primer evenly to achieve the best results.
When the primer has dried, you can begin painting your blackstone. It is important to choose a paint that is suitable for your blackstone and to follow the instructions carefully. Once the paint has dried, you can add a clear coat to protect your blackstone from future rusting and keep it looking great for years to come.
By following these steps, you can fix a rusted blackstone and restore it to its former glory. With a little bit of time and effort, you can make your blackstone look brand new again.
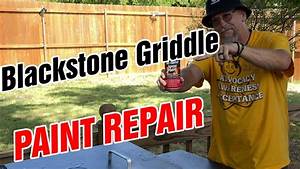
Painting and sealing your Blackstone to prevent future rusting
Blackstone griddles are known for their durability, ease of use, and excellent heat distribution. However, with regular use, these griddles can become rusty, which can be a pain to deal with. Rusty Blackstones are not only unsightly, but they can also affect the flavor and quality of your food. Fortunately, it is possible to fix a rusted Blackstone and prevent future rusting with the right tools and techniques. In this article, we’ll discuss how to paint and seal your Blackstone to prevent future rusting.
Preparation

The first step in fixing a rusted Blackstone is to clean the griddle thoroughly. Scrub the rusted area with a wire brush or sandpaper to remove all the rust and loose debris. Then, wash the griddle with soap and water and let it dry completely. Make sure there is no moisture left on the surface before painting to avoid trapping moisture and causing future rusting problems. Cover all the surrounding areas and bottom of the griddle with painters tape or plastic wrap.
Painting

Once the surface of the griddle is clean and dry, it’s time to paint it. Use a high-temperature paint specifically designed for use on griddles or similar surfaces. High-temperature paint can withstand the heat that the griddle produces, which is essential to ensure the paint stays put and doesn’t chip or peel off after the first use. Apply the paint in thin coats using a paintbrush or spray can. Allow each coat to dry for at least an hour before applying the next one. Apply at least two coats of paint all over the griddle, including the areas where rust appeared. If you want to add a personal touch, you can use high-temperature grill paint and select a different color of your liking.
Sealing
After the paint has dried, it’s time to seal the surface of the griddle. Sealing the griddle is essential to prevent moisture from rusting the griddle again. There are various sealers available in the market, but we recommend using a high-temperature sealer specifically designed for use on griddles. Apply the sealer evenly on the griddle surface using a paintbrush. Let it dry for at least a day before using the griddle.
Maintenance
To prevent future rusting, you need to maintain your Blackstone regularly. After each use, clean the griddle with soap and water and dry it completely. It is better to give your griddle a deep clean every six months. That might include a complete disassembly, cleaning every part, resealing and painting if needed. Covering your griddle and storing it in a dry place when you’re not using it is also a great way to prevent rusting.
Blackstone griddles are excellent cooking tools, and with proper care and maintenance, you can ensure that they last a lifetime. By following these steps, you can fix a rusted Blackstone and prevent future rusting, giving you peace of mind and a clean cooking surface every time you cook.