
Understanding the coffee filter basket spring
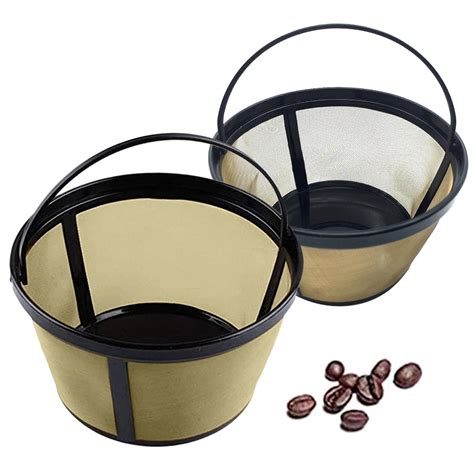
The coffee filter basket spring is a small but important component of many drip coffee makers. Its primary function is to hold the coffee filter in place, creating a tight seal to prevent coffee grounds from escaping into the carafe. However, if this spring becomes loose or damaged, it can cause leaks or other problems, disrupting the coffee brewing process and decreasing the quality of the coffee.
There are a few different reasons why the coffee filter basket spring might need to be fixed or replaced. One of the most common causes is simply wear and tear. Over time, the spring may become stretched out or weakened, making it less effective at holding the filter in place. Alternatively, the spring may become bent or damaged if the filter basket is handled roughly or dropped.
Another possible reason for a malfunctioning coffee filter basket spring is incorrect installation or use. If the filter basket is not properly inserted or if the incorrect size or type of filter is used, this can put unnecessary strain on the spring and cause it to wear out more quickly or become damaged.
If you notice that your coffee maker is leaking or that the coffee grounds are not being contained in the filter, the first thing to check is the condition of the filter basket spring. If it is loose or damaged, it will need to be fixed or replaced in order to restore proper function to the coffee maker.
Fixing or replacing the coffee filter basket spring is generally a simple task, although the specific steps will vary depending on the make and model of your coffee maker. In general, you will need to disassemble the filter basket and remove the old spring. If the spring is stretched out, you may be able to bend it back into shape with a pair of pliers. However, if the spring is broken or severely damaged, you will need to replace it with a new one.
When replacing the coffee filter basket spring, be sure to choose a replacement that is specifically designed to fit your make and model of coffee maker. Some manufacturers sell replacement parts directly, while others may require you to order the part from a third-party supplier. Either way, be sure to carefully read the instructions and follow all safety guidelines, as working with electrical components can be dangerous if proper precautions are not taken.
In addition to fixing or replacing the coffee filter basket spring, there are a few other steps you can take to help prevent future problems. For example, always make sure to use the correct size and type of coffee filter, and be gentle when handling the filter basket to avoid unnecessary strain on the spring. Regular cleaning and maintenance of the coffee maker can also help to prevent wear and tear on the components and prolong the overall lifespan of the machine.
By taking the time to understand the role of the coffee filter basket spring and how to fix or replace it when necessary, you can help to ensure that your coffee maker remains in good working condition for many years to come.
Preparing the necessary tools for repairing the spring
Fixing a coffee filter basket spring can be an easy task if you have the necessary tools at hand. Here are the items that you will need:
- Needle Nose Pliers
- Long Nose Pliers
- Flathead Screwdriver
- Wire Cutters
- A Replacement Spring (optional)
These tools can be found in most hardware stores or online retailers, and they are a great investment if you enjoy making coffee at home. The needle-nose pliers and long-nose pliers are particularly useful because they allow you to grip the spring tightly and apply the necessary force to bend it into place.
The flathead screwdriver can be used to remove any screws or bolts that are holding the coffee filter basket together. The wire cutters are handy if you need to trim any excess metal from the spring, and the replacement spring is useful if the original one is damaged beyond repair. With these tools, you can easily fix the coffee filter basket spring in just a few steps.
Determining the Method of Repairing the Spring
Once you have confirmed that the spring in your coffee filter basket is broken, the next step is to determine the method of repairing it. There are a few different approaches that you can take, depending on your level of experience with DIY repairs and the tools that you have available.
One option is to attempt to remove the old spring and replace it with a new one. This can be a good choice if you are comfortable working with small parts and have some experience with basic repair tasks. To get started, you will need to purchase a replacement spring that is the appropriate size and shape for your coffee filter basket. You can often find these online or at your local hardware or home improvement store.
Once you have your new spring, you will need to remove the old one from your coffee filter basket. This can be tricky, so proceed with caution and make sure that you are using the right tools for the job. Some people find that gently prying the old spring out with a pair of pliers or a small screwdriver works best, while others prefer to use a pair of wire cutters or a small hacksaw. Whatever method you choose, be careful not to damage the basket or any other part of your coffee maker in the process.
Next, you will need to attach the new spring to your coffee filter basket. This can also be a bit tricky, so take your time and make sure that you are following the manufacturer’s instructions carefully. Some springs may simply snap into place, while others may require you to thread them through a small hole or use a special tool to secure them in place. Whatever you do, make sure that the spring is firmly attached and that it is not in danger of coming loose or falling out.
Another option for repairing a broken spring in a coffee filter basket is to use a glue or adhesive to reattach the old spring in place. This can be a good choice if you are not comfortable with DIY repairs or if you do not have the tools or materials needed to perform a full replacement. To use this method, you will need to carefully clean the area around the broken spring and apply a small amount of glue or adhesive to both the spring and the basket. Then, gently press the spring into place and hold it there until the adhesive dries completely.
However, it is worth noting that this method may not be as reliable or long-lasting as a full replacement. Over time, the glue or adhesive may wear down or break apart, causing the spring to become loose or fall out of place. Additionally, using an adhesive may make it difficult or impossible to perform a full replacement later on, if necessary.
Ultimately, the best method for repairing a broken spring in a coffee filter basket will depend on your individual needs and preferences. If you are comfortable with DIY repairs and have the right tools and materials, a full replacement may be the way to go. However, if you prefer a quicker and simpler solution, using an adhesive may be a good choice. Either way, taking the time to fix your coffee filter basket spring can help ensure that your favorite morning beverage is always ready and waiting for you.
Repairing the spring using pliers or tweezers
Using pliers or tweezers can be helpful when repairing a coffee filter basket spring. This method may be necessary if the spring is bent out of shape or has become disconnected from the coffee maker. Here are the steps to fix a coffee filter basket spring using pliers or tweezers.
Step 1: First, ensure that the coffee maker is unplugged. Next, locate the coffee filter basket and remove it from the coffee maker.
Step 2: Inspect the coffee filter basket and the spring. Make sure that the spring is still connected to the basket and that it is not bent out of shape. If the spring is disconnected or warped, it will need to be replaced.
Step 3: If the spring is bent out of shape but still connected to the basket, use pliers or tweezers to bend the spring back into place. Carefully grasp the spring with the pliers or tweezers and gently manipulate it until it is straight again.
Step 4: If the spring has become disconnected from the basket, use the pliers or tweezers to reconnect it. First, locate the end of the spring that has become disconnected. Next, use the pliers or tweezers to bend the end of the spring into a small loop.
Step 5: Carefully attach the looped end of the spring to the appropriate point on the coffee filter basket. Using the pliers or tweezers, bend the looped end of the spring until it is securely attached to the basket.
Step 6: Reinsert the coffee filter basket into the coffee maker. Ensure that the spring is properly aligned and in place before using the coffee maker.
Using pliers or tweezers to fix a coffee filter basket spring is a simple and cost-effective solution. However, it is important to be gentle when manipulating the spring to avoid causing further damage. Additionally, if the spring is warped or disconnected beyond repair, it may be necessary to replace the entire basket or purchase a new coffee maker altogether. With a little patience and some careful maneuvering, your coffee maker should be up and running again in no time.
Testing the Repaired Coffee Filter Basket Spring
After repairing the coffee filter basket spring, it is important to test it out to ensure that it is functioning properly. Here are some steps to follow:
Contents
Step 1: Reassemble the Coffee Maker
Make sure that all the parts of your coffee maker, including the repaired coffee filter basket spring, are put together correctly and securely.
Step 2: Fill the Coffee Maker with Water and Ground Coffee
Fill the reservoir of your coffee maker with water and add the appropriate amount of ground coffee to the filter basket. Make sure that the basket is securely placed in the coffee maker and that the spring is correctly aligned.
Step 3: Turn On the Coffee Maker
Turn the coffee maker on and wait for it to finish brewing the coffee. As the coffee is being brewed, observe the filter basket to ensure that the spring is functioning properly.
Step 4: Check the Coffee Filter Basket
Once the coffee maker has finished brewing, carefully remove the filter basket and check it for any issues. If the spring is functioning properly, the grounds should be evenly distributed and there should be no leaks or spills.
Step 5: Repeat the Process
In order to ensure that the repaired coffee filter basket spring is reliable, repeat the brewing process several times. This will help you to catch any issues that may arise over time and ensure that the spring is functioning as it should.
Overall, it is important to take the time to test the repaired coffee filter basket spring to ensure that your coffee maker is functioning properly. By following these steps, you can be confident that your coffee will turn out perfectly brewed each time you use your machine.