
Understanding Short Circuits in Vapes
If you are a dedicated vaper, then you’re already familiar with the concept of short circuits in vapes. Short circuits occur when the current flows through an unintended path, bypassing the resistance of the coil. Short circuits are a common problem in vapes, which can cause a lot of damage to the device, and can also be hazardous to your health.
One of the most common causes of a short circuit is a damaged or frayed wire in your device. Over time, the wire can become corroded or damaged, making it more prone to short circuits. Another common cause of short circuits is the use of a low-quality coil or a damaged coil. Coils that are not working correctly can create a short circuit, creating a significant risk to your device and your safety.
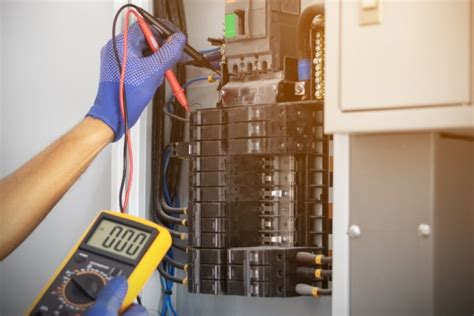
One way to identify a short circuit in your vape is by testing the resistance of your coil. If your coil resistance is much lower than what your device is reading, there may be a short circuit present. In some cases, your device may even display an error message, warning you that there is a short circuit in your vape.
Fixing a short circuit in your vape may seem complicated, but it can be done quite easily, as long as you know what you’re doing. Here are some simple steps to help you fix a short circuit in your vape:
Contents
- 1 Step 1: Detach The Tank
- 2 Step 2: Inspect The Coil
- 3 Step 3: Check The Battery
- 4 Step 4: Check The Connections
- 5 Step 1: Identify the Short
- 6 Step 2: Check the Coil and Battery
- 7 Step 3: Inspect the Wires and Connections
- 8 Conclusion
- 9 1. Always Use the Right Batteries
- 10 2. Proper Maintenance and Cleaning
- 11 3. Don’t Overload Your Device
- 12 4. Store Your Vaping Equipment Properly
- 13 Conclusion
Step 1: Detach The Tank
The first step in fixing a short circuit is to detach the tank from your device. This will help to prevent any accidental damage to your vape or any leakage from the tank. Make sure that your device is turned off and unplugged before you proceed.
Step 2: Inspect The Coil
The next step is to inspect the coil for any signs of damage or corrosion. Look for any frayed or damaged wires, and check that the coil is sitting correctly in the device. Make sure that there are no obstructions in the coil, such as dirt or debris, as this can also cause a short circuit.
Step 3: Check The Battery
The battery can also be a common cause of short circuits. Check the battery terminals for any signs of corrosion or damage and ensure that the battery is not loose or incorrectly positioned in the device.
Step 4: Check The Connections
Finally, check all connections in your vape for any signs of damage or looseness. Make sure that every connection is tight and secure, and there are no damages that could create a short circuit.
Once you have completed these steps, you can reassemble your device and test it again. If there is no improvement in the device, you may need to replace the coil or battery, as these may be damaged beyond repair.
In conclusion, short circuits in vapes are common, and they can cause significant damage to your device and be hazardous to your health. If you think that you have a short circuit in your vape, it’s important to take action quickly to rectify the situation. By following these simple steps, you can easily fix a short circuit in your vape and return to enjoying your vaping experience.
Finding the Source of the Short in Your Device
If you’re experiencing a shorted vape, it can be frustrating. It’s important to determine what caused the short so you can make the necessary repairs. Here are some steps to help you find the source of the short in your device:
Step 1: First, you need to check if the battery is the culprit of the short. Remove the battery from the device and inspect it carefully. If the battery has a tear or any visible damage to its wrapping or insulator ring, it could cause a short. Inspect the positive and negative terminals of the battery, as well as the contact points in the device, to ensure they are clean. It’s also important to make sure that there is no moisture or debris on the battery or contact points. If you suspect the battery is the cause of the short, replace it with a new one.
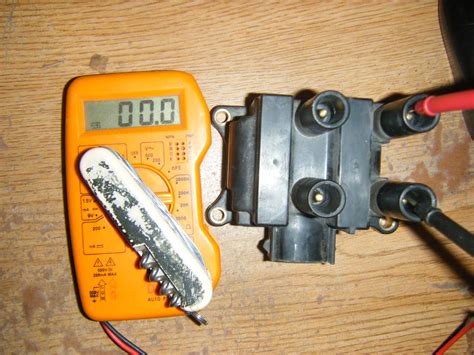
Step 2: If the battery looks good, the next step is to check the resistance of your atomizer. A short can be caused by a low resistance coil. Use a multimeter or an ohmmeter to measure the resistance of your atomizer. If the reading is lower than what is recommended for your device or battery, it could cause a short. The recommended resistance range can usually be found on the manufacturer’s website or user manual. Replace the coil or atomizer with a new one that has the appropriate resistance.
Step 3: If checking the battery and atomizer doesn’t reveal the source of the short, the next step is to inspect the wiring in the device. Look for any damaged or exposed wiring and replace if necessary. Pay attention to any solder joints that may have come loose or cracked as well. Re-solder any joints that look damaged. Wires that are frayed or loose can sometimes cause a short. Check all connections for tightness, especially from the battery to the circuit board.
Step 4: Another possible cause of a short can be a damaged circuit board. If all of the above steps do not fix the problem, then it’s advisable to inspect the circuit board carefully for any visible signs of damage such as cracks, chips, or blown out circuit traces. Replacing a circuit board can be tricky, and a qualified technician’s help could be necessary. It’s important to ensure you get the right circuit board for your device as a generic one can cause more damage than good.
Fixing a shorted vape could be dangerous if done incorrectly, so always proceed with caution and take all necessary safety measures. It’s also important to ensure that you have the correct tools and replacement components. Following the steps above should give you an idea of where the short is coming from so that you can fix it and be able to vape safely again.
Steps to Fixing a Shorted Vape

If you are an avid vape user, it is essential to know how to fix a shorted vape. It can be frustrating when your vape suddenly stops working in the middle of a vape session. A shorted vape happens when the circuit in your device gets overloaded due to a problem in the atomizer or battery, leading to a short circuit. In some cases, it might also be due to a loose connection in the coil or the battery.
Fixing a shorted vape is not a complicated process and requires a few simple steps. Follow these steps to fix your shorted vape:
Step 1: Identify the Short

The first step in fixing a shorted vape is to identify the short. To do this, remove the tank or atomizer from your device and attach it to another mod or battery. If it works on the new device, you have identified the short in your device. However, if it does not work on the new device, you need to troubleshoot the tank or the atomizer.
Step 2: Check the Coil and Battery
The next step is to check the coil and the battery. Check if the coil is screwed in correctly and securely. Sometimes, the coil might not be making a proper connection, leading to a short. In such cases, unscrew the coil and screw it back in tightly. Similarly, check the battery connections to ensure that they are clean and free from debris.
If the coil and the battery connections are not the issue, the problem may have arisen due to a dead battery or a low battery charge. Replace the battery or charge it to full capacity before trying to use the device again.
Step 3: Inspect the Wires and Connections
If the issue persists even after checking the coil and battery issues, the problem may lie in the wires and connections. Inspect the wires and connections for any wear or tear, damages, or loose connections. You may also want to check the circuit board for any damages or short circuits.
If possible, try cleaning the connections and wires to ensure that there is no debris blocking the connection. Check to see if any wires are touching other components or causing a short circuit. If you cannot identify the issue, consult a professional or take the device to a vape shop for repair.
Conclusion
Fixing a shorted vape is not a complicated process, and you can do it yourself with a few simple steps. The key is to understand the problem and identify the issue causing the short. Always ensure that your device is properly maintained, and the atomizer or tank, the battery, and the wires and connections are clean and secured in place. If you are unable to fix the issue or face continued problems with your vape device, take the device to a professional for repair or replacement.
Preventing Future Short Circuits in Your Vaping Equipment
Now that you have fixed your shorted vape, you probably want to avoid the same issue in the future. Here are some tips for preventing future short circuits in your vaping equipment.
1. Always Use the Right Batteries
One of the main causes of short circuits in a vape device is using the wrong type of battery. Always make sure that you are using the right battery for your device. Check the manufacturer’s specifications and recommendations. Additionally, make sure that the batteries are of high-quality and that they are not damaged or leaking. Proper handling and storage of your batteries can help prevent short circuits.
2. Proper Maintenance and Cleaning
Proper maintenance and cleaning of your vaping equipment can prevent short circuits. Clean the contacts of your device regularly and make sure they are free of debris and moisture. Also, check the wiring and the connections regularly. Loose connections can eventually lead to short circuits.
3. Don’t Overload Your Device
Overloading your vaping device can also lead to short circuits. Always use the device as recommended by the manufacturer, and do not exceed its maximum capacity. Avoid mixing and matching different batteries, different atomizers, or other parts that are not designed to work together.
4. Store Your Vaping Equipment Properly

Storing your vaping equipment properly can also help prevent short circuits. Avoid exposing your device to extreme temperatures, humidity, or moisture. Keep batteries in a safe and dry place, away from direct sunlight, heat, or water. Use a protective case or a carrying bag to transport your device, and do not leave it loose in your pocket or your purse.
Conclusion
Short circuits in vaping equipment can be dangerous and damaging, but they can be prevented. Always use the right batteries, clean and maintain your device properly, avoid overloading, and store your equipment safely. If you experience any issues or concerns, do not hesitate to consult with a professional or the manufacturer.
When to Seek Professional Assistance for a Shorted Vape
If you have tried the troubleshooting steps for your shorted vape and it still won’t work, it’s time to call in the experts. A professional vape technician can diagnose the root cause of the problem and repair it properly for you, which could save you a lot of time and money in the long run.
One common reason why people seek professional help is because the problem may lie in the circuitry or wiring of the vape device. A short circuit can cause overheating, melting, or even a fire, which can put you and your property in danger. If you suspect that your vape has a short circuit, or if you notice any unusual behavior with your device, such as the battery draining too quickly or the atomizer not working properly, it’s best to seek professional help as soon as possible.
Another reason why you may want to consult a professional is if you have tried all the troubleshooting steps but the issue still persists. This could be an indication that the problem is more complicated than you thought, and you may not have the necessary skills or tools to fix it on your own. Plus, a professional vape technician has access to the latest tools and technologies, which means that they can quickly diagnose and repair the issue, getting your vape back up and running in no time.
If you have a heavily modified vape or a high-end device, it’s also a good idea to consult a professional. These devices often have more complicated features and require specialized knowledge and expertise to fix. A DIY approach may do more harm than good and may even void your warranty, so it’s best to leave it to the experts if you want to ensure that your device remains in good condition.
In summary, you should seek professional assistance if:
- You suspect that your vape has a short circuit or any other electrical issue
- You have exhausted all DIY troubleshooting steps and the issue persists
- You have a heavily modified or high-end device
Remember, when it comes to your safety and the functionality of your device, it’s always better to err on the side of caution and seek professional help. By doing so, you can ensure that your vape is back in good working order, allowing you to enjoy your vaping experience to the fullest.