
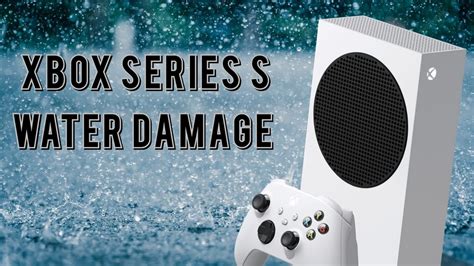
Identifying Water Damage in Your Xbox Series S

Water damage can be quite common with electronic gadgets, especially in case of gaming devices like the Xbox Series S. Often, people don’t even realize that they have spilled water on their Xbox until it’s too late. However, timely identification of water damage is essential to ensure that you can fix it and salvage your gaming console. In this article, we’ll talk about the signs to look for when it comes to water damage in your Xbox Series S.
1. Check the Power
The first step is to turn on the Xbox Series S and check if it’s working correctly. If the console doesn’t switch on, then it’s a clear indication that it has water damage. However, don’t panic just yet. There are still a few things you can check to make sure that your Xbox is repairable.
If the console manages to power on, observe if it’s functioning normally. Any abnormal behavior in the booting up process can be a sign of water damage. For example, the start-up screen may take longer than usual to appear or may not appear at all, and often, you might hear unusual sounds coming from it. If you notice that the hard drive is malfunctioning or if your controllers are not syncing with the console, then this could also indicate water damage.
2. Look for Signs of Water
It might sound obvious, but at times, identifying water damage is as simple as looking for water traces on your Xbox. Often, the liquid might remain hidden, but if you look closely at the crevices, grooves, and the USB ports, you might spot some residual moisture. Try not to touch anything other than the power button when inspecting the console as this can spread the moisture further inside the console, causing more damage.
Another thing to look for is discoloration of the Xbox’s case. If you see any stains, patches, or color inconsistencies on the surface, this can indicate that water has seeped into the console.
3. Check the USB Ports
The USB ports are another area to investigate when it comes to water damage. It’s quite common for water to seep into these ports, and as a result, the controllers may not sync with the console, or the USB devices may not work correctly. You can check for damage by plugging in the controllers and any other USB devices to see if they work. If they don’t, then it’s highly likely that the ports have been water-damaged, and you need to take them for repair as soon as possible.
4. Listen for Fan Noises
Another common sign of water damage is abnormal fan noises. The Xbox Series S is equipped with cooling fans that help air circulate inside the console to prevent overheating. If there’s water damage, these fans may clog up with debris or slow down, resulting in loud fan noises, overheating, and the console shutting down abruptly.
You can check whether the fan is spinning correctly by opening the console and checking it for any obstruction. However, we don’t recommend doing this yourself if you’re not experienced in this field.
Final Thoughts
Water damage is one of the most feared mishaps that can happen to your Xbox Series S. However, timely identification and repair can prevent complete loss of the gaming console. If you spot any of the signs of water damage we have mentioned earlier, your best bet is to take it to a professional repair service or contact Microsoft support for help. Remember, it’s easier and less expensive to fix water damage the sooner you identify and repair it.
Immediate Steps to Take After Water Damage

Water damage is a serious problem that can occur on your Xbox series S. It can cause a lot of issues such as hardware damage, malfunctioning, and data loss. In case your Xbox series S gets water damaged, you can take a few steps to help mitigate the damage. These immediate steps can help prevent further damage and expensive repairs. Here are some of the immediate steps to take after water damage:
Contents
- 1 1. Turn off your Xbox Series S
- 2 2. Remove the water
- 3 3. Let your Xbox Series S dry out
- 4 4. Check if your Xbox Series S is working
- 5 1. Turn Off and Unplug Your Xbox Series S
- 6 2. Remove All External Parts and Accessories
- 7 3. Dry Your Xbox Series S Components
- 8 4. Repairing Components of Your Xbox Series S
- 9 Step 1: Review your Xbox Series S warranty
- 10 Step 2: Inspect the Xbox Series S
- 11 Step 3: Test the Power Supply
- 12 Step 4: Look for Strange Noises
- 13 Step 5: Perform a Game Test
- 14 Final Step: Fully Functional Xbox Series S
1. Turn off your Xbox Series S
The first and immediate step to take after your Xbox series S gets water damaged is to switch it off. This may seem obvious, but it is essential to avoid short-circuiting your Xbox. Once your Xbox series S is switched off, disconnect everything from it, including the power cord, controllers, USB ports, and other external devices.
2. Remove the water

The second step to take is to remove all the water from your Xbox series S. Remove any visible water that may have entered the Xbox series S through any openings such as the disc tray, USB ports, and other external openings. You can use a dry cloth or towel to remove any visible water. Be sure not to use a paper towel or tissue as it may scratch the surface of your Xbox series S hardware.
However, if water has entered your Xbox series S through the openings on the bottom or back, do not try to open your Xbox series S, as doing so may void your warranty or cause more damage. Instead, turn your Xbox series S upside down and shake it gently to remove any excess water.
Additionally, if you suspect that water has entered the internal workings of your Xbox series S, do not attempt to switch it on. Doing so will cause further damage to your Xbox series S’s hardware. It is best to let your Xbox series S dry out before attempting to turn it on. We will discuss how to dry out your Xbox series S, in the next step
3. Let your Xbox Series S dry out
After removing all visible water, the next crucial step to take is to let your Xbox series S dry out. Do not switch your Xbox series S on or attempt to plug it in immediately after removing water. If you do, you risk causing more extensive damage to your Xbox series S.
Set your Xbox series S aside in a dry, well-ventilated area and let it dry out for at least 48 hours. It is recommended that you do not turn on your Xbox series S for at least a week to ensure that all the internal workings are dry. You could also use a fan or a hairdryer to speed up the drying process, but be sure not to use a high setting, and do not hold the hairdryer too close to your Xbox series S.
4. Check if your Xbox Series S is working
After letting your Xbox series S dry out for a week, check if your Xbox series S is working. Connect all the cables and external devices back into your Xbox series S and switch it on. Check if the Xbox series S is starting correctly and if all the buttons and functions are working. If your Xbox series S does not switch on, or there are any abnormalities seek professional help immediately.
In conclusion, water damage is one of the worst things that can happen to your Xbox series S. Immediate action can help prevent costly repairs and potentially save your data. If you follow these immediate steps after your Xbox series S has sustained water damage, you could avoid significant issues. However, if you have any concerns or are unsure about your Xbox series S’s state, it’s best to seek professional help.
Disassembling Your Xbox Series S for Cleaning
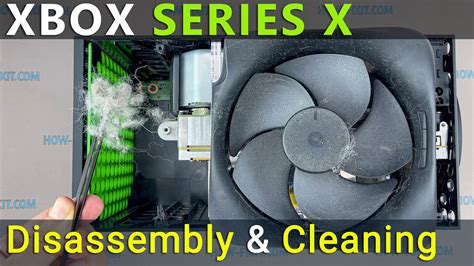
If your Xbox Series S has suffered water damage, it is important to clean it as soon as possible to avoid further damage to your console. Disassembling the console for cleaning may seem like a daunting task, but it is actually quite simple if you follow these easy steps. Make sure to have all the necessary tools and a clean, dry workspace before you begin.
Step 1: Gather Your Tools
Before you start disassembling your Xbox Series S, gather all the necessary tools. You will need a T6 Torx screwdriver, a small Phillips head screwdriver, a spudger or plastic opening tool, and a clean, dry workspace.
Step 2: Turn Off Your Xbox Series S
Before you begin disassembling your console, make sure it is turned off and unplugged from any power sources. This will avoid any electrical damage to you or your console.
Step 3: Remove the Console’s Bottom Plate
The first step in disassembling your Xbox Series S is to remove the console’s bottom plate. Use the T6 Torx screwdriver to remove the screws on the bottom of the console. Once you have removed all the screws, use the spudger or plastic opening tool to carefully pry off the bottom plate.
Step 4: Disconnect the Wi-Fi Antenna
Once you have removed the bottom plate, you will notice a white Wi-Fi antenna near the front of the console. Use the small Phillips head screwdriver to carefully remove the screw holding the Wi-Fi antenna in place. Once the screw is removed, gently disconnect the antenna from the motherboard.
Step 5: Remove the Mainboard Shield
The mainboard of your Xbox Series S is shielded with a metal bracket. Use the T6 Torx screwdriver to remove the screws holding the shield in place. Once the screws are removed, carefully lift the shield off the motherboard.
Step 6: Disconnect the Cables and Ribbons
Next, you will need to disconnect the cables and ribbons from the motherboard. Use the spudger or plastic opening tool to carefully disconnect the cables and ribbons by gently prying them from their sockets.
Step 7: Remove the Mainboard
Once all the cables and ribbons are disconnected, use the spudger or plastic opening tool to gently pry the motherboard from the console’s frame.
Step 8: Clean the Components
Now that you have disassembled your Xbox Series S, it is time to clean the individual components. Use a soft-bristled brush or compressed air to remove any debris or dust from the components. Then, use a clean microfiber cloth to gently wipe down all the components.
Step 9: Reassemble Your Xbox Series S
After cleaning all the components, it is time to reassemble your Xbox Series S. Follow these steps in reverse order to reassemble your console. Make sure all the cables and ribbons are reconnected and that the screws are securely tightened.
In Conclusion
Disassembling your Xbox Series S for cleaning may seem like a daunting task, however, it is important to clean your console as soon as possible to avoid further damage. Follow these easy steps and you’ll have your console back up and running in no time!
Drying and Repairing Components of Your Xbox Series S

If your Xbox Series S was exposed to water or any other liquid, you’re not alone. Water damage is a common issue, but it doesn’t mean the end for your console. In this article, we’ll guide you through the steps to dry and repair the components of your Xbox Series S.
Before we dive into the steps to fix your Xbox Series S, please keep in mind that water damage can potentially cause severe damage to your console’s hardware, including the motherboard and circuitry. If the damage is severe, it’s best to consult a professional.
1. Turn Off and Unplug Your Xbox Series S
The first step is to turn off your Xbox Series S and unplug it from the power source. Unplugging your console will prevent any potential electrical damage or short circuits. It’s crucial to turn your console off, immediately preventing electrical currents from shorting your console’s circuitry.
2. Remove All External Parts and Accessories

The next step is to remove all the external parts and accessories, such as controllers, cables, and batteries from your console. This will allow the internal parts of your Xbox Series S to dry faster and prevent your accessories from sustaining any water damage. If there is any residue on the controller, please clean it properly to prevent further damage.
3. Dry Your Xbox Series S Components
After removing the external components, it’s time to dry out the internal components of your Xbox Series S. The best method is to use a gentle source of heat to evaporate the liquid inside your console, such as placing it in a sunny and dry area or using a fan. It’s essential to be patient with the drying process- don’t use a hairdryer as it may cause further damage to the console.
4. Repairing Components of Your Xbox Series S
Once you’ve allowed your Xbox Series S to dry for a few days, it’s time to test out your console. Power up your Xbox Series S and check to see if it is functioning correctly. If your console doesn’t function properly, examine the different components inside your console that may need fixing because of water damage.
The following are several components that can break due to water damage and possible ways to repair them:
The Hard Drive
The hard drive can rust, corrode, and cause disk errors, appearing as unreadable disks or file corruption. However, if the damage isn’t severe, you can fix the hard drive by replacing the circuit board or using a data recovery tool to backup your data before replacing it.
The Power Supply Unit
The power supply unit or PSU can get short-circuited if there is any liquid residue. However, you can try to repair it by disassembling the unit and cleaning the internal parts. It’s crucial to allow the components to dry thoroughly before reassembling the unit.
The Fan
The internal fan can damage the Xbox Series S’s circuits if it isn’t functioning correctly or rusted by liquid. You can clean and lubricate the fan to make it working again. But, if the damage is extensive, you may need to replace it.
The Motherboard
The most critical component of any electronic device is arguably the motherboard. It controls the circuitry and frequently sustains the most significant damage due to water. A professional technician can examine your Xbox Series S’s motherboard and perform precise repairs on damaged areas, but, in most cases, replacing the motherboard will be necessary.
Finally, remember that prevention is always better than cure. Ensure to keep your console dry and avoid any liquids like soda or water near the Xbox Series S.
Water damage can be frustrating, but it doesn’t mean the end for your Xbox Series S. By following these steps, you can fix your console and restore it to its former glory.
Testing and Final Steps for a Fully Functional Xbox Series S
After successfully removing the water from your Xbox Series S, the next step is to test if it is still functional. You can follow these steps to know if your Xbox Series S is still working like it used to.
Step 1: Review your Xbox Series S warranty
Before you proceed with any testing, ensure that you have reviewed your Xbox Series S warranty. Attempting to fix the console yourself may void the warranty, so you might want to consider sending it to a professional instead. Check if your warranty covers water damage and go through all the necessary procedures before proceeding.
Step 2: Inspect the Xbox Series S
After drying the Xbox Series S, you need to inspect it for any damages. The water may have caused physical damage to some of its parts, so check the console’s exterior carefully. Focus also on the ports, buttons, and other crevasses where water may have seeped into. Ensure that the console is still intact and the design was not ruined by the water exposure.
Step 3: Test the Power Supply
The water may have damaged your Xbox Series S power supply. Conduct a power supply test by plugging it in and observe the power light to determine if it turns on or not. If the light turns on, that’s a good sign. You can then proceed to power on the console to see if it ignites properly.
Step 4: Look for Strange Noises
Start your console and listen for any strange noises like clicking, whirring, or grinding sounds. Although the console may power on, these noises might indicate further damage inside the console.
Step 5: Perform a Game Test
You successfully reached the last stage of testing. To ascertain the Xbox Series S’s functionality, insert a game that you are sure works properly into the console. While the game is running, check the audio and the graphics. Observe how smooth the console runs the game without lagging, and if you see any problems, you may need to consider contacting Microsoft
Final Step: Fully Functional Xbox Series S
Congratulations! If your Xbox Series S passed all the steps, then you now have a fully functional Xbox Series S again. Enjoy playing your games, streaming videos, and browsing your favorite website with your freshly restored Xbox Series S.